Philippines Night!

Narrowing down what dishes to make for this international dinner was really a challenge. There were so many options and they all sounded equally as delicious! I also found that so many could easily be plant based which made it even harder. Originally pancit and adobo was on the menu but having made similar dishes for Guam and Samoa dinner night’s I knew I had to branch out.

Regardless this was a super exciting country for me for two reasons:

1) I have loved so many Filipino dishes I had tried before going vegetarian that I was excited to make a vegetarian version one of my favorites – lumpia – that I haven’t had in so long and are like Filipino spring rolls

2) this was the perfect excuse to go to one of my favorite Chicago bakeries, Jennivee’s, that is Filipino owned and has AMAZING Ube Cake.

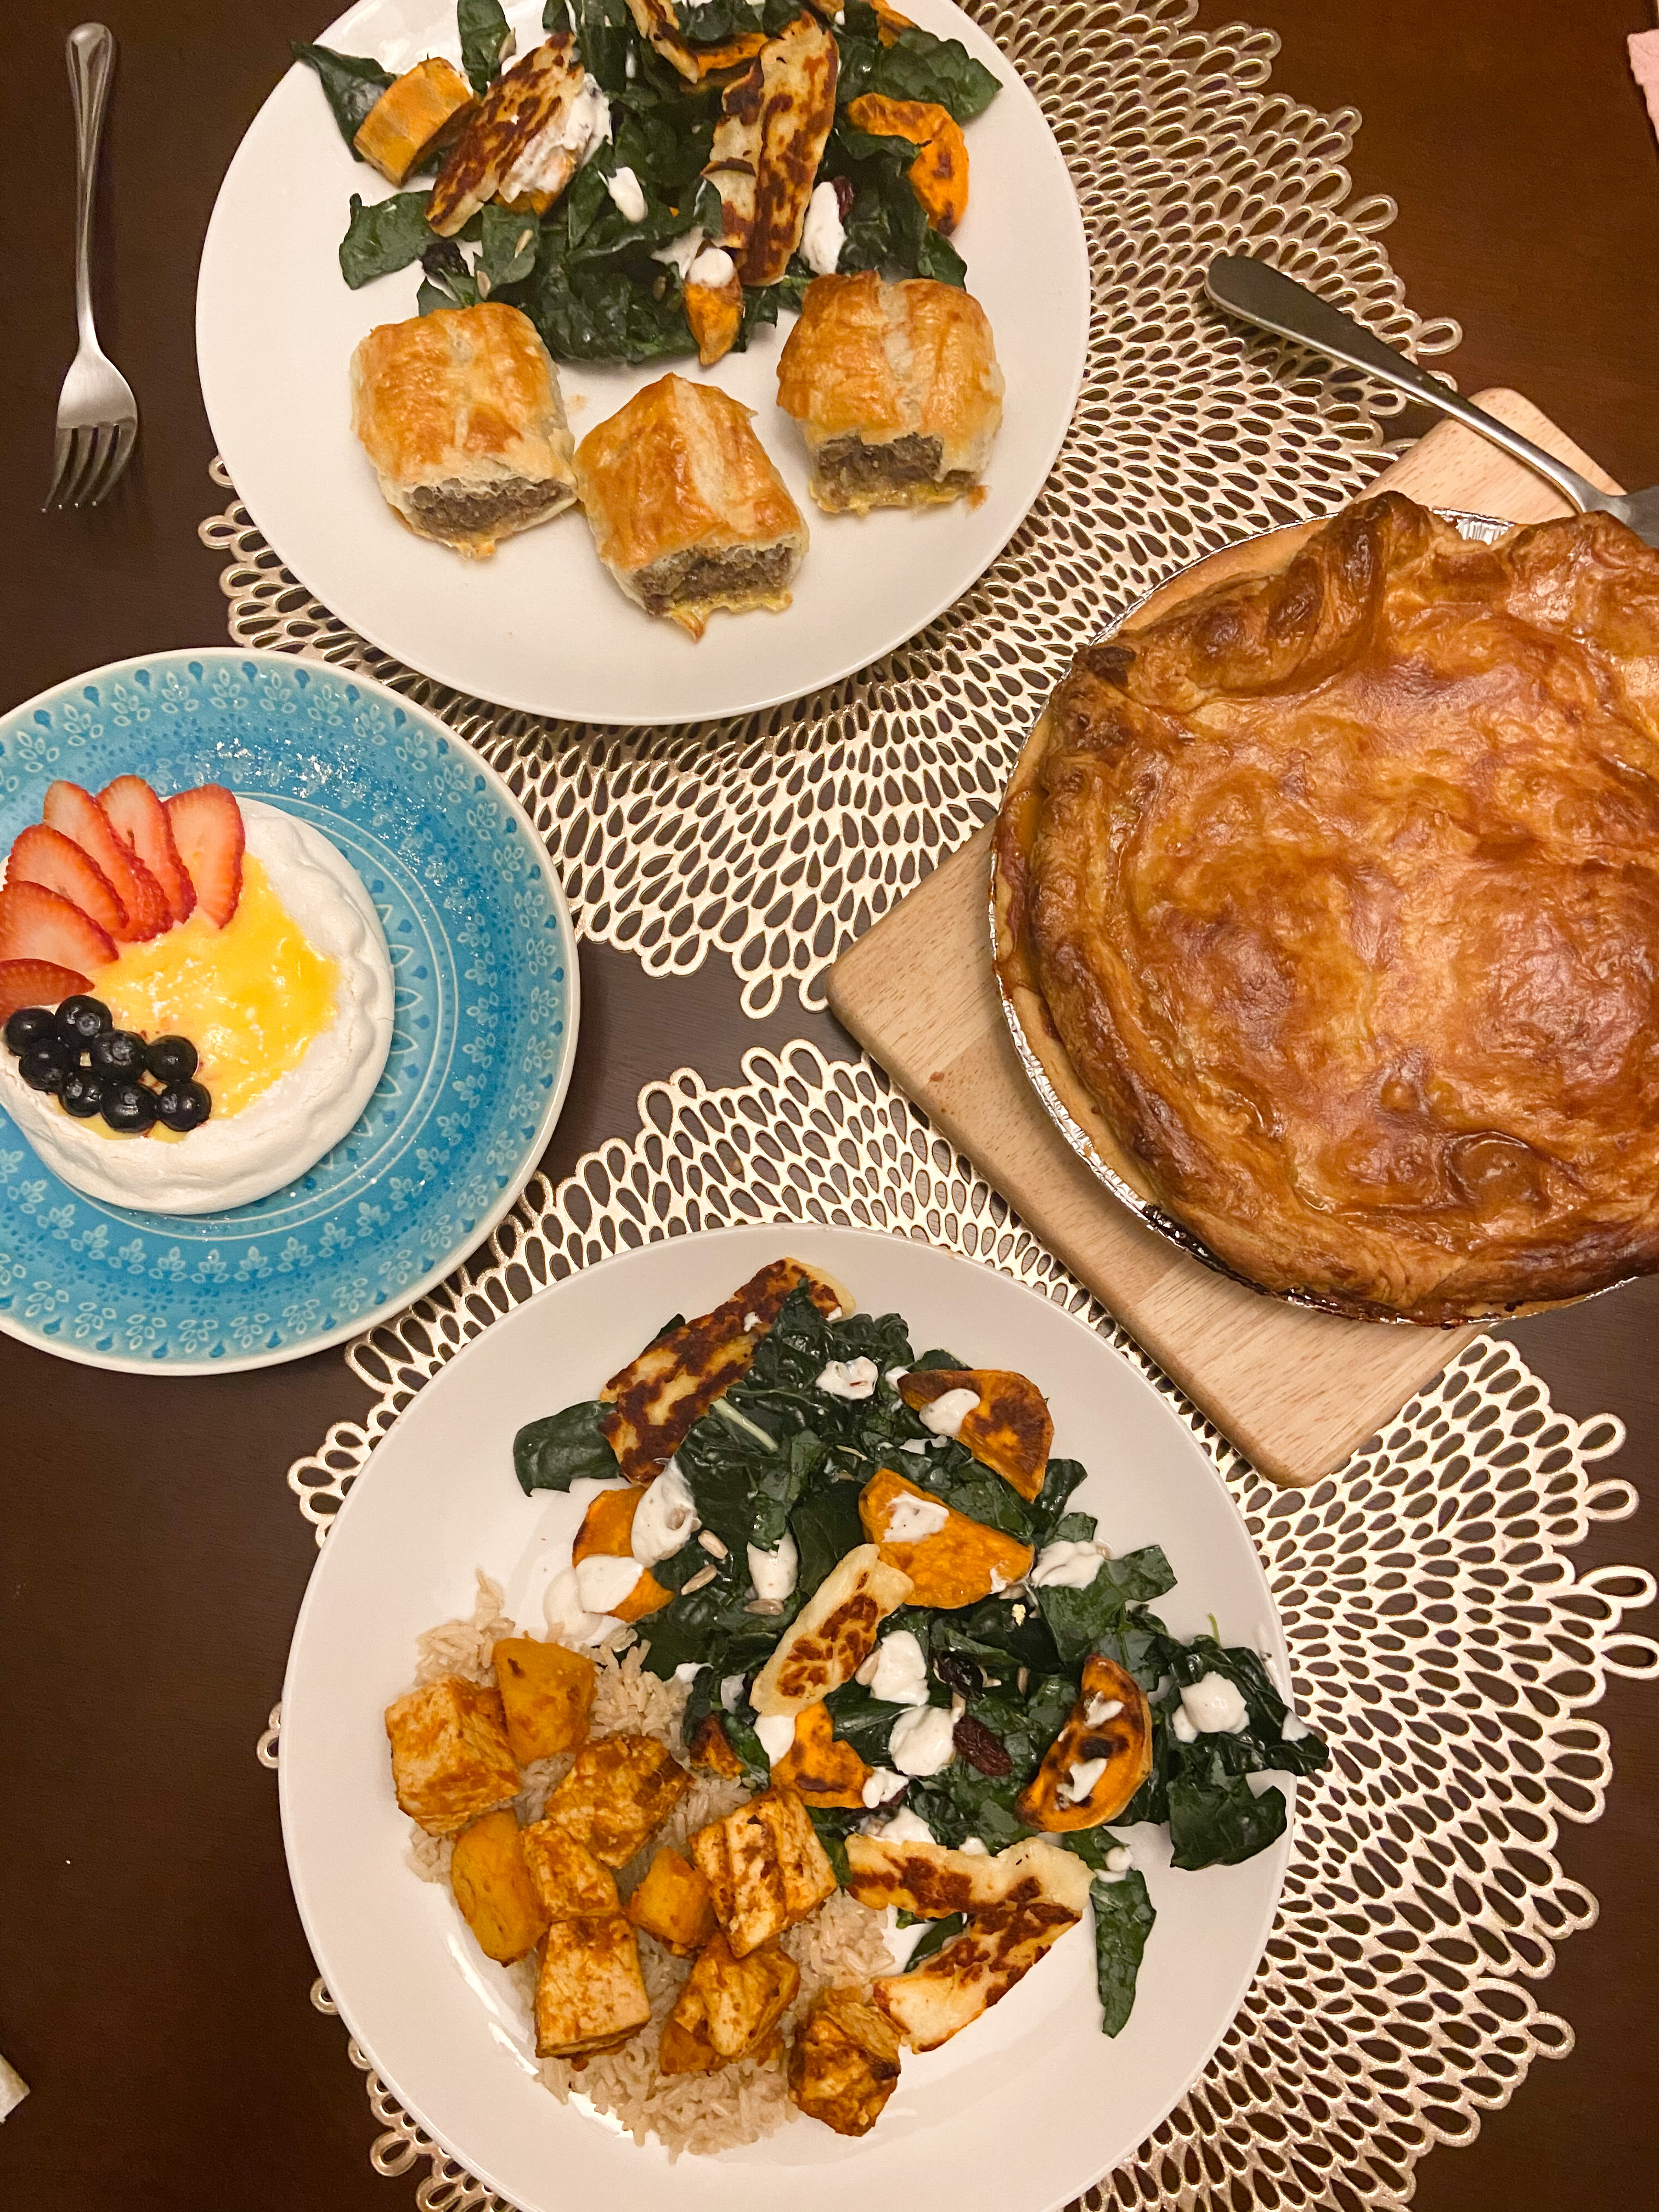
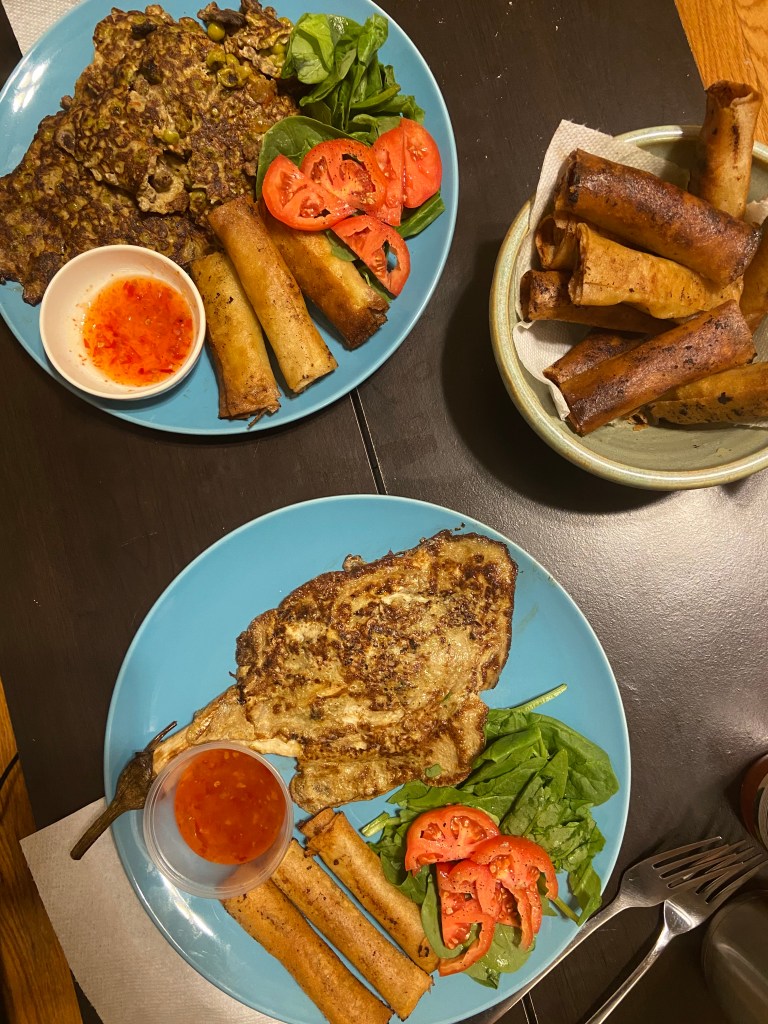
This night was a true success that consisted of lumpia two ways – pork and vegetarian, tortang talong, tortang giniling, ube cake and a sweet ube stuffed brioche bun to hold us over while we cooked.

Sweet Chili Dipping Sauce

Something you absolutely need is dipping sauce for your lumpia. There are many variations of this sweet chili sauce and I’m sure any of them will do but this is the one I got.sauce

Any local Asian market is sure to have it and if not check out the “ethnic” aisles in your grocery store- most will carry at least one variation of this sauce. This one is “Mae Ploy” brand it is very reasonably priced!

menlo wrapper

At my local Asian market, I was also able to purchase the lumpia wrappers, carrots, eggplants, and the other produce I needed – really a one stop shop!


Menu

Vegan Lumpia with Tortang Talong
Pork Lumpia with Tortang Giniling


Recipes

Vegan Lumpia 

IMG_3799
IMG_3819
IMG_3804
IMG_3805

Ingredients

  • 1 lb “meat” crumbles
  • 2 flax eggs (2 tbsp flax meal, 6 tbsp water)
  • 1 8oz can of water chestnuts
  • 2 carrots, roughly chopped
  • 4 cloves of garlic
  • 1/2 cup green onions or regular onion
  • 1 sheet of nori
  • 2 tbsp coconut aminos/soy sauce
  • 1/4 tsp salt
  • 1/4 tsp pepper
  • lumpia wrappers 
  • Oil for frying
  • Sweet Chili Dipping Sauce 
Find the full recipe from Sweet Simple Vegan Here

Make your lumpia filling:

  1. First prepare your flax egg by adding your flax meal and water in a small bowl, give it a gentle mix, and let it sit for 5-10 minutes.

2. In a food processor add your filling ingredients: water chestnuts, carrots, nori, garlic, and green onions

3. Pulse until everything is finely chopped

4. Transfer to a large bowl and mix in your “meat crumbles,” coconut aminos/soy sauce, salt and pepper and flax egg. Mix until well combined.

Filling and Rolling your Lumpia

  1. Make sure your wrappers are thawed out and not frozen stuck!

2. Clear a space for you to roll your lumpia. When you take the wrappers out of the package they may be stuck together, so although tedious, go through the process of peeling them apart now.

3. Then take one wrapper and along the edge, add about 2 tbsp of filing and then spread it out along the edge. Tightly roll your lumpia up like a cigar.

4. Once you get to the other end, you may need to wet the edge with water to get the wrapper to “stick” to itself. You can also make a cornstarch “glue” to help with this, which is outlined in the full recipe here. Using water was sufficient when I made them.

4. Cut your lumpia either in half or into thirds. You can simple snip them with kitchen scissors or a pizza cutter.

5. Repeat the process until you have used all your lumpia filling or run out of wrappers.                                                                                         

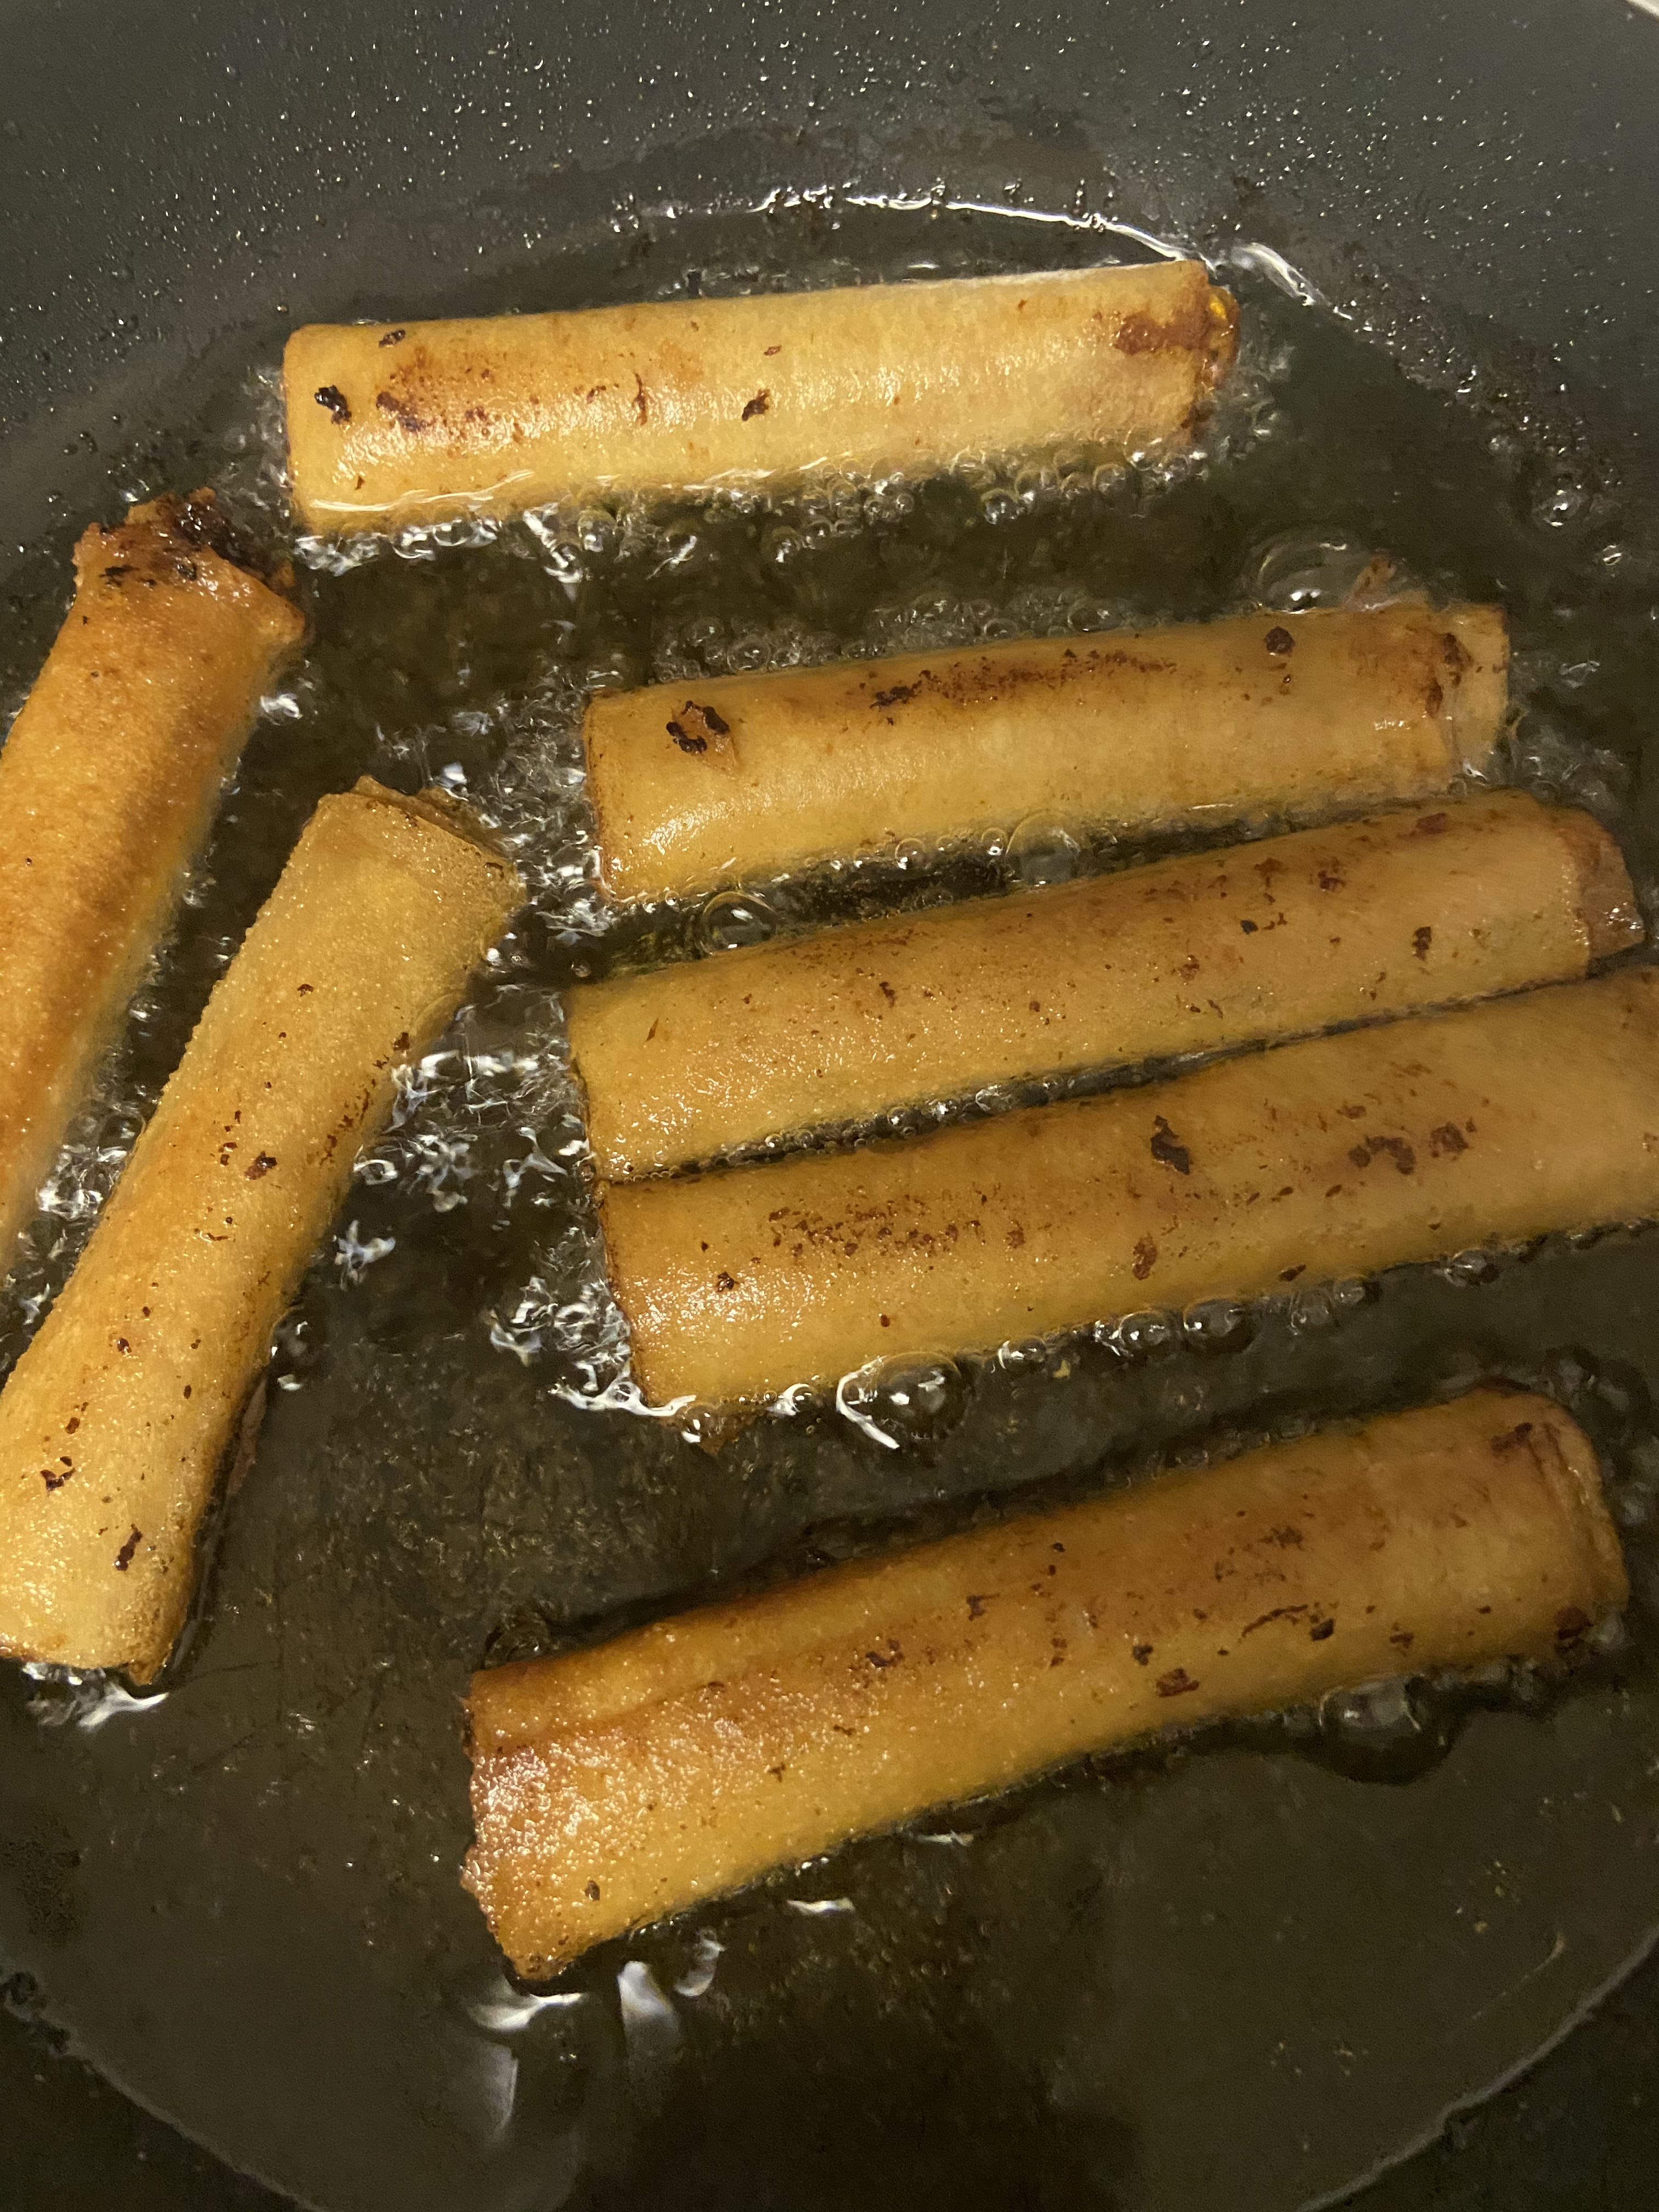
6. Prepare your oil and heat it until it is about 350F. You should have about 2-3 inches of oil. Gently drop your lumpia in, seam side down. Fry for about 4 minutes on each side. You’ll see them turn a beautiful golden color. As you continue cooking your lumpia, keep an eye out on the oil temperature and make sure to turn the flame down, as it can quickly get too hot and burn the outside of your lumpia while keeping the inside uncooked.

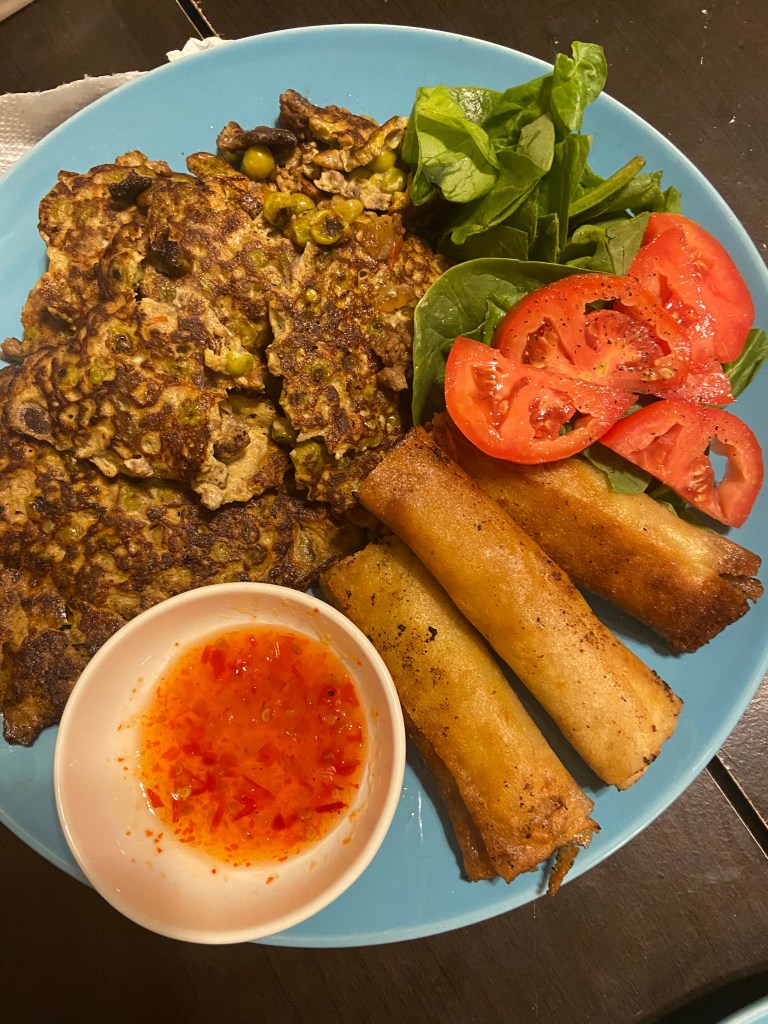
7. Place your cooked lumpia on a paper towel lined plate and enjoy with lumpia dipping sauce!!

Notes:

  1. You can freeze your lumpia before cooking them for a later day! Simple take your cut lumpia pieces and place on a cookie sheet to freeze for an hour. After that you can transfer to a freezer safe bag and store them in the freezer. You can fry them straight from the freezer, no need to thaw out, they may just take an extra minute or two to cook.
  2. I recommend heating up leftovers in the oven to ensure they are crispy and don’t become “soggy” in the microwave.

Tortang Talong

Tortang Talong is a filipino dish that can be described as a whole eggplant omelette and works best with Chinese eggplants. I used the recipe from this video however I kept it vegetarian. Instead of using ground pork, I used the Pure Farmland meat crumbles. I also found that one egg was enough to coat each eggplant, so I only needed 2 eggs for the recipe rather than 4 as the recipe lists. This also tasted great with the Sweet Chili dipping sauce!

Step 1: Broil your eggplants (brushed with olive oil) for about 10 minutes on each side, until the skin gets nice and charred. IMG_3800

Step 2: While the eggplant cooks, prepare your “meat” crumbles. In a hot pan, add 2 chopped garlic cloves, 1/4 cup chopped red bell pepper, 1/4 cup chopped onion and 1/2 lb of crumbles, 1 tbsp coconut aminos and cook until the crumbles have cooked through. Set aside in a bowl.

Step 3: Peel the skin off the eggplant once it has cooled down and “mash down” with a fork. IMG_3801

Step 4: In a wide bowl, scramble 1 egg and add a splash of coconut aminos. Place one smashed eggplant and coat thoroughly. Then scoop some of your filling on top of the eggplant and cover with egg. To a preheated oiled pan, you will then slide everything out the bowl to the pan. Let cook for a few minutes until egg on bottom has cooked and then gently flip it. Cook for another few minutes and serve immediately!

IMG_3806

IMG_3810 (1)


Vegan [ Cranberry Pecan ] Banana Bread

Banana bread has been on repeat lately, I love how versatile it can be when it comes to what you mix into it and how it can come together with minimal ingredients and falls into the realm of healthy baking. I was going to do make my classic cinnamon swirl banana bread when it suddenly occurred to me that I didn’t have a vegan banana bread up on the blog yet. Although I am not vegan ( I do keep a vegetarian diet) I find myself drawn to lots of vegan baked goods and have baked up a lot of vegan treats, I’m just not the best at keeping track of what I do in the kitchen … well until now!

IMG_3517

So I decided to do some experimenting and bake up a vegan banana bread and for a fun twist I wanted to add in some cranberries and pecans – perfect for the upcoming season.. F A L L – I see you around the corner. However, this can be enjoyed without the pecans/cranberries or they can be switched out for chocolate chips, walnuts, even some blueberries!

IMG_3523

This cup calls for two cups of flour. I made this loaf with both all purpose flour and whole wheat flour. I love the slight nuttiness that comes with using whole wheat flour however sometimes when using just whole wheat flour baked goods can come out too dense so I cut it half all purpose flour. You can also just use all purpose flour if you’d like. I haven’t tested out gluten free flours but will update this post once I have. Whichever flour you use, make sure to measure out your flour correctly, not doing so can drastically change your bread’s texture!

IMG_3515


How to Measure Flour

  1. Grab your measuring cup and a spoon. 
  2. Gently scoop your flour with a spoon into your measuring cup. 
  3. Once filled to the top, level off any excess flour over your flour bag with a flat edge like a knife.  
  4. Following these steps, rather than scooping the flour out of the big directly with your measuring cup will ensure you are not over-packing your flour. Over-packing it would result in much more flour than what is needed. 

Ingredients

Wet Ingredients

  • 4 medium bananas – super ripe
  • ½ cup brown sugar 
  • ¼ cup coconut oil, melted 
  • ¼ cup plus 1 tbsp almond milk 
  • 1 tbsp vanilla
  • 1 tbsp ground flax/flax meal 

Dry Ingredients

  • 1 cup all purpose flour
  • 1 cup whole wheat flour
  • 2 tsp cinnamon 
  • 1 tsp baking powder
  • ½ tsp baking soda
  • Pinch of salt 

Add-ins 

  • ¼ cup crushed pecans
  • ¼ cup cranberries 

Directions

  1. Preheat your oven to 350F and line a loaf pan with parchment paper. I love using this parchment paper for all my baking, Thrive Market has a great deal on it! 
  2. In a mixing bowl, mash your bananas well. Then add in the following ingredients: brown sugar, coconut oil, almond milk, and vanilla. After all the ingredients are well incorporated, add in your flax meal and give it a good stir. 
  3. In a separate bowl combine your dry ingredients: whole wheat flour, all-purpose flour, baking soda, baking powder, cinnamon, and salt. Make sure you measure your flour correctly as outlined above!
  4. Add your dry ingredients to your wet ingredients and mix until just combined. Do not over mix, you just want to make sure the flour is incorporated. Your batter will likely be thicker than other banana bread batters. 
  5. Fold in your cranberries and pecans. Feel free to swap them out for other nuts of chocolate chips, but again, don’t over mix!
  6. Pour your batter into your prepared loaf pan and bake for 50 minutes. After the baking time, check the loaf with a toothpick and if it comes out clean after inserting it is all done. 
  7. Let your loaf cool for 15 minutes before slicing. Enjoy!
  8. Store in an airtight container. You can also pre-slice your loaf and freeze some slices for another time! Simply defrost and warm it up in your microwave for 30 – 60 seconds.

Almond Banana Sea Salt Chocolate Chip Oat Mug Muffin

Raise your hand if you are ready for a delicious 5 minute recipe!!! I’m all about being efficient in the mornings and getting the most done with my time BUT that doesn’t mean I can’t enjoy a delicious breakfast! AND that’s where this mug muffin comes in! I’ve seen many recipes for mug muffins/mug cakes but so many of them are full of ingredients that I know will leave me feeling sluggish and have minimal nutrients.

I set out to make a healthier mug muffin that can be enjoyed as a healthy breakfast but that can also be dressed up to satisfy a sweet tooth craving! I also polled on my Instagram for flavor combination requests and chocolate was a clear winner so that inspired me to make this almond-banana-sea salt-chocolate chip oat muffin! 

I loved how quickly this came together and how versatile I know this recipe can be. I plan on making more with fun combinations and also a mug muffin with a plant based protein powder – stay tuned! PLUS this may be the best part – it can all be mad in just one mug – that’s just one dirty dish to clean! If that’s not a sure win, I don’t know what is!

IMG_3557 (1)

IMG_3565

IMG_3572


Recipe

Ingredients

  • 1/4 cup quick oats
  • 1 egg white
  • 1/2 mashed banana
  • 1/2 tsp chia seeds
  • 1 tbsp almond milk
  • 1 tsp vanilla
  • 1 tsp baking powder
  • 1/4 tsp cinnamon
  • 1 tsp honey/maple syrup (optional)
  • 1 tsp almond butter
  • 1 tbsp chocolate chips
  • pinch of flaky sea salt

Directions

  1. Spray your mug with nonstick spray. 
  2. Mash the banana in the mug and then add the egg white.
  3. Give it a good whip with a fork.
  4. Add in the rest of the ingredients and give it a good mix. 
  5. Microwave for 2 minutes, at 30 second intervals. You will know it is ready when you see the sides pull away from the mug. 
  6. Top with a pinch of sea salt.
  7. Eat it straight out the mug or flip it on to a plate.
  8. Add your additional toppings! I topped mine with almond butter, greek yogurt, almond slices and banana slices! 

Notes

  1. A wide set mug works best for this recipe. 
  2. Best enjoyed the day that it’s made!
  3. I opted for just the egg white in this recipe because I didn’t want it to taste too “eggy” but it would still turn out if you use the entire egg. 
  4. If you don’t have quick oats, you can just pulse your rolled/old fashioned oats in a blender/food processor for a few seconds – no need to make them into an oat flour for this. 

Creamy Overnight Oats

Overnight Oats (ONOs) are nothing new around here. I first started making them while I was in college. They were the perfect breakfast to prep ahead of time and that I could easily grab on my way out and even enjoy while in class (yes of course, while voraciously taking notes)! My oats recipe back then was made up of your common ONO ingredients: oats, chia seeds, almond milk, fruit, nut butter. Nothing wrong with that but since then I have had MANY servings of overnight oats and I think I have perfected this recipe so I’m so pumped to share my go-to base recipe!

These ONOs are so creamy, taste indulgent, so versatile AND they are protein packed so they actually leave you satisfied and full until your next meal comes around! Because of its high protein it makes the perfect breakfast after a morning workout. The protein from the yogurt and powder along with the carbs from the oats and fruit also make for great fuel for a busy afternoon! Since most protein powders have a sweet flavor to them (usually from monk fruit or stevia extract) I find that the protein plus the banana that is mixed in makes these sweet enough without adding in any additional sweetener like honey or maple syrup.

img_3237-1

I love topping my oats with nut butter and fruit! My favorite nut butter is absolutely WILD FRIENDS – it is a must if you’re looking for the best drizzle and for pure, clean ingredients in every jar! Adding granola on top of ONOs is also delicious and adds a great textural element. These are some great combos:

  1. Banana, hemp seeds, and cacao nibs
  2. Blueberries/mixed berries, sliced almonds, and almond butter
  3. Mango and unsweetened coconut shreds
  4. Apples, raisins, and nut butter
  5. Dark cherries and almond butter
  6. Kiwi, hemp seeds, and peanut butter
  7. Caramelized banana and extra cinnamon 
  8. REALLY ANYTHING PLUS NUT BUTTER 🙂

IMG_3235


Ingredients 

serves 1; base overnight oats recipe 

– 1/3 c rolled oats
– 1 tsp chia seeds
– 1 scoop plant based protein
– few shakes of cinnamon
– 1 cup almond milk
– 1/3 – 1/2 of a banana – mashed
– 1/3 c plain greek yogurt

Directions

  1. Mix all the ingredients together except for the Greek yogurt and let it sit in the fridge overnight in a mason jar/tuppeware/almost empty jar of nut butter.
    1. You can also make it early in the morning and have it chill in the fridge for at least 2 hours.
  2. Once you’re ready to eat, top it with the greek yogurt and additional toppings like fruits and nut butters! 
    1. If you’ll be enjoying this on the go you can add your yogurt and fruit/toppings the night before, just don’t mix it in!

Notes

  1. Overnight oats can also be prepped in advance and can last at least 3 days in the fridge!
  2. I don’t have the complete nutritional breakdown but this oats recipe packs around 25g of protein that will keep you satisfied all morning long!
  3. To caramelize a banana, slice it in half lengthwise and sprinkle that side with cinnamon. Place it on a preheated skillet that has been sprayed with coconut oil and place it cut side down for a few minutes. You’ll notice it begins to smell sweet as it caramelizes and browns!

Kazakhstan


This meal is brought to you from Kazakhstan! Besides knowing that the controversial film Borat was about a character from Kazakhstan and that it is located geographically caucasus_cntrl_asia_pol_2003next to Russia, I knew very little about this country. After doing some research I rounded up some interesting facts: 

  1. Kazakhstan became its own country on December 10, 1991. 
  2. Over 100 different nationalities make up the population of Kazakhstan – this totally transfers over to the cuisine.
  3. It has a population of over 18 million 
  4. There are three different “New Years” that are celebrated in Kazakhstan – January 1, January 14, and March 22.
  5. It is the largest landlocked country! It is bordered by  is bordered by Russia, China, Kyrgystan, Uzbekistan, Turkmenistan, and the landlocked Caspian Sea. 
  6. It is the ninth largest country in the world!
  7. It is believed that this is the first place where horses were domesticated and rode on.
  8. Not surprising after fact 4, but Kazakhstan also has more horses than women.
  9. We can thank this country for apples – it is were they were first cultivated! 
  10. Russian is the official language. 

This Kazakhstan meal was so much fun to make – it was definitely a time consuming meal but it was well worth it. While researching the various foods of Kazakhstan I did IMG_2349
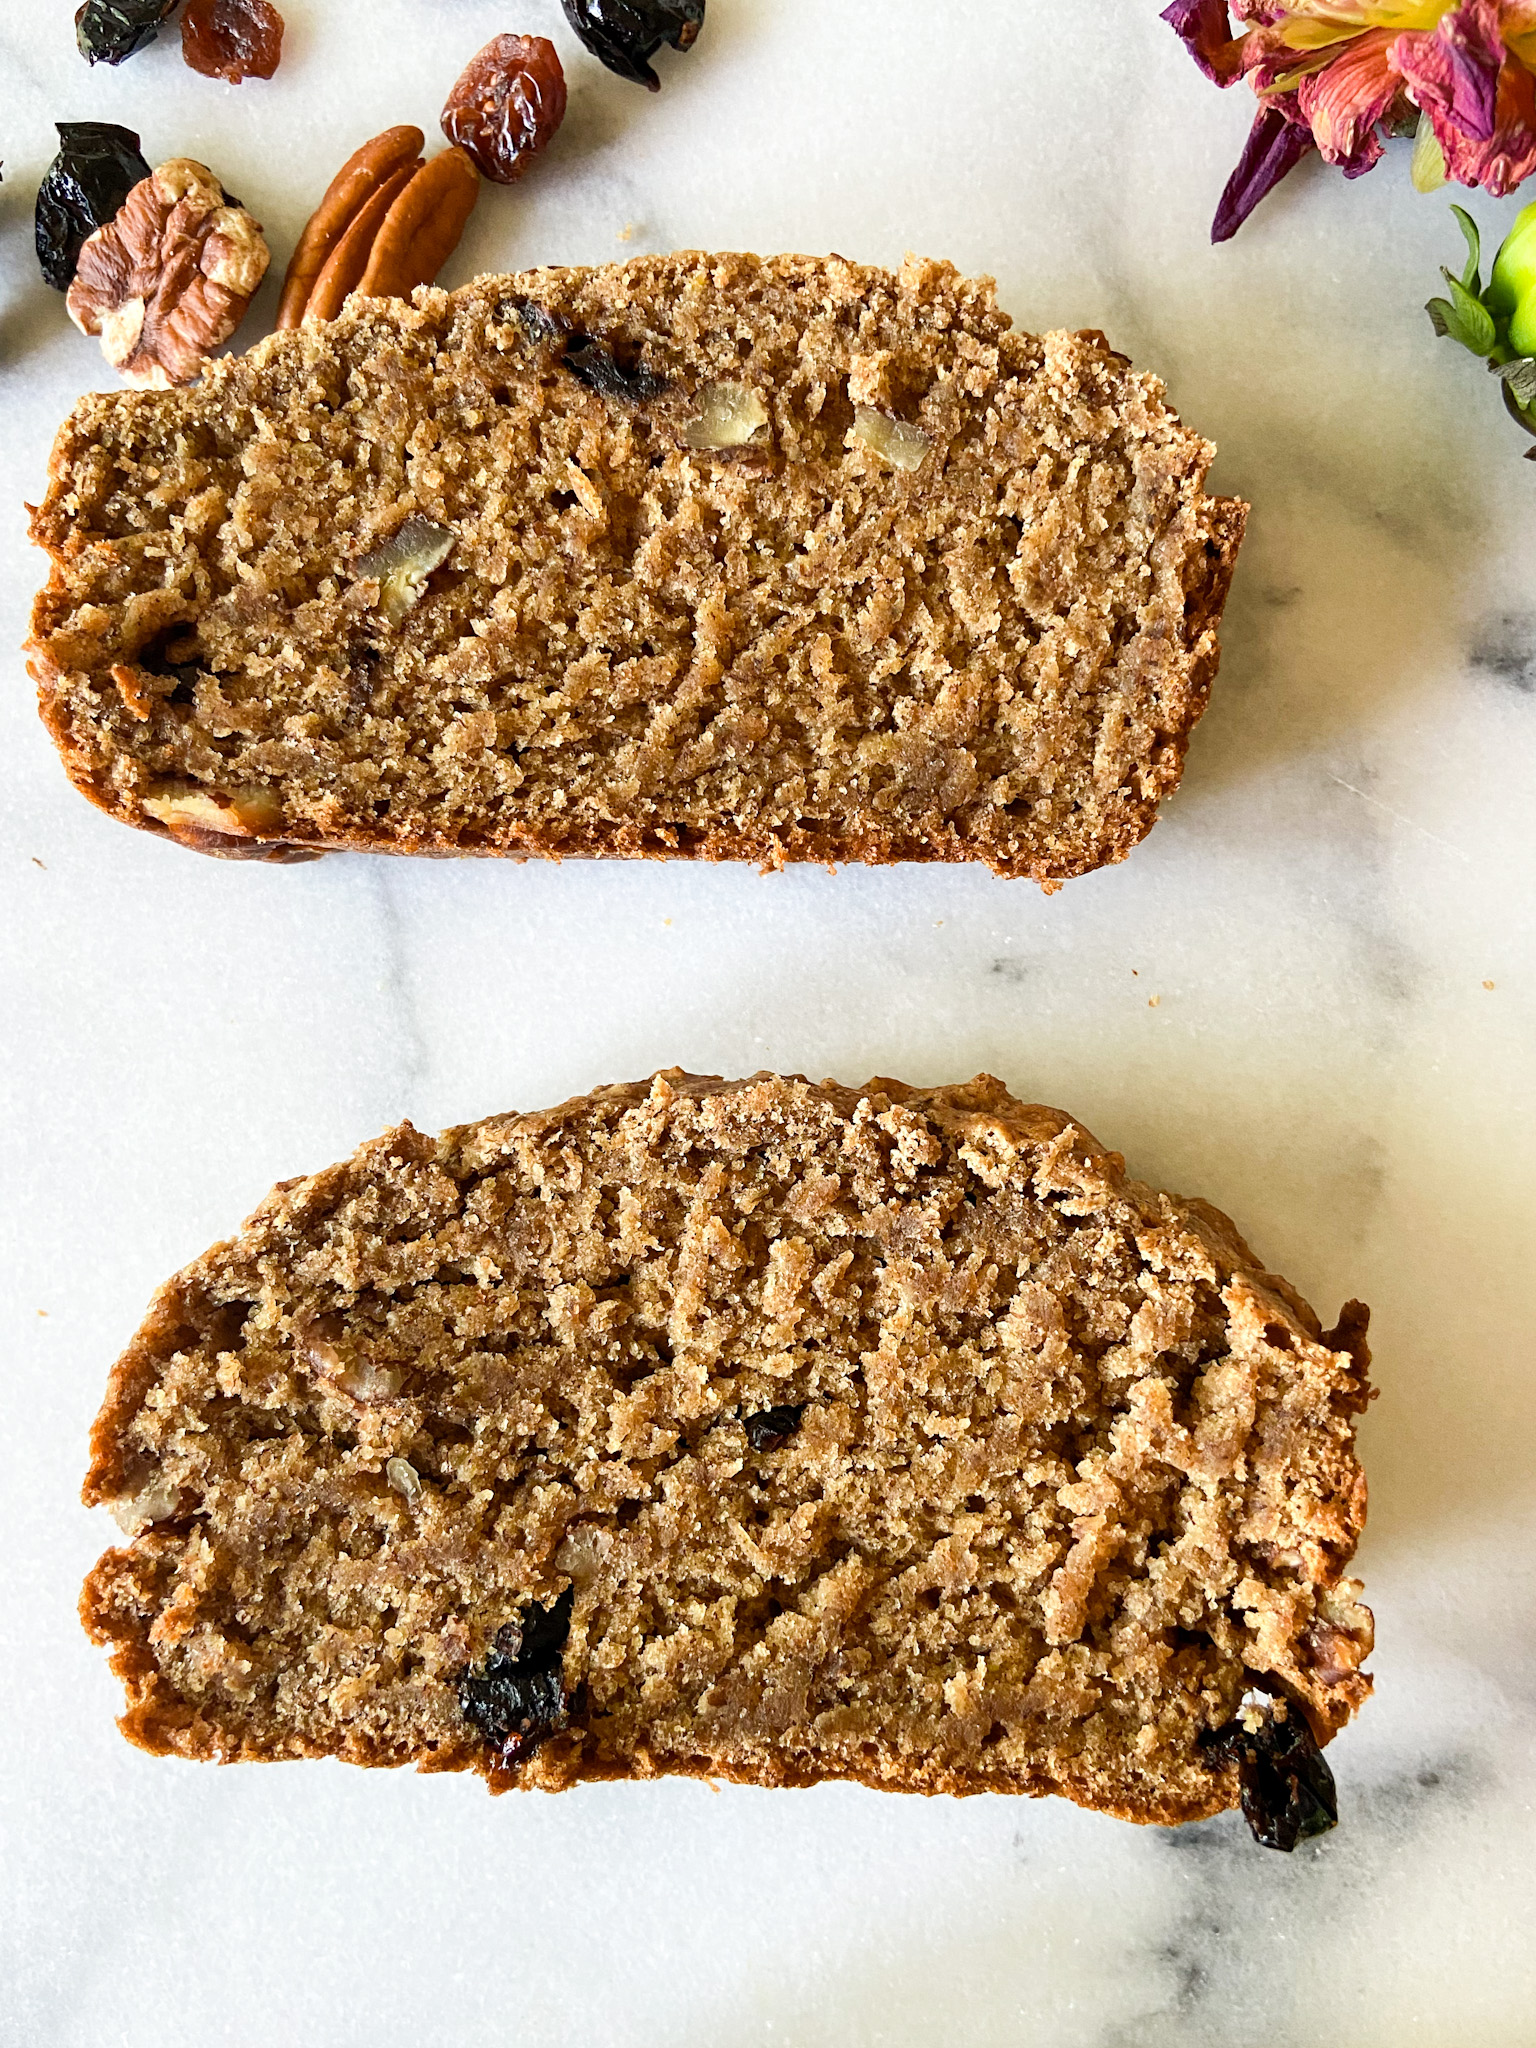
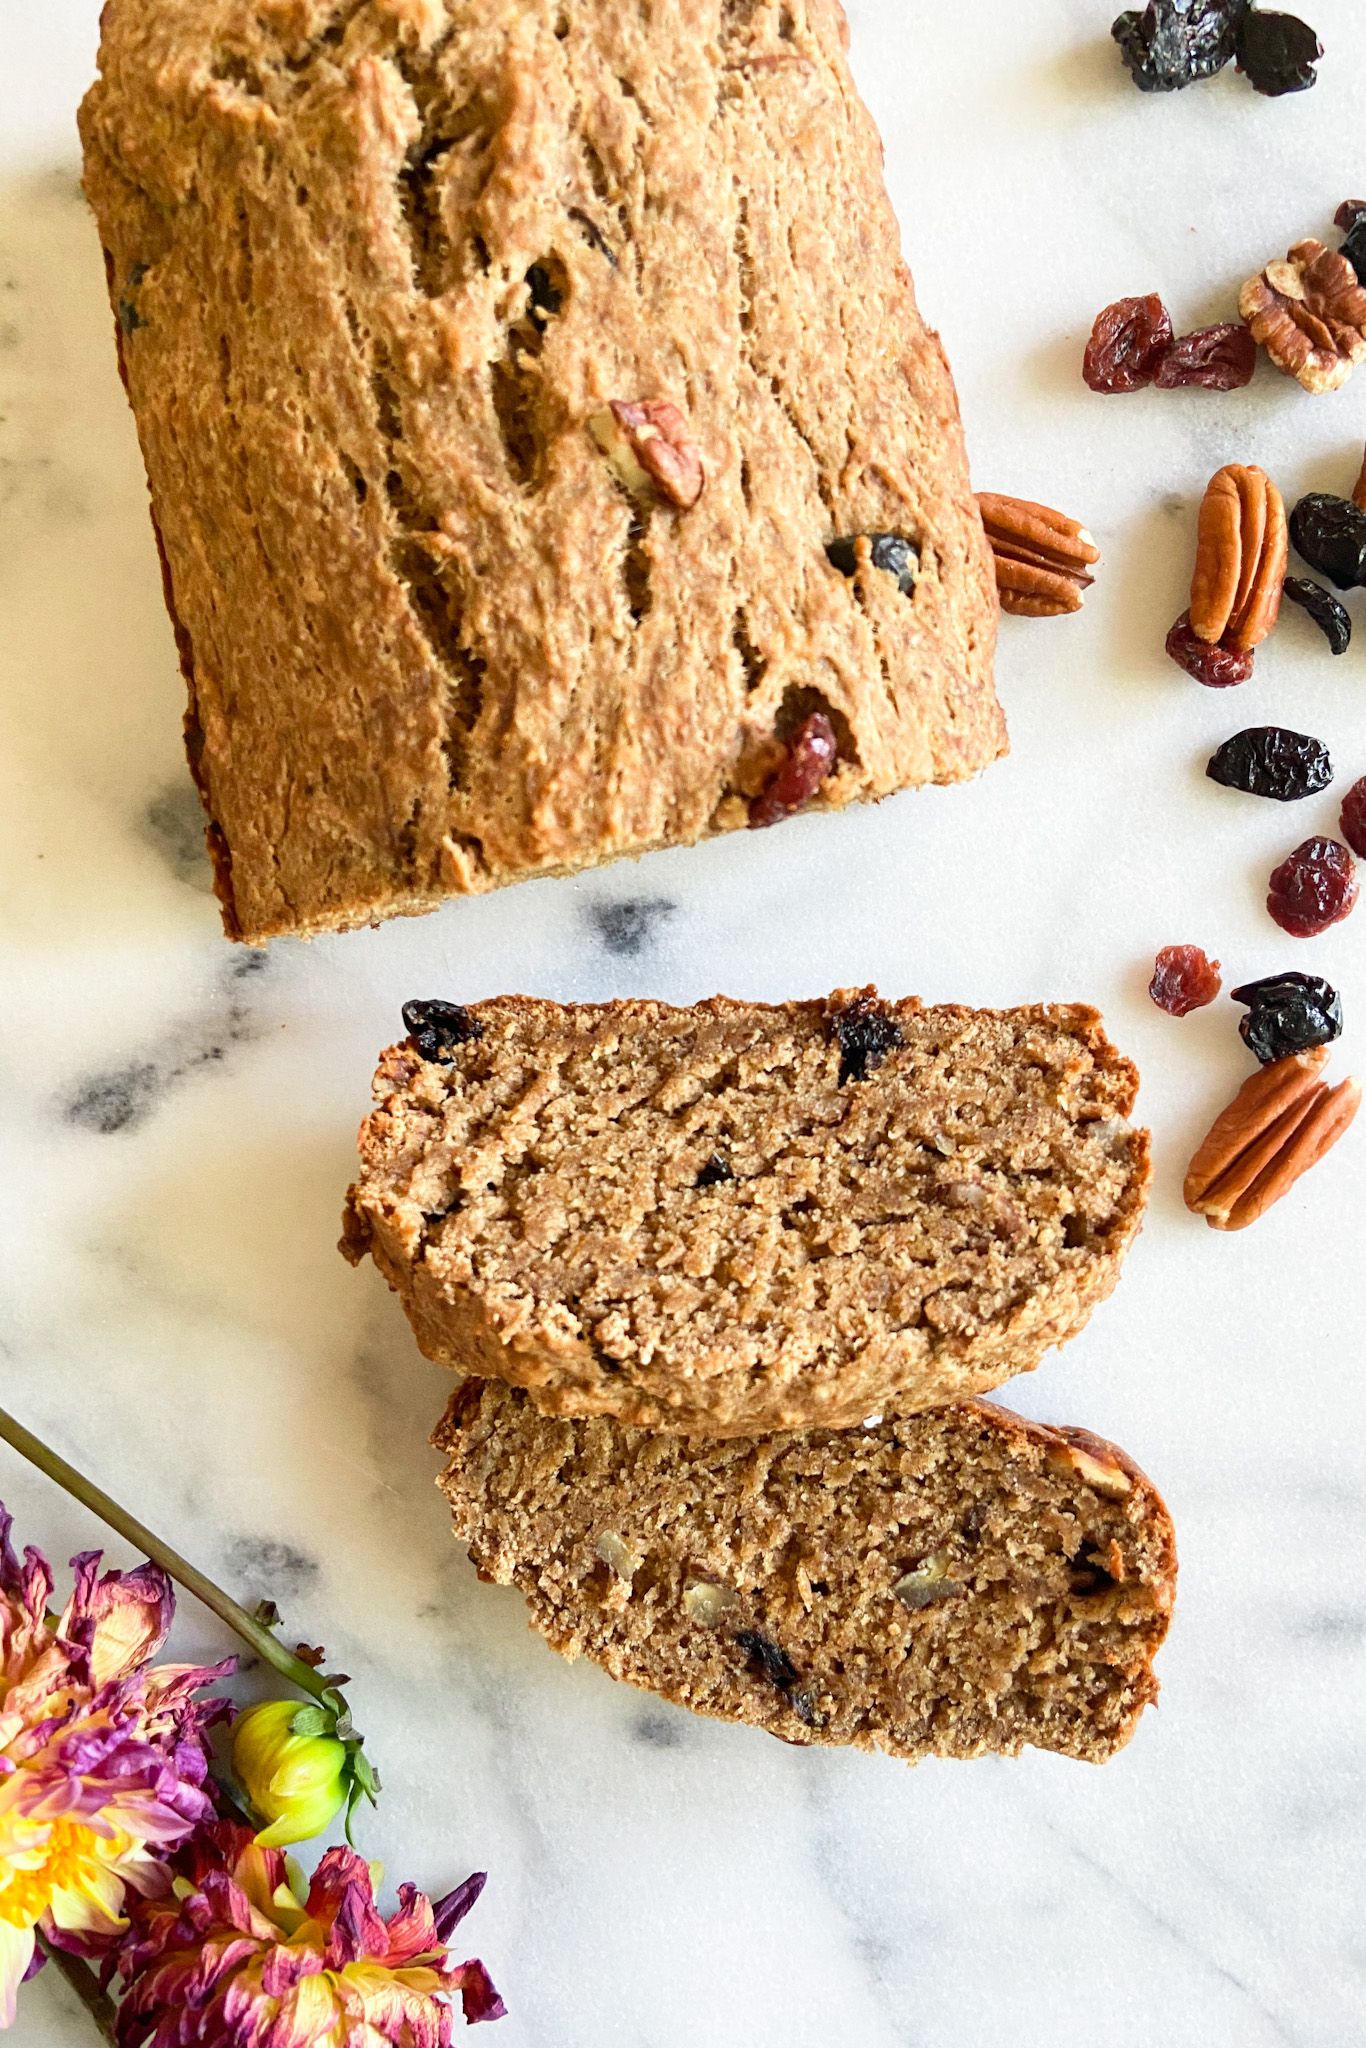
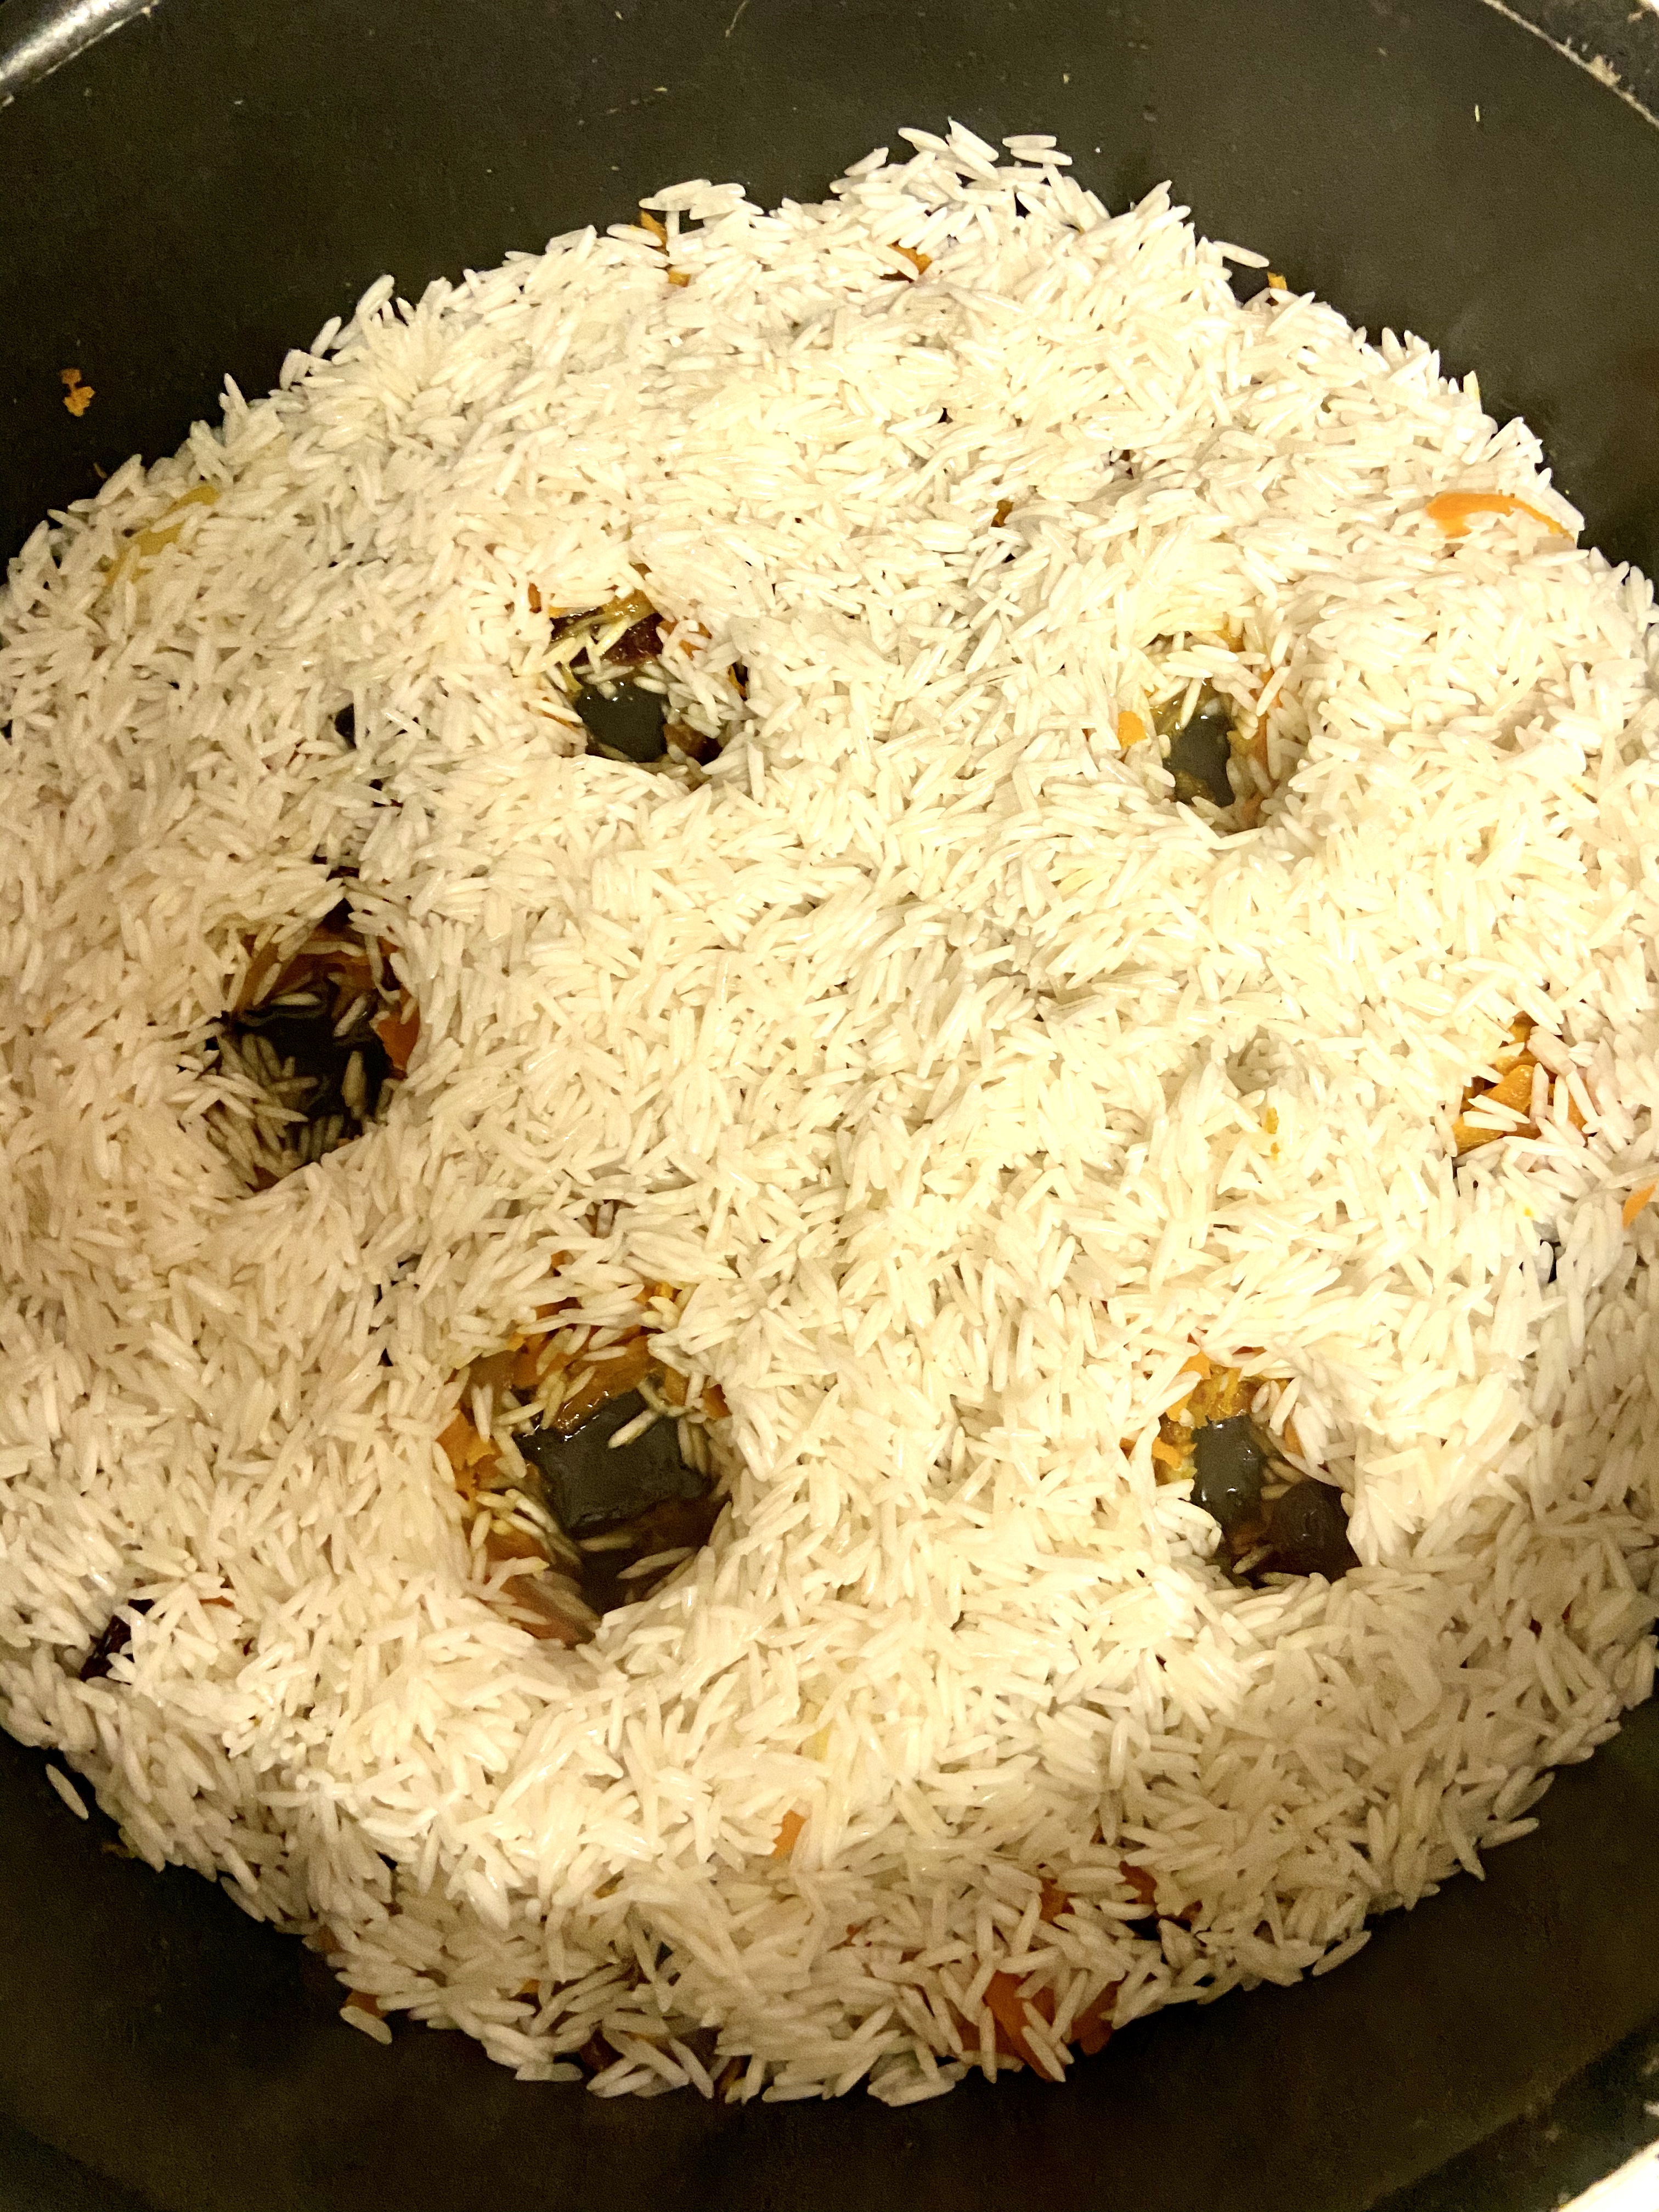
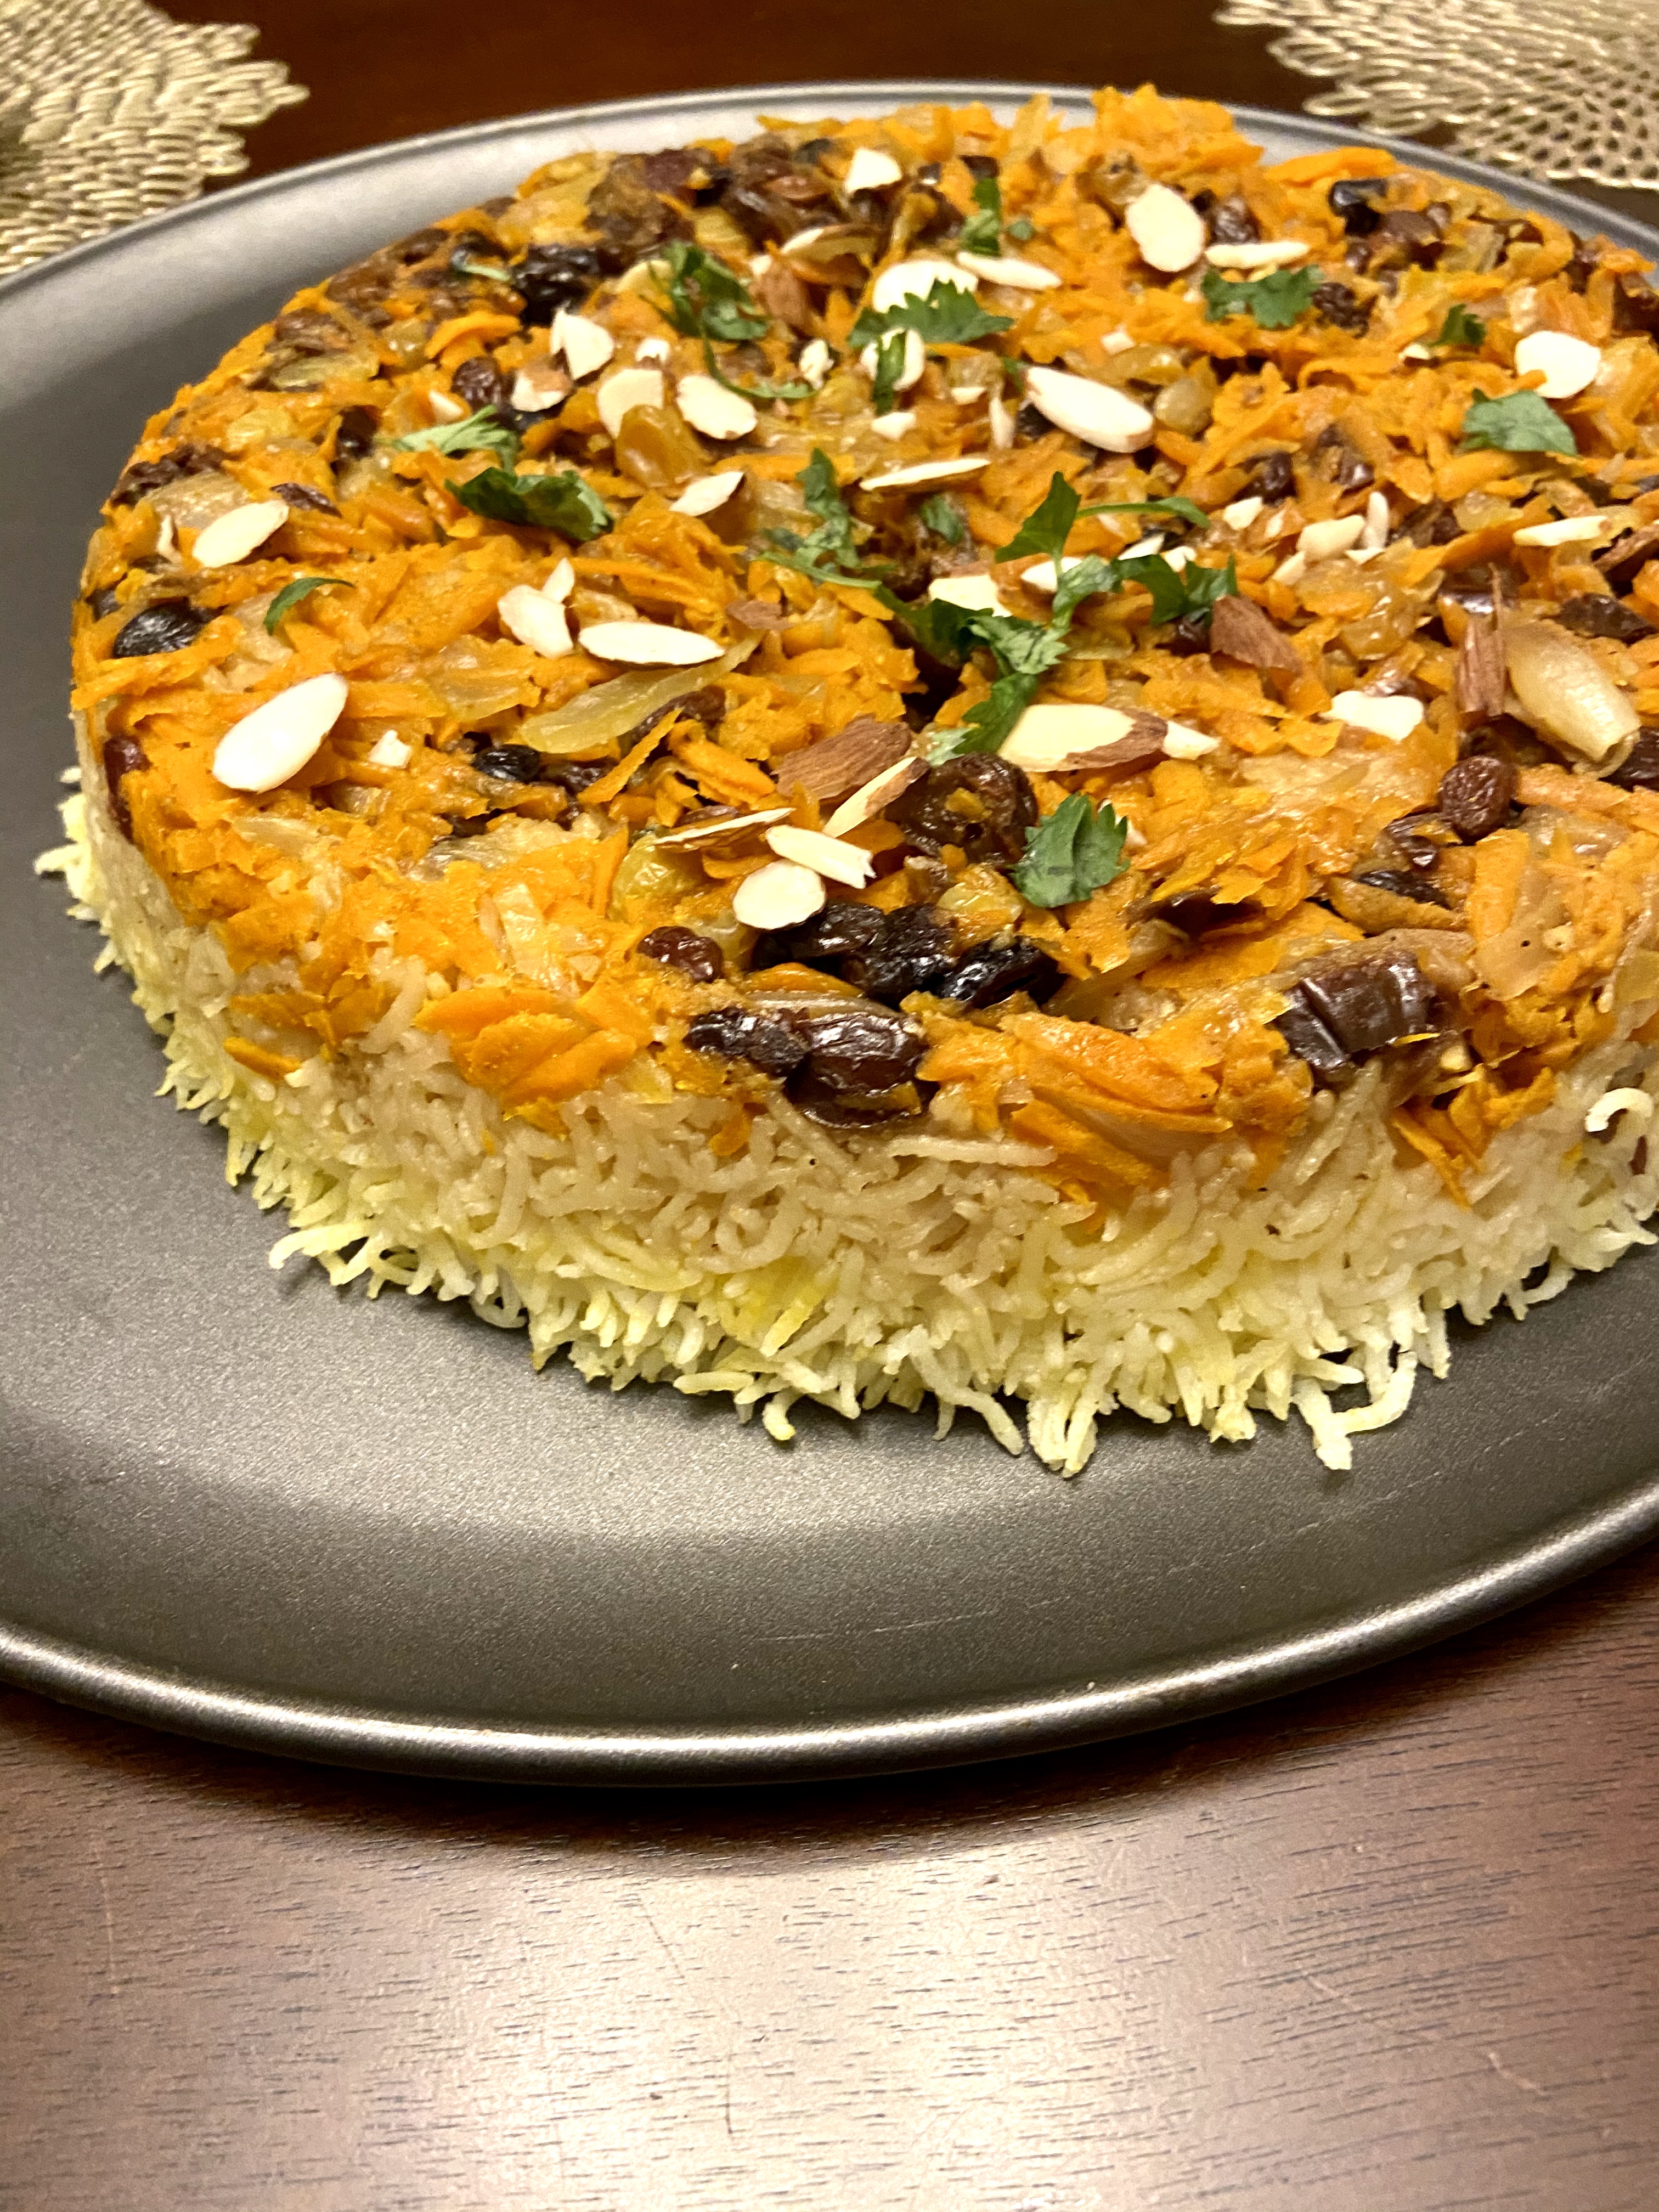
find that many were meat heavy, however, I think this may have led to one my favorite rice dishes – a jeweled vegetarian rice plov– it is definitely the most beautiful rice dish I have ever made. Traditional plov usually contains meat, lamb being a popular choice and most don’t have such a medley of dried fruits but I can’t imagine this dish without them!

The other vegetarian dish that I made were vegetarian manti. Manti are like Kazakhstan steamed dumplings, again usually stuffed with a meat filling but I opted for  a mushroom kale filling. They were so good! I served them with a tomato and yogurt sauce and that really took them to another level. I was surprised by how such simple ingredients came together to make such a tasty meal!

The third component of this meal was an impressive feat – Beshbarmak! This is a traditional meal that kept coming up in all of our research and the name of it directly translates to “Five Fingers.” The dish is composed of meat, potatoes, veggies, homemade pasta, and broth. The “five fingers” translation originally made me feel some kind of way, but I read that it got its name because it was traditionally eaten with one’s hands and the broth component was served on the side like a soup- which now makes the name make so much more sense. However, many in Kazakhstan now eat the  meat, veggies, pasta with the broth so it is no longer eating with one’s hands.


Menuimg_2346


Beshbarmak

The Beshbarmak recipe was followed as written out in the recipe linked above. It was definitely a dish that required lots of different skills and time to make but nonetheless it was a cooking experiment! Although I did not try this dish, it was fun making the dough and I loved how colorful the dish turned out. 

IMG_2339
Fresh dough ready to be boiled and cooked!


IMG_2343
Finished Beshbarmak topped with crispy onions!

Vegetarian Rice Plov

Recipe 
  • 2 cups of basmati rice, rinsed
  • 1 onion, finely chopped 
  • 2 carrots, shredded
  • 2 inch knob of fresh ginger, finely diced
  • 2 tsp ground coriander
  • 3 tsp salt
  • 1/2 tsp ground pepper 
  • 1 tsp ground turmeric 
  • 1/2 cup raisins
  • 1/2 cup diced prunes
  • 1/4 cup cranberries 
  • 1/4 cup golden raisins
  • Approx 3 – 4 cups of water
  • 2 tbsp oil (avocado, olive or coconut oil)
  • sliced almonds for garnish
  • cilantro for garnish 

Directions: 

  1. Rinse your basmati rice well and let soak for at least 30 minutes
  2. Prep your veggies -finely chop your onion, peel and grate/chop the ginger, and shred the carrots.
  3. Chop your dried fruits so they are all around the same size – this may only be necessary for prunes and raisins if they are large. 
  4. In a large pan (pick one with a lid) heat up your oil and then add onions. Let them cook for a few minutes. 
  5. Add ginger, ground coriander, black pepper, turmeric, shredded carrots and 1 tsp of salt to cooked onions. Saute for 5 minutes until carrots soften.
  6. Add your dried fruit to the pan and cover with just enough water to cover the fruit/carrot mix. Let cook for 5 minutes and then add 2 tsp of salt and mix well.
  7. While the fruit softens, drain the rice and rinse through one last time.IMG_2329
  8. Add the rice to the pan. DO NOT MIX!!!
  9. Make 5 – 6 holes/wells in the rice. This can be done with the end of a wooden spoon. Add in 1 tbsp of oil and water to cover the rice. You’ll want to try to add the water and oil in the holes you have created. You will want the water to fully cover the rice and rest 1 – 1 1/2 inches above the rice.
  10. Cover the pan – if you have a clear lid that will work best. Turn the heat to med-low and let cook for 35-40 minutes. If you are unsure if you added the right amount of water check around 25 minutes. If the rice looks like it has soaked up all the water add about 1/2 cup of more water. 
  11. After 40 minutes check to see if the rice is done. It should be light and fluffy. If it is still under-cooked – cook for 5-10 more minutes. After the rice is done cooking let it rest for 10 – 15 minutes with the lid on. IMG_2337
  12. This next step is optional but HIGHLY recommend it- you’ll transform this dish from a tasty side to a showstopper. 
  13. Grab a flat serving dish that is larger than your pan. You will flip your rice pan onto the serving dish, like you would flip a cake. 
    1. Cover your rice pan with your serving dish.
    2. Holding the serving dish tightly over the rice pan, quickly flip the pan over.
    3. Place your serving dish on the counter/table with the pan over it.
    4. Gently tap on top of the rice pan to loosen up the rice. 
    5. Lift your pan and you should have your beautiful plov – the dried fruits and carrots should be on top.
    6. Garnish with almonds and cilantro!

IMG_2341

Recipe adapted from here.


Manti

I followed this recipe when I was making the manti. I added kale and garlic powder to my filling just to make it a little more robust. The recipe also calls for oven roasting the mushrooms but I just sauteed them in my pan they turned out great. I also added some paprika to my finished tomato sauce and dish. While grocery shopping I could not find specific dumpling wrapper but so I used wonton wrappers and they turned out great steamed!

IMG_2327
Added kale to my onion and mushroom filling to make them a little more robust. 
IMG_2331
Add about a tablespoon into the center of each wonton/ dumpling wrapper. Dab the edges with water to help them stick when making the seal.
IMG_2332
You can shape them however you see best but I found this shape to work best!
IMG_2340
Steam for 10 minutes and serve with yogurt and tomato sauce and a little extra paprika! Enjoy!

Namibia Night!

A while back the random country generator pulled up Namibia! We were excited to see where this food adventure would lead us, low and behold – Namibia. We had previously cooked meals from other woldat141
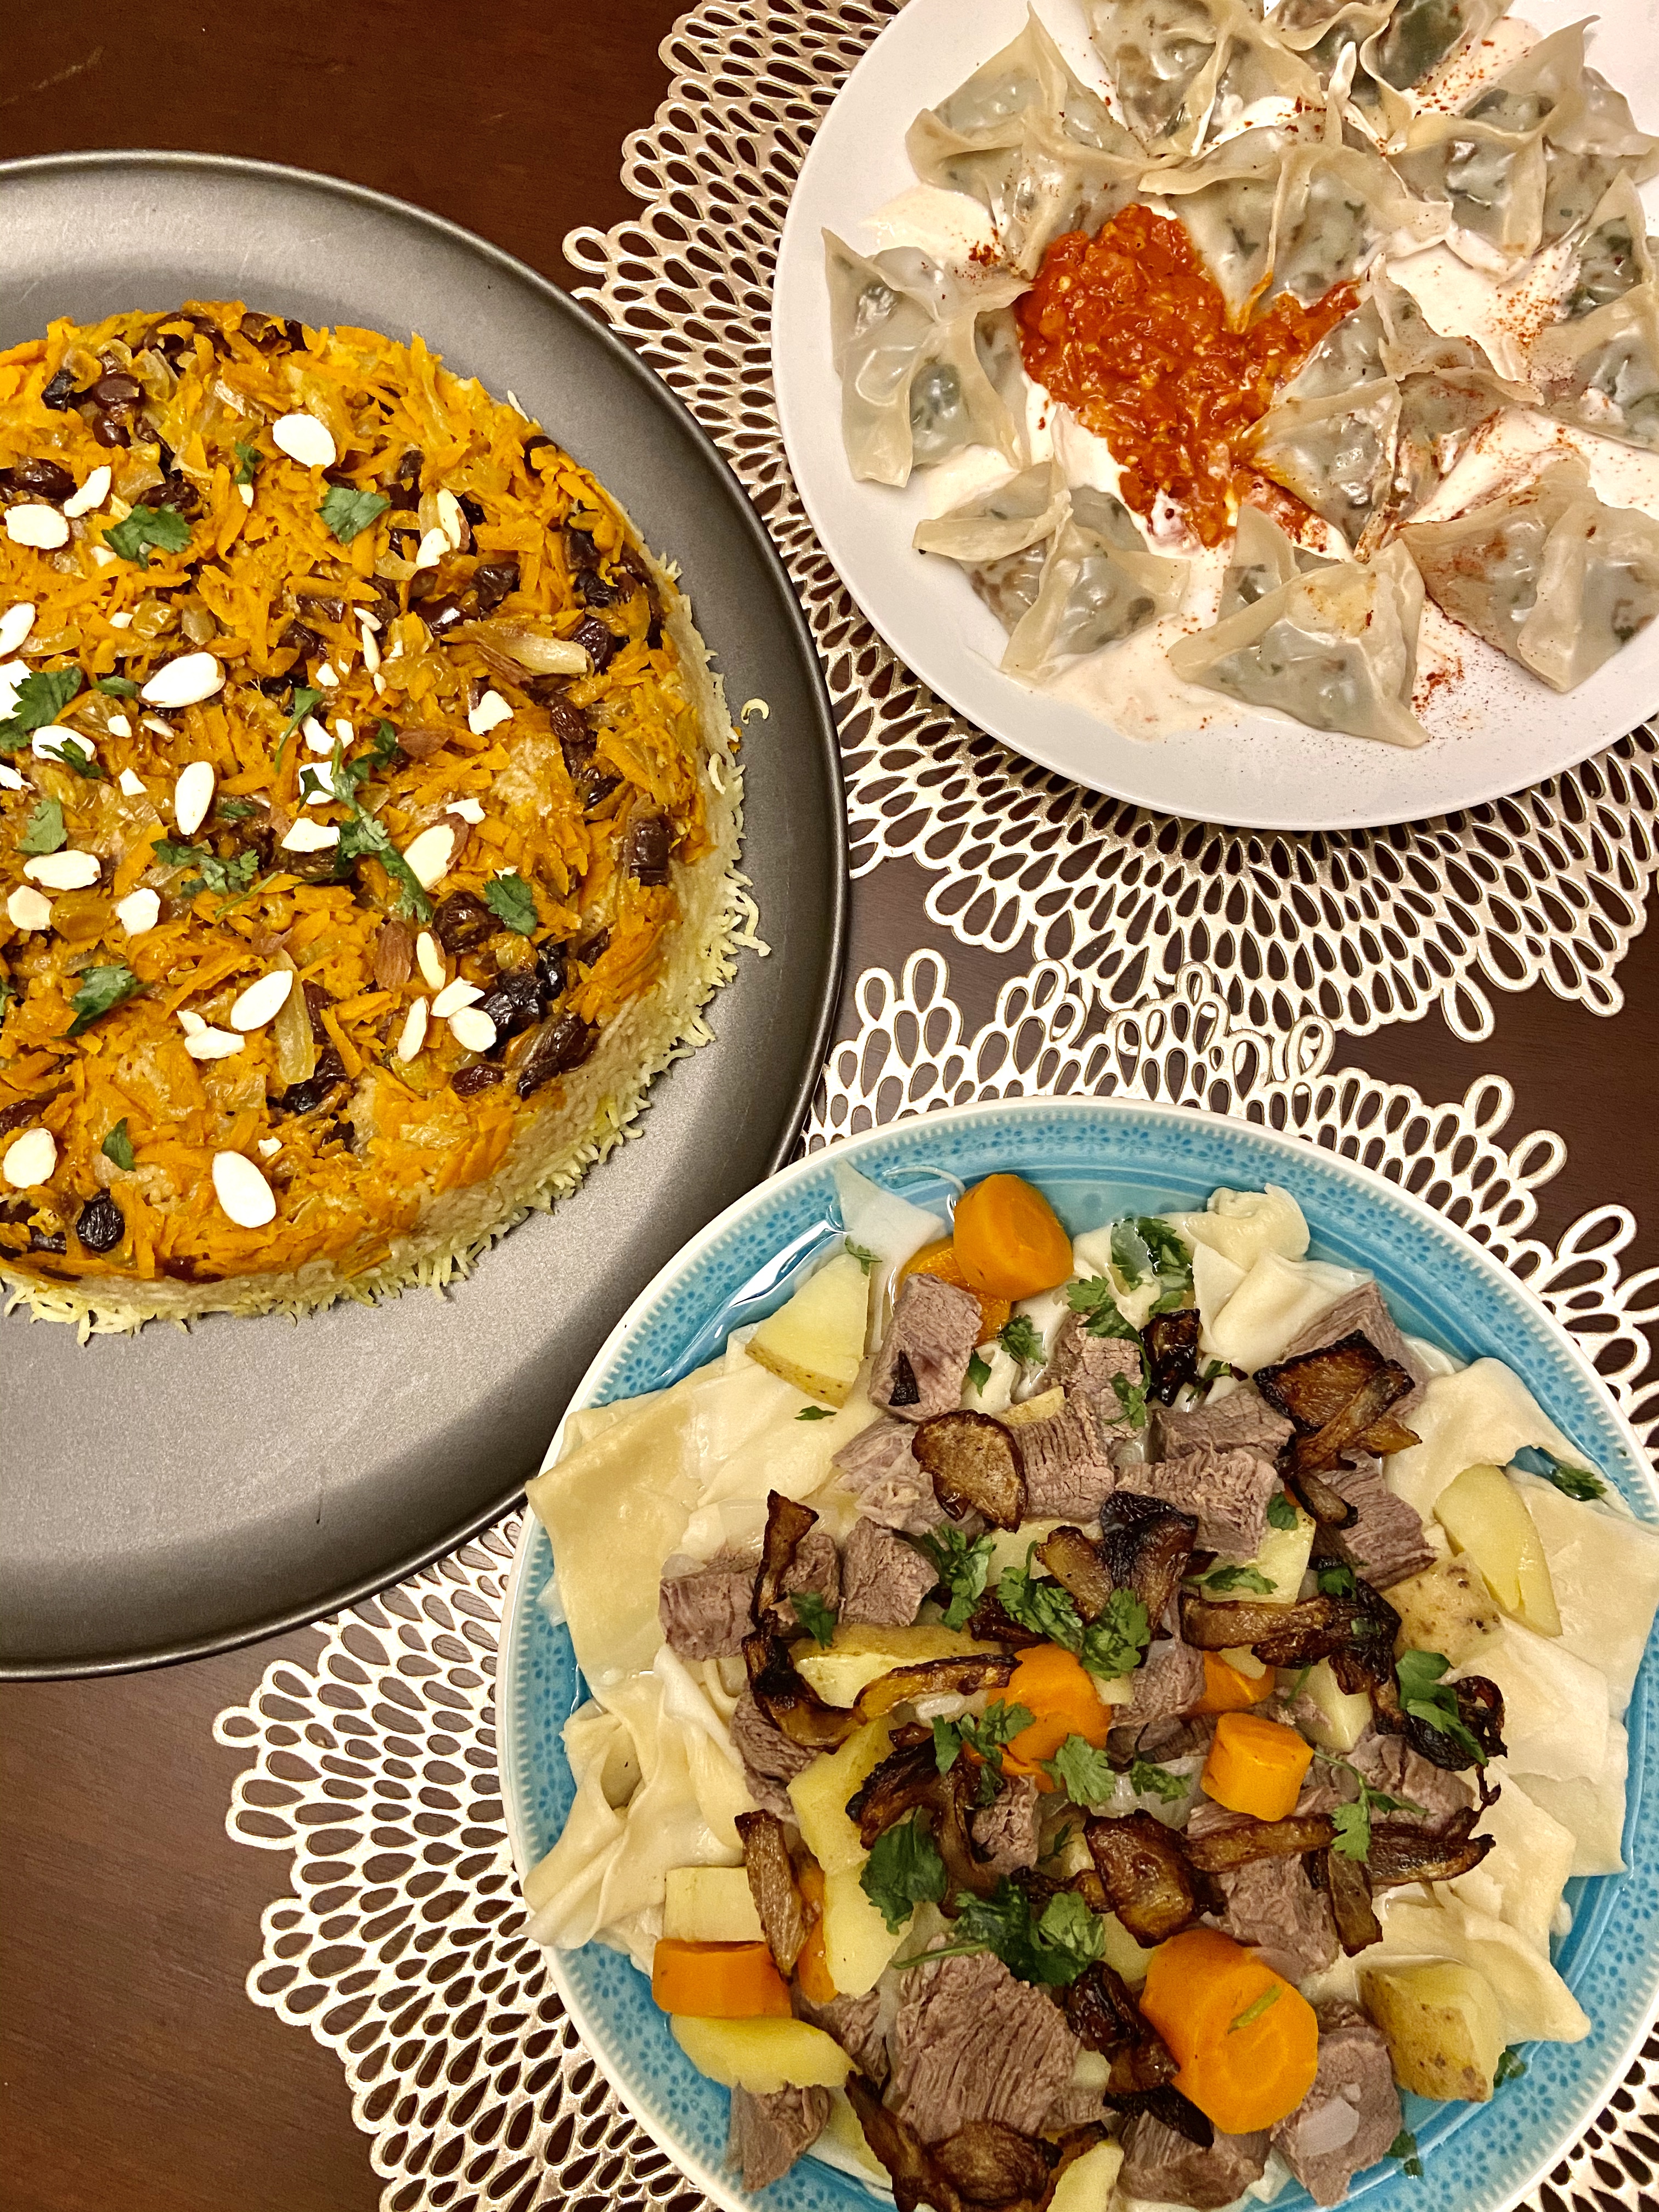
countries that I was somewhat familiar with in terms of food culture (Thailand & Argentina) but I really had no idea what the food scene was like in Namibia, or for that matter, I really did not know much about Namibia. Along with cooking up new meals and discovering new ingredients and flavors, learning about these countries’ histories, cultures, and traditions has been a great added benefit!

After browsing a few sites we saw that many of the recipes were meat heavy and called for different game meats that we do not have access to so we would have to improvise with what was available at our local grocery store. I also initially struggled a bit to find a vegetarian dish but I quickly found a sweet treat that I knew we would be making to end the night with – FAT CAKES! With a name like that I knew they would have to be good. They are basically just fried dough and reminded me a lot of New Orleans style beignets – super light and fluffy and dusted with powdered sugar!

IMG_0755

It was kind of ridiculous how easy these fat cakes were to make that in fact I have to actively forget how easy they are to keep me from making them a weekly event!


Menu

I really enjoyed making this meal. The recipes were straightforward and although they used ingredients I was familiar with, they were combined in new ways and left me feeling like I had added new attainable recipes into my rotation! 


Namibian Dinner is complete!

Tomato Sauce: I will say the tomato sauce flavors deepened the next day and it was great with scrambled eggs and toast. It reminded me of a shakshuka or huevos rancheros situation. The same goes for the soup, although I usually find soups to be tastier the next day as all the ingredients and spices come together. 

The Fat Cake recipes that I found were all pretty similar in ingredients and in the quantity they made! Since we were just cooking for two, I halved the recipe and it worked out great! I don’t recommend making more than what you will be having that day since they are fried and if you leave them overnight they may become too soggy/oily. 

With that said, I did have some dough leftover that I stored in the fridge overnight. The following morning I mixed in raisins, cinnamon and sugar into the dough and baked at 350F for 20-25 minutes and they came out like little tasty buns – delicious with jam and butter!

IMG_0754 (1)

Namibian Spicy Peanut Soup: This was so delicious and I loved that it included so many nutrient rich foods – pumpkin/squash, chickpeas, and kale (and of course my beloved peanut butter). I mostly followed along with what the recipe said but I used cubed butternut squash in place of pumpkin. You could totally substitute it with sweet potato as well. I added some of the oshifima into my soup and it went great with it. I loved how the oshifima soaked in some of the soup broth while it kept its thick consistency. This is definitely a filling soup or could be served as a delicious side.


Australia Night

Australia has been on my travel list since the third grade when I picked it to do an extensive presentation on it. It was absolutely devastating seeing as the wildfires tore across the country just a few months ago.

When the random country generator pulled up Australia I was so excited, however I 10981__32785.1524094492quickly realized I did not know very much about Australian cuisine besides knowing that Vegemite is an Australian staple. After doing some research, I realized that Australia is somewhat like America, it is strongly influenced by lots of the different cultures that make up the country! It was exciting to see but it made it difficult to pick a meal that represented Australia. 

Ultimately we settled on a menu, in which I was so excited to make an Australian dessert staple – Pavlova!

Pavlova is something I had seen so many times being made on the Great British Baking Show but I never thought I would be making one and it intimidated me so much. A pavlova is delicate dessert made with whipped egg whites that is crispy on the outside and soft and pillowy in the inside , somewhat like a marshmallow but better, and it’s a perfect dessert for anyone looking for something that’s gluten free!


Menuimg_1660

Overall it was a great meal! The tofu and pineapple skewers were delicious and made for great leftovers as the bbq sauce intensified in flavor. As a vegetarian I did not have the rolls or pie, but they were also a success, no complaints at this dinner table! We used puff pastry on both and the egg wash gave them such a great golden color!


Kale Haloumi Salad Ingredients: 
  • Bunch of lacinato kale massaged with lemon juiceIMG_1662
  • 1 roasted sweet potato -cubed
  • 2 tbsp sunflower seeds
  • 2 tbsp cranberries
  • Haloumi cheese – as much as you’d like! 
  • Dill Garlicky Greek Yogurt Dressing/dressing of your choice 

The kale salad’s star is definitely the haloumi cheese! It was a little pricey but SO WORTH IT! The way to prepare it is simply heat up a pan and once it’s hot place the haloumi slices and you’ll see it sizzle. After a minute or so turn it over and you’ll see it is nice and crisp. Let it crisp up on the other side and enjoy while it is nice and hot! It’s so good!


Pavlova:

I followed the recipes linked above for the pavlovas, however I opted for making six mini pavlovas rather than one large one. This did cut down on the baking time and made it easier to share!

I topped them with the lemon curd recipe and fresh strawberries and blueberries. A light dusting of powdered sugar finished off the pavlovas! FYI I had some lemon curd leftover and it was great on french toast and mixed in with greek yogurt. I also opted for freezing some to see how it would hold and it was still tasty!

Easy Quick Bagels

This was my first attempt at making bagels and I was pretty pleased! Now here me out, these aren’t going to taste like your New York Deli bagels, they are in on way made the same nor are they supposed to be exactly like your typical chewy bagel. BUT with that said, they make a great bagel sandwich, can successful satisfy those bagel cravings, delicious sweet or savory and the best part is they are SO EASY!!!

I made a couple “cinnamon raisin” which were great! I’m not a big cream cheese fan (I’m weird, I know) so I had mine with peanut butter and banana fore breakfast. The others were topped with sesame seeds and they were great for veggie packed sandwiches. 

img_5260

I made this sammie right here on the toasted sesame bagel with hummus, roasted beets, carrots, cucumber, avocado and a layer of mixed greens! 

Another great way to have these would be to recreate the classic childhood favorite — pizza bagel bites!


Recipe

Ingredients

  • 1 cup (5 oz) all purpose flour
  • 2 tsp baking powder
  • 1/2 tsp salt 
  • 1 cup PLAIN greek yogurt ( Fage is great for this!)
  • 1 egg white 

Optional Toppings: sesame seeds, everything but the bagel seasoning, cinnamon sugar, poppy seeds, Parmesan 


  1. Preheat your oven to 375F and prep your baking sheet with parchment paper or a silicone mat and spray with non-stick spray (can’t be too safe!)
  2. In a bowl mix your dry ingredients: flour, baking powder and salt.
  3. Add in your yogurt to the dry ingredients until well combined. This wont be one smooth dough, there will be bigger pieces that come together while the rest looks a bit crumbly. 
  4. On a clean counter top, dust a little bit of flour. Dump your dough onto the floured surface and knead for a few rounds. You will know you are done kneading when the dough is still a little sticky but does not stick to your hands. 
  5. Split the dough into four balls. Roll each ball out into a rope and then pinch the ends together to make the shape of your bagel. 
  6. Place your four bagels onto your prepared baking sheet.
  7. In a small bowl whisk your egg white for the egg wash. Brush each bagel top with the egg wash and now add any of the toppings you would like – sesame seeds, everything but the bagel seasoning, cinnamon, etc. 
  8. Place your bagels in the oven for 25 minutes. 
  9. Let your bagels cool for 15-20 minutes before slicing and enjoy!

Notes:

1. If you do not have a scale to measure out your flour, make sure you are measuring out one cup correctly.

  • Rather than scooping out flour with your measuring cup from the flour bag, you should first fluff the flour with your spoon. 
  • Person using a knife to even off the top of a measuring cup filled with flourThen scoop out flour with a spoon from the bag and put into your measuring cup until it is full.
  • Lastly level it off with a knife. This will ensure you do not over pack your measuring cup!