Super Seed Breakfast Porridge


This year is all about filling, delicious and nutrient packed breakfasts, which means it has to have a healthy amount of protein, fat and fiber in it! This breakfast is just exactly that and the perfect way to kick-off a Monday and is what I like to call chia pudding but all grown up!

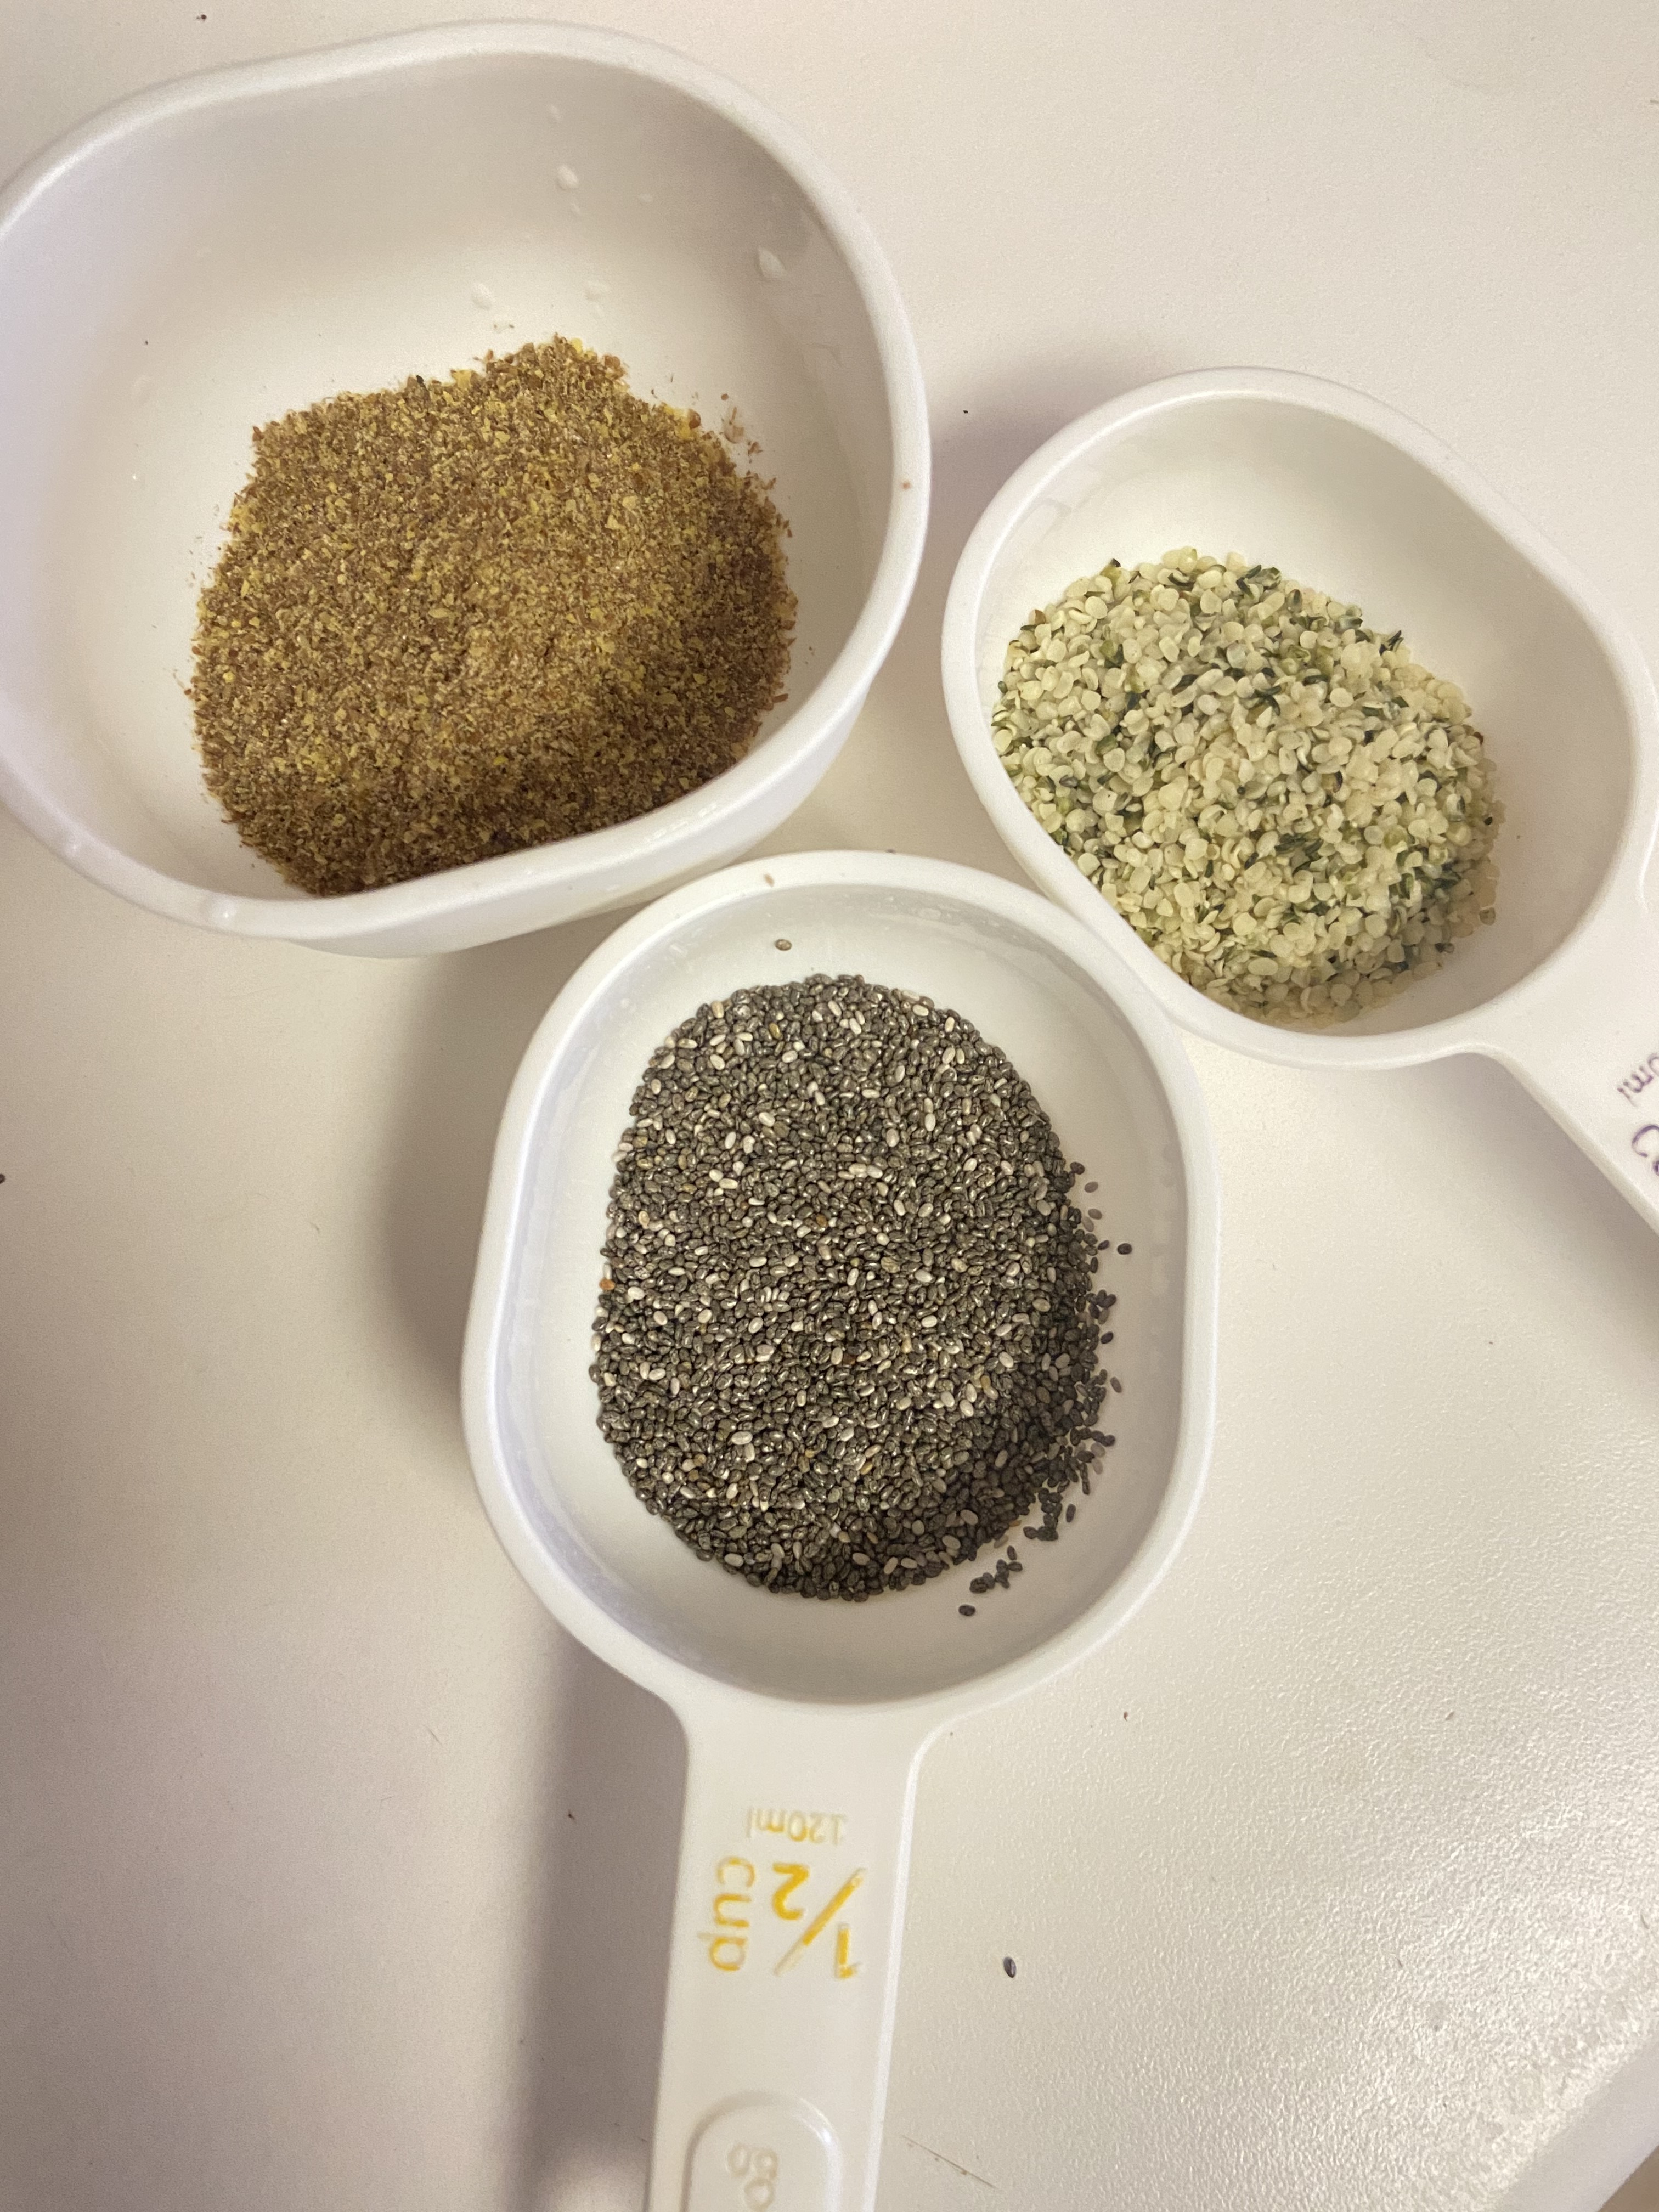
The main ingredients you will need are a protein powder of your choice ( I like using Nutiva plant based, vegan protein powder which also has some veggies in it, I get mine from Thrive Market), hemp seeds, chia seeds, ground flax seeds, and for an extra bonus, pumpkin seeds to use as your topping!

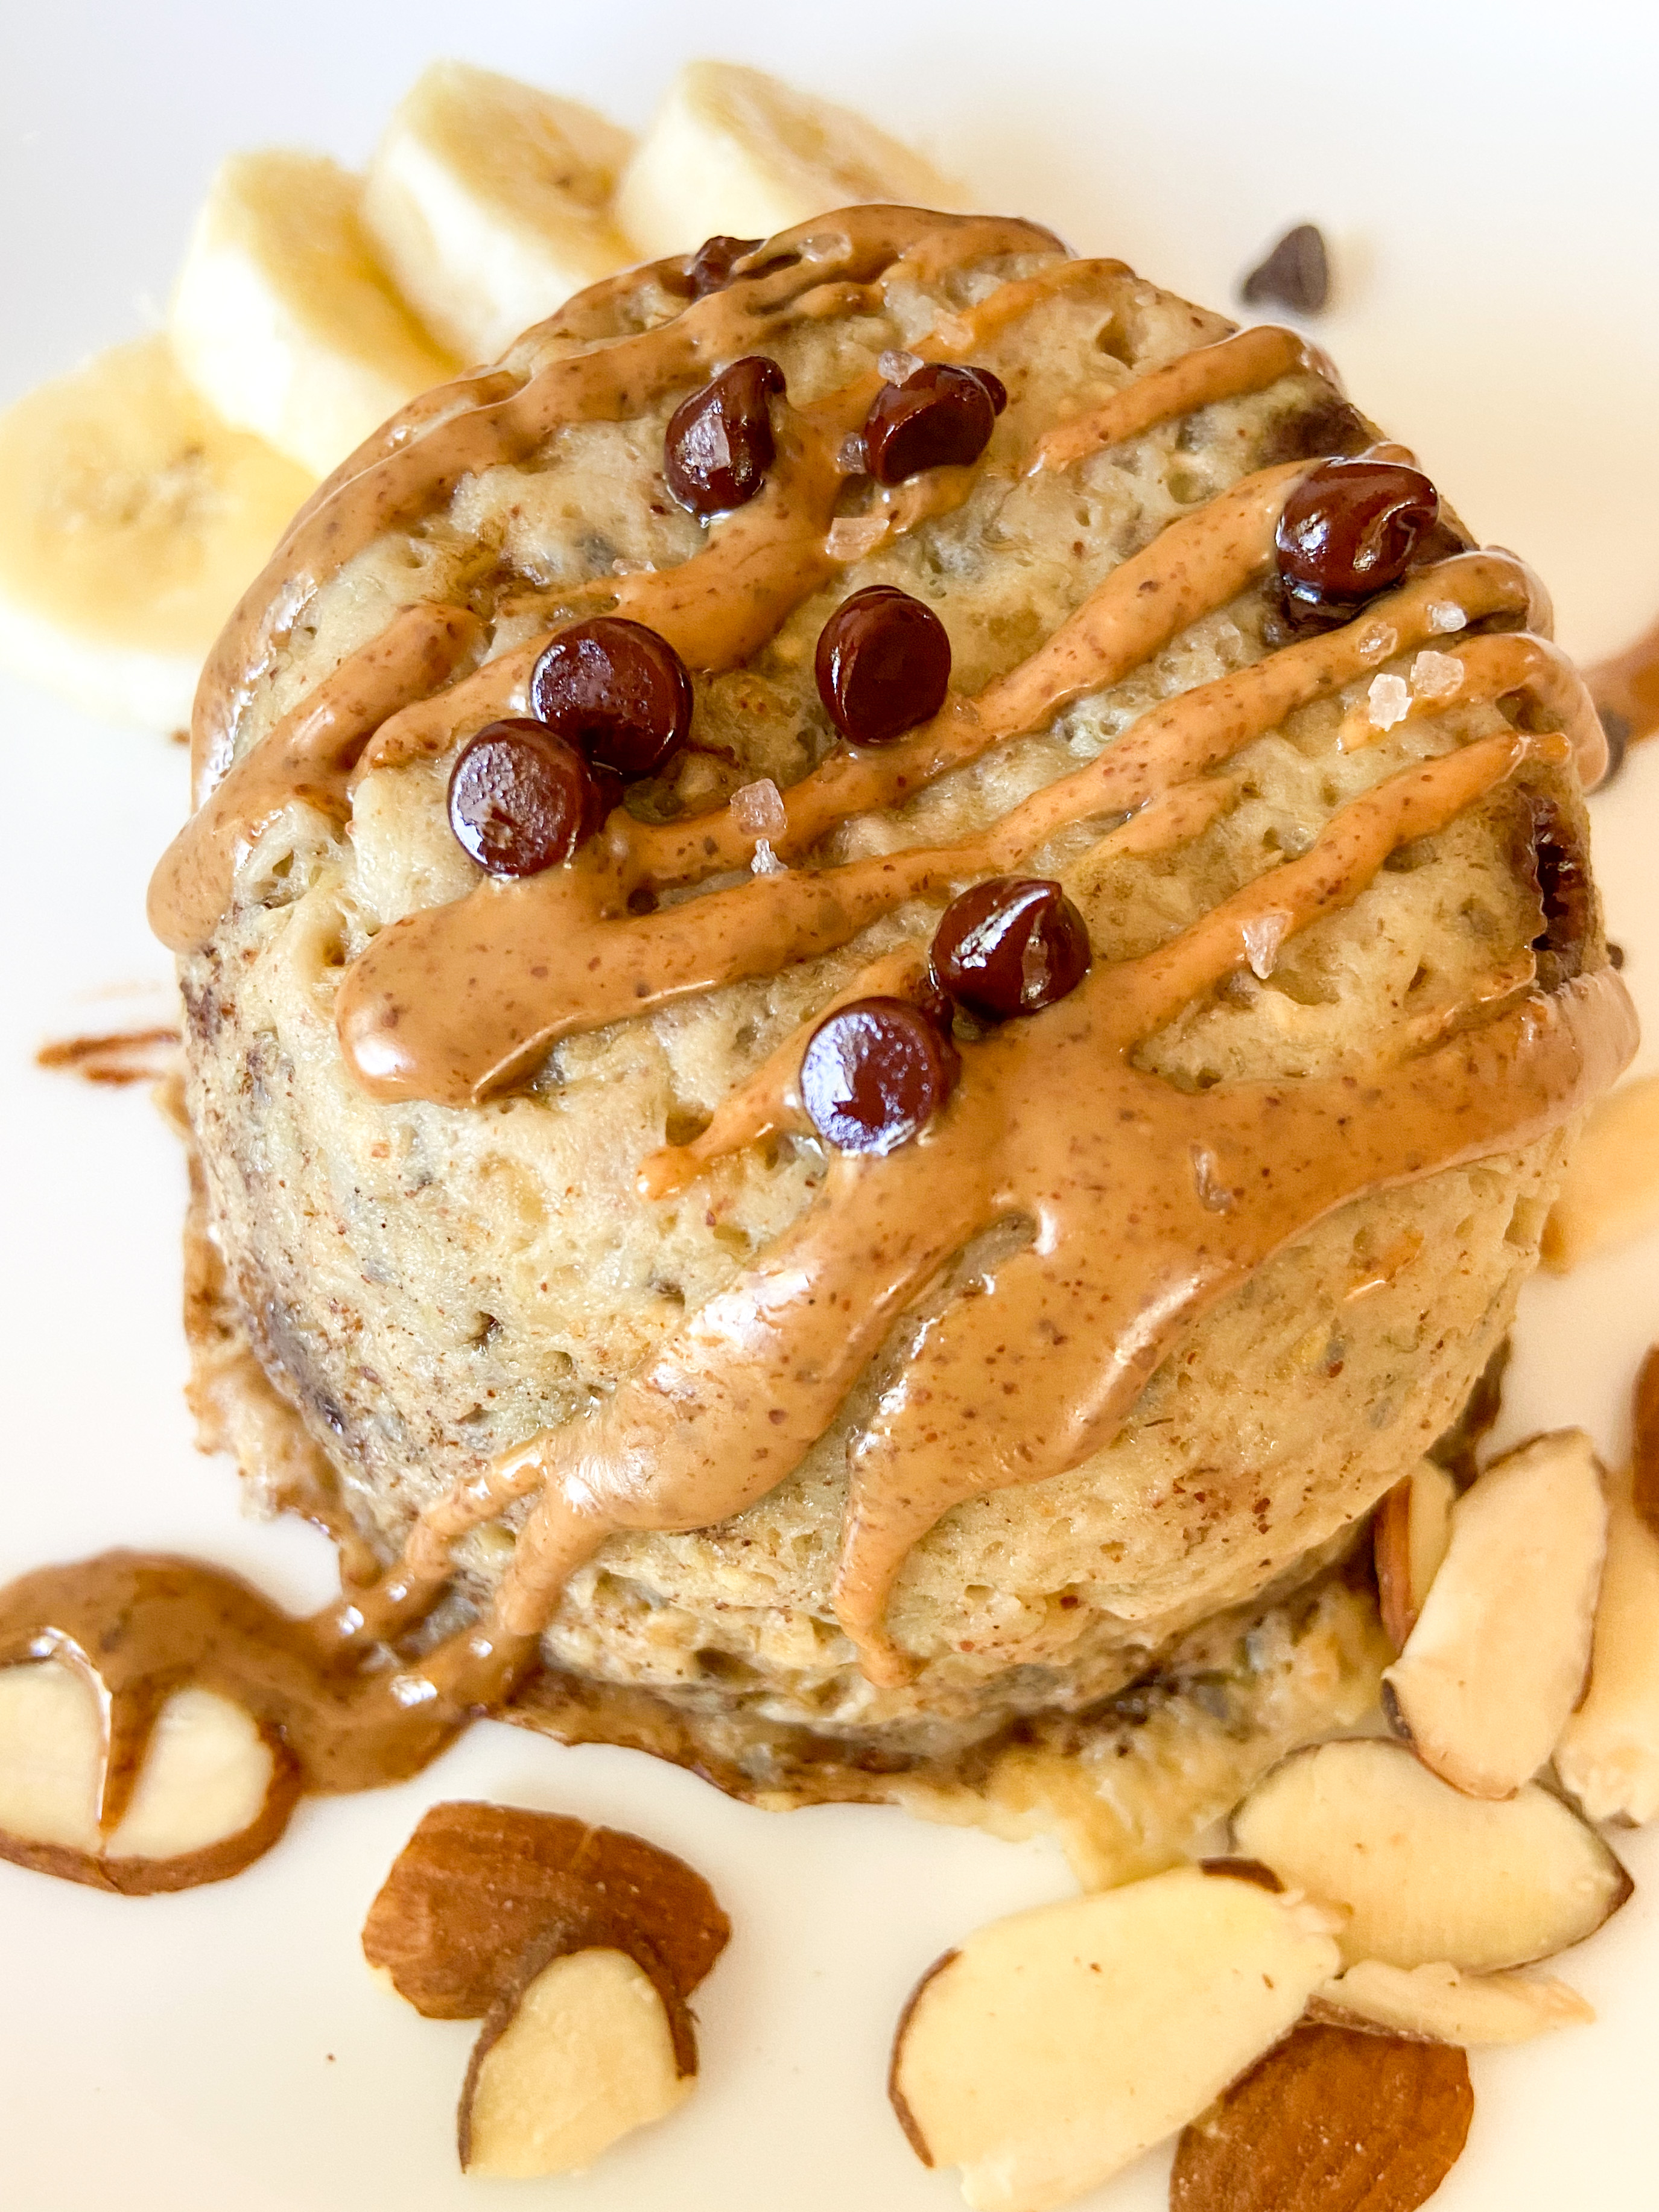
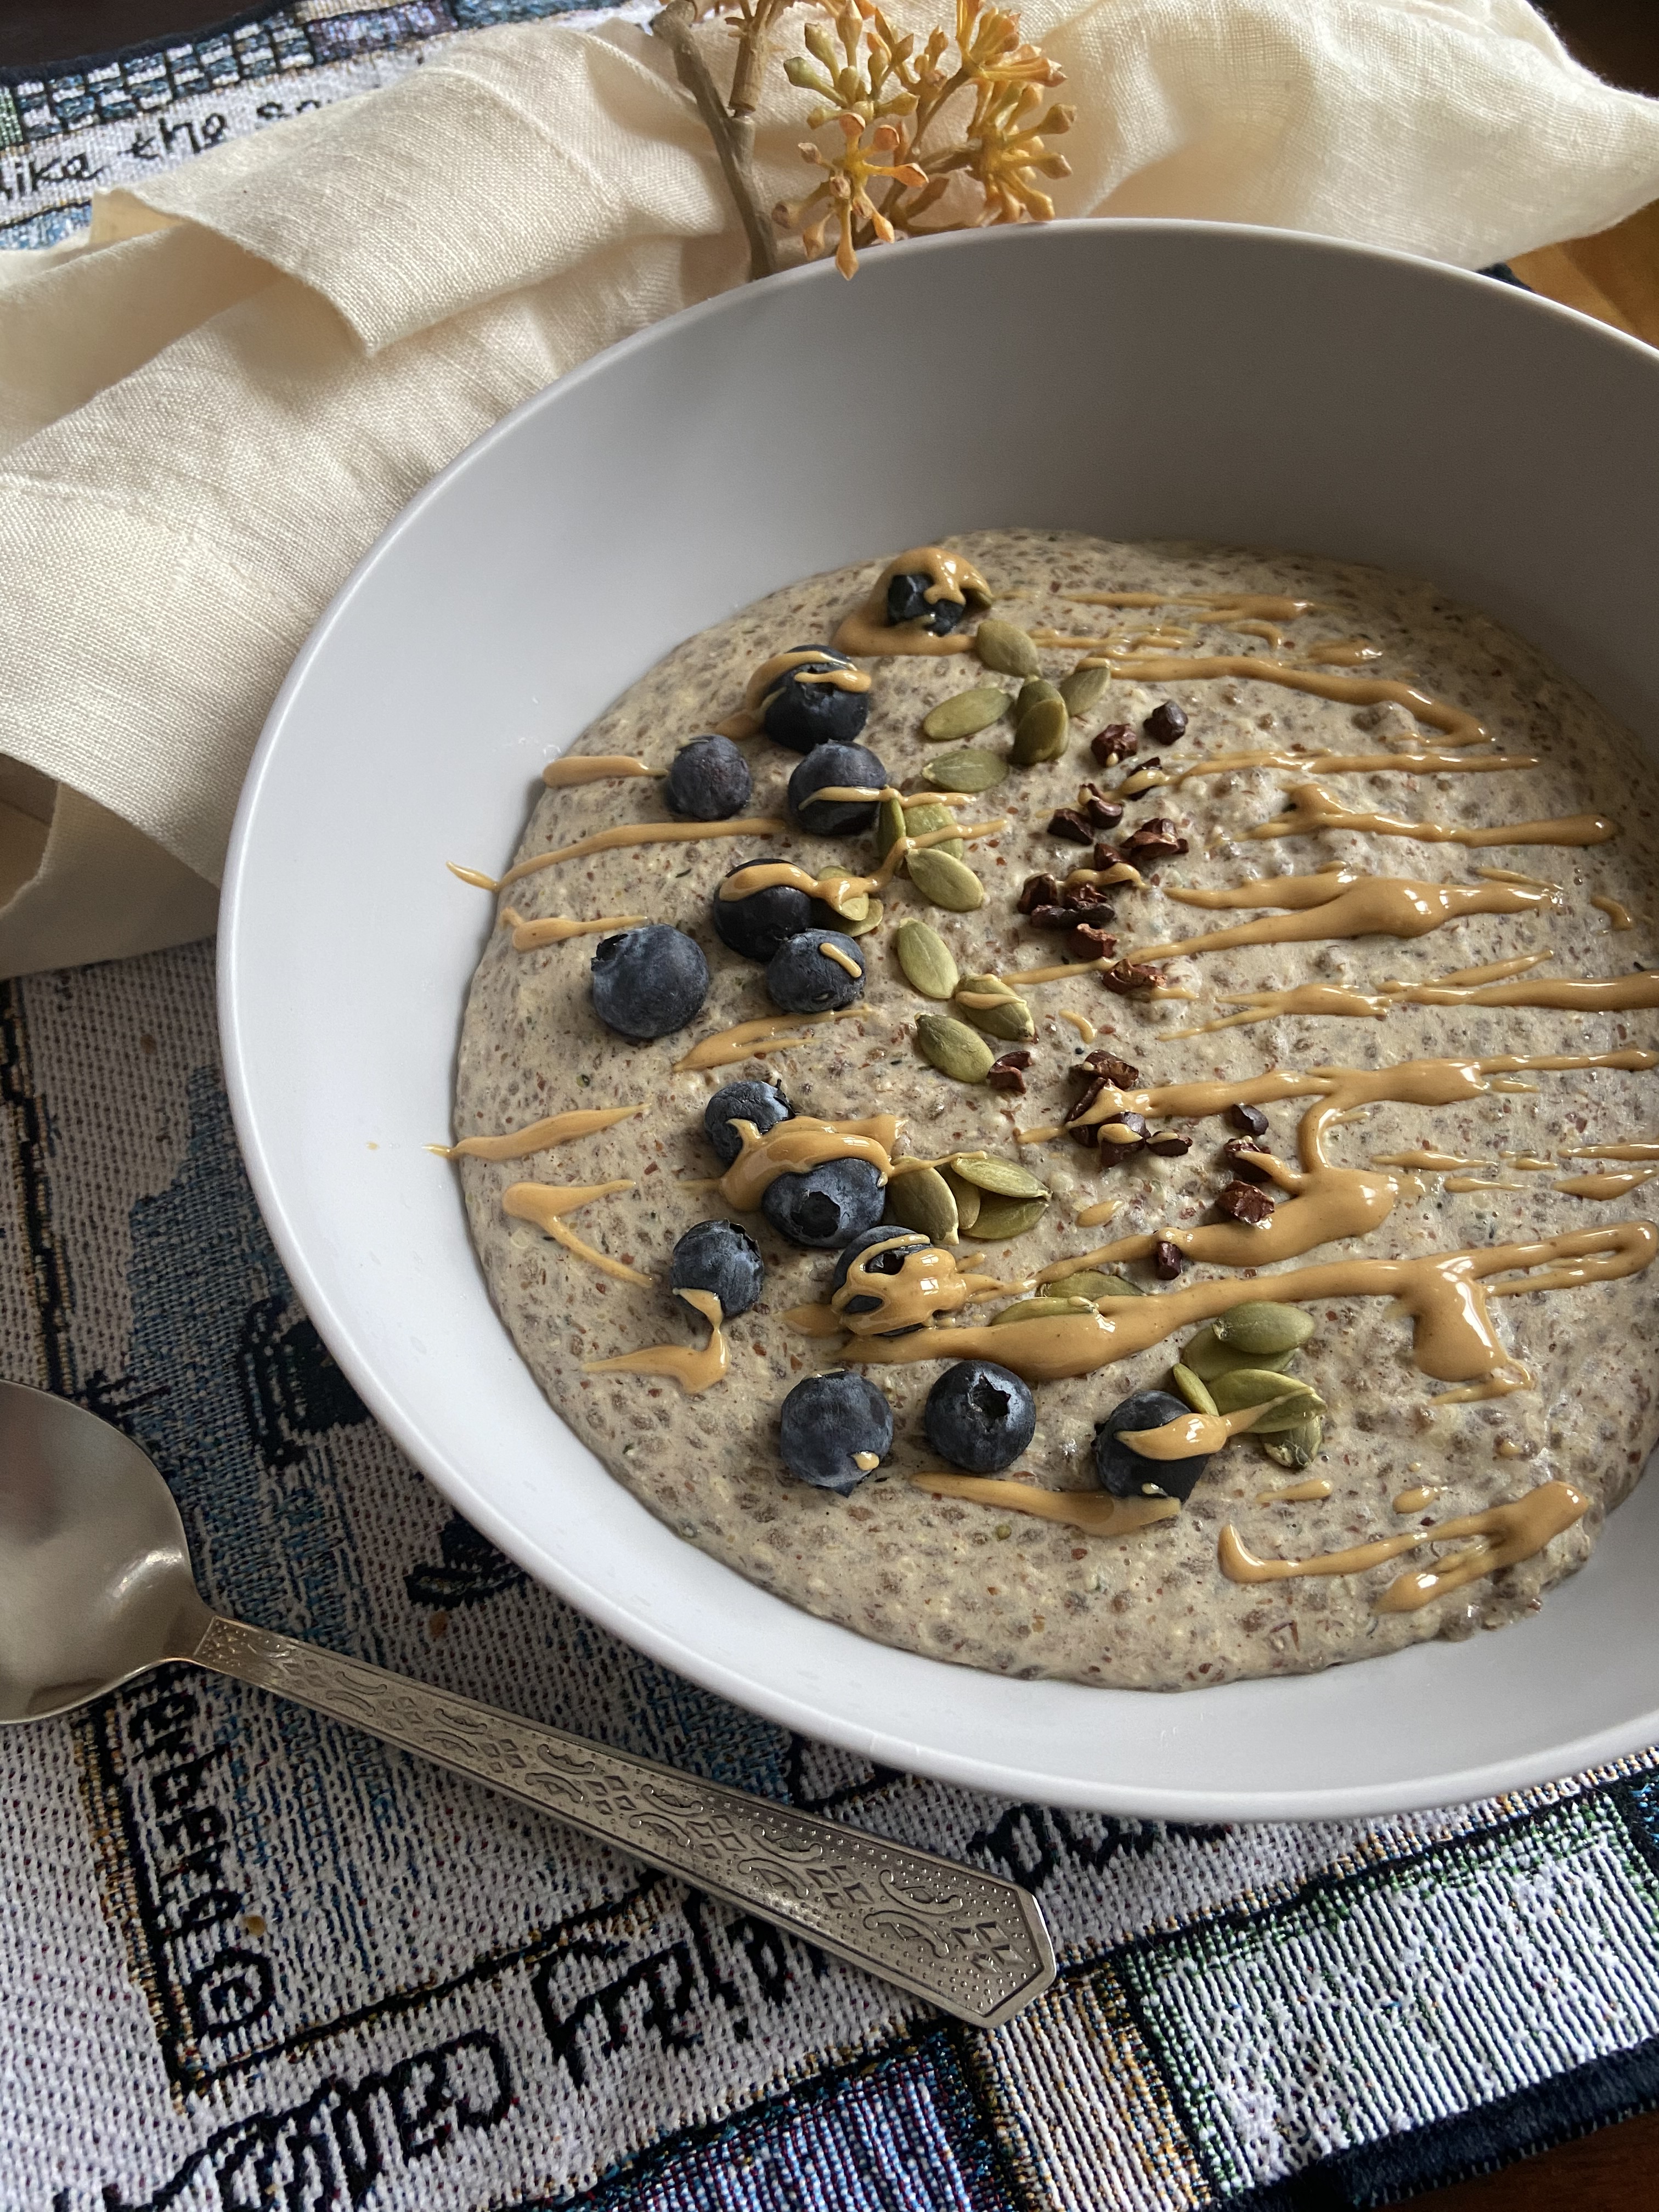
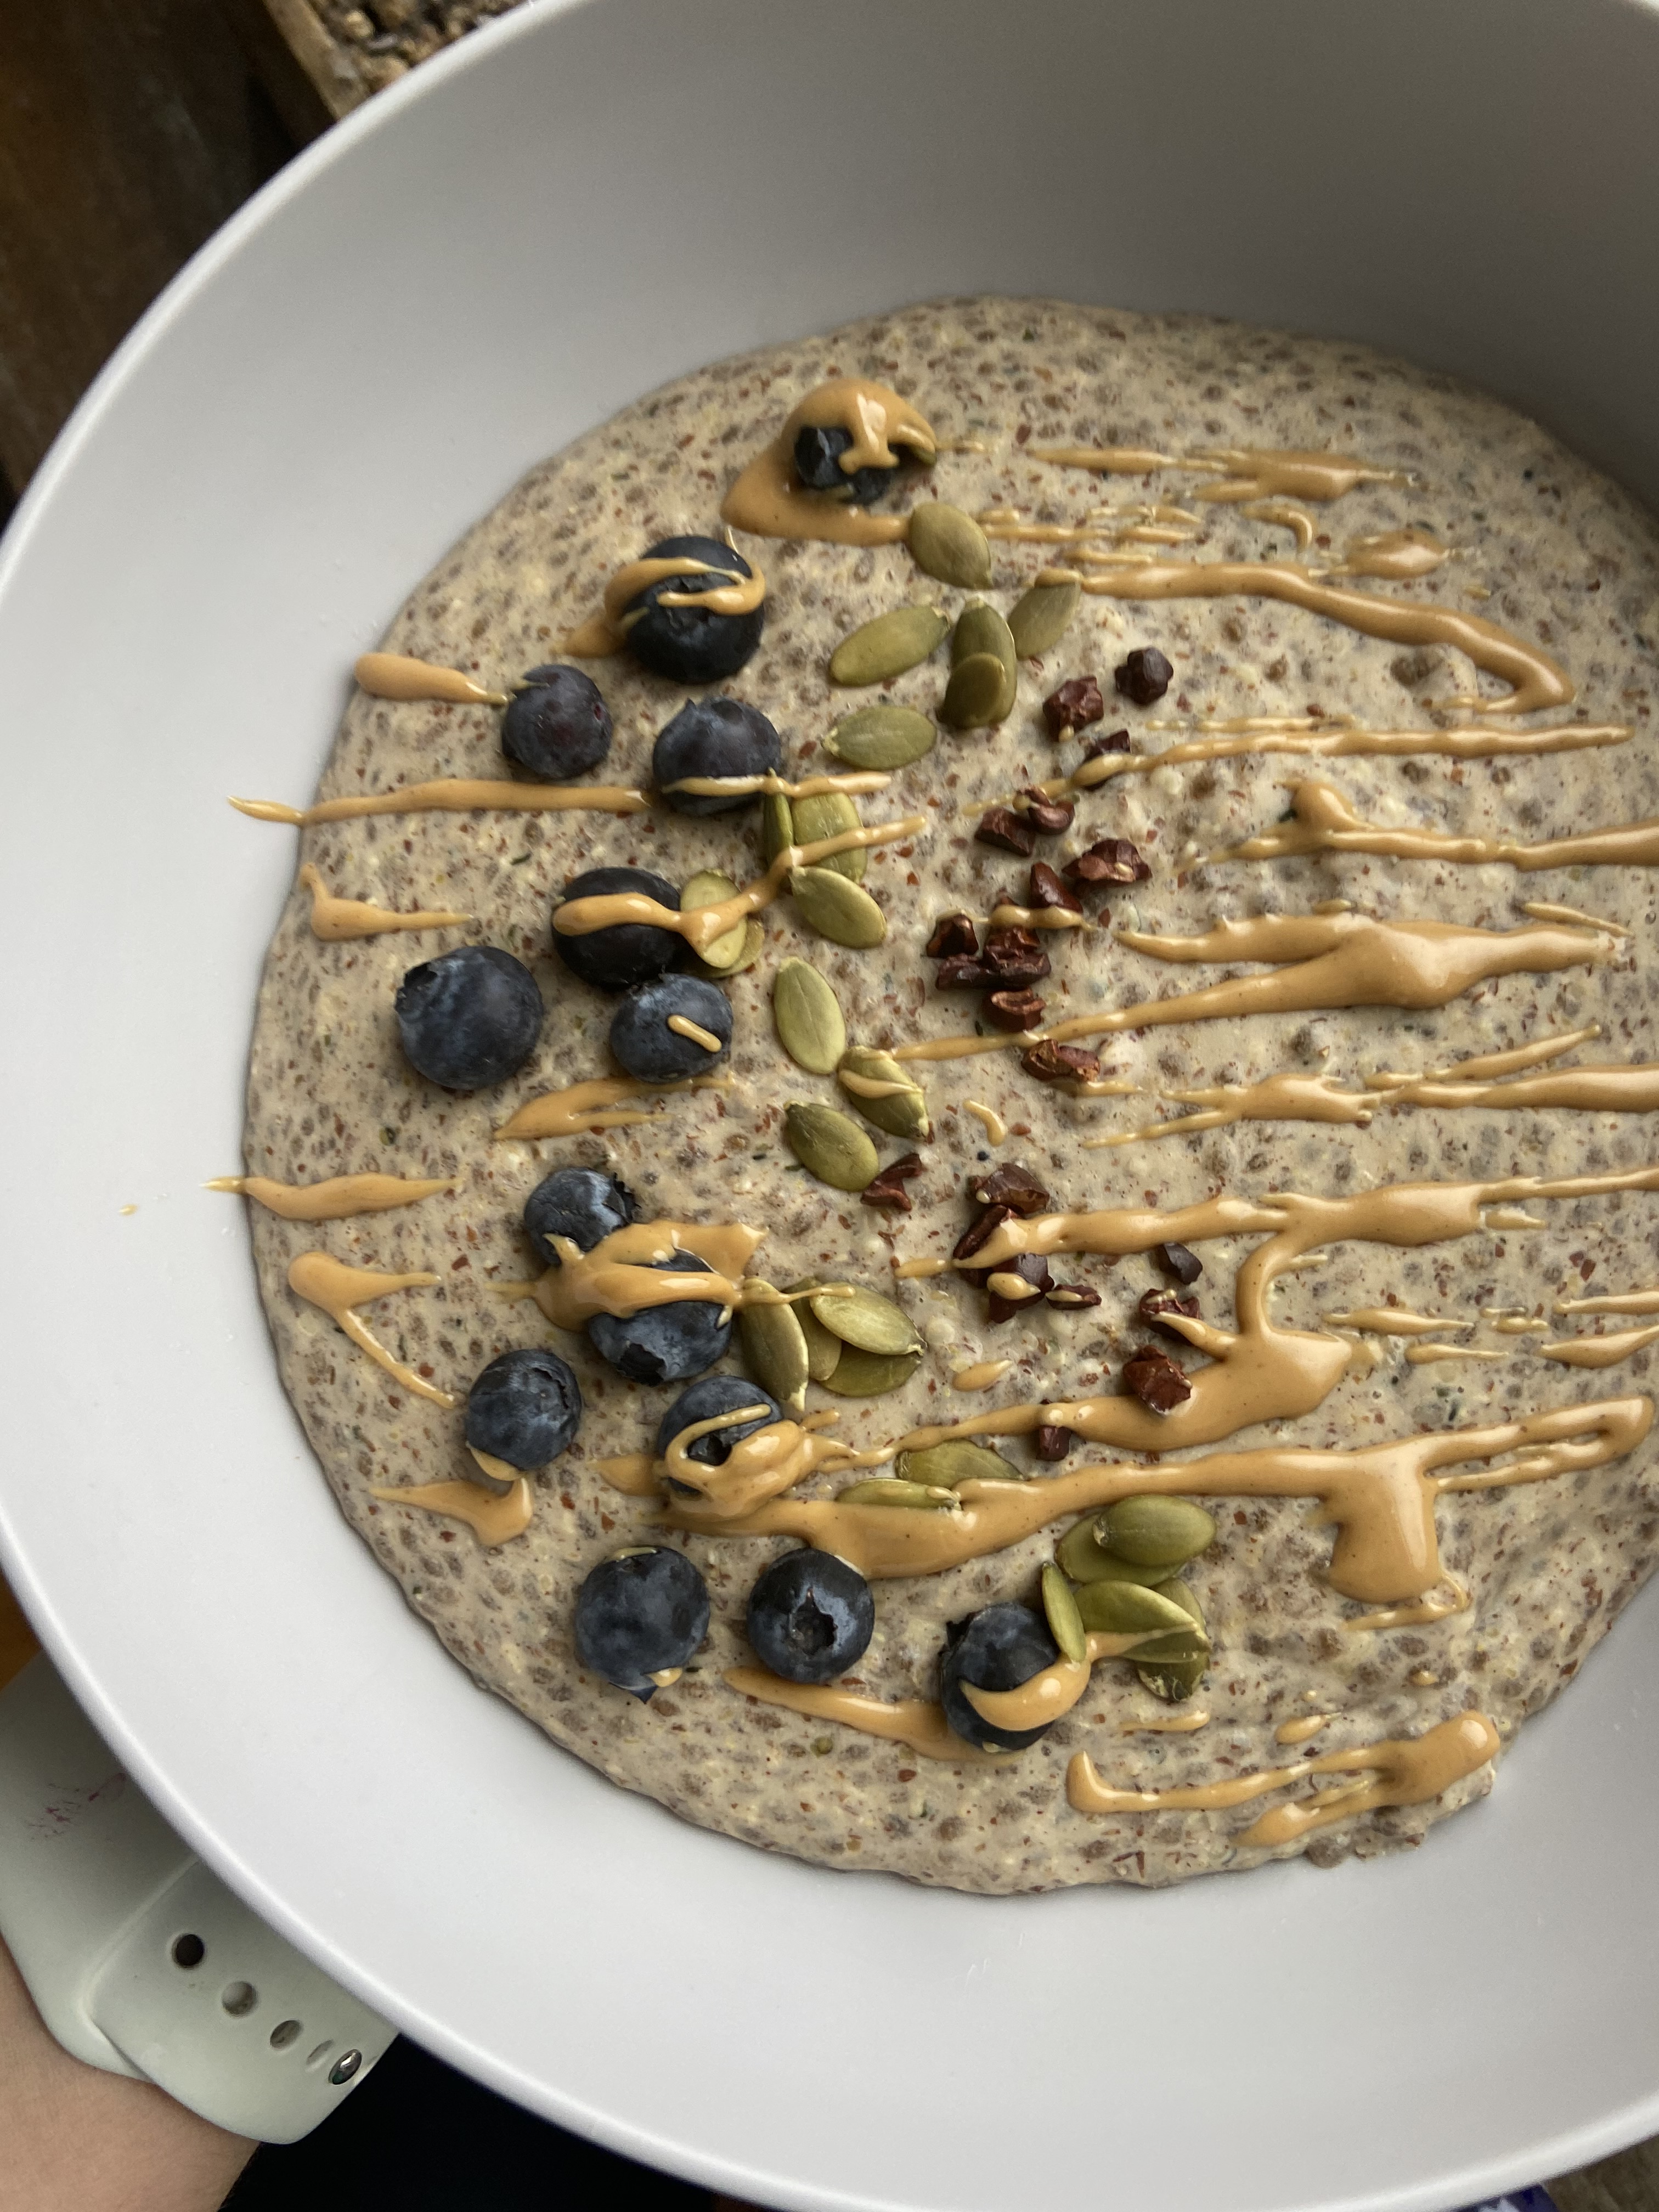
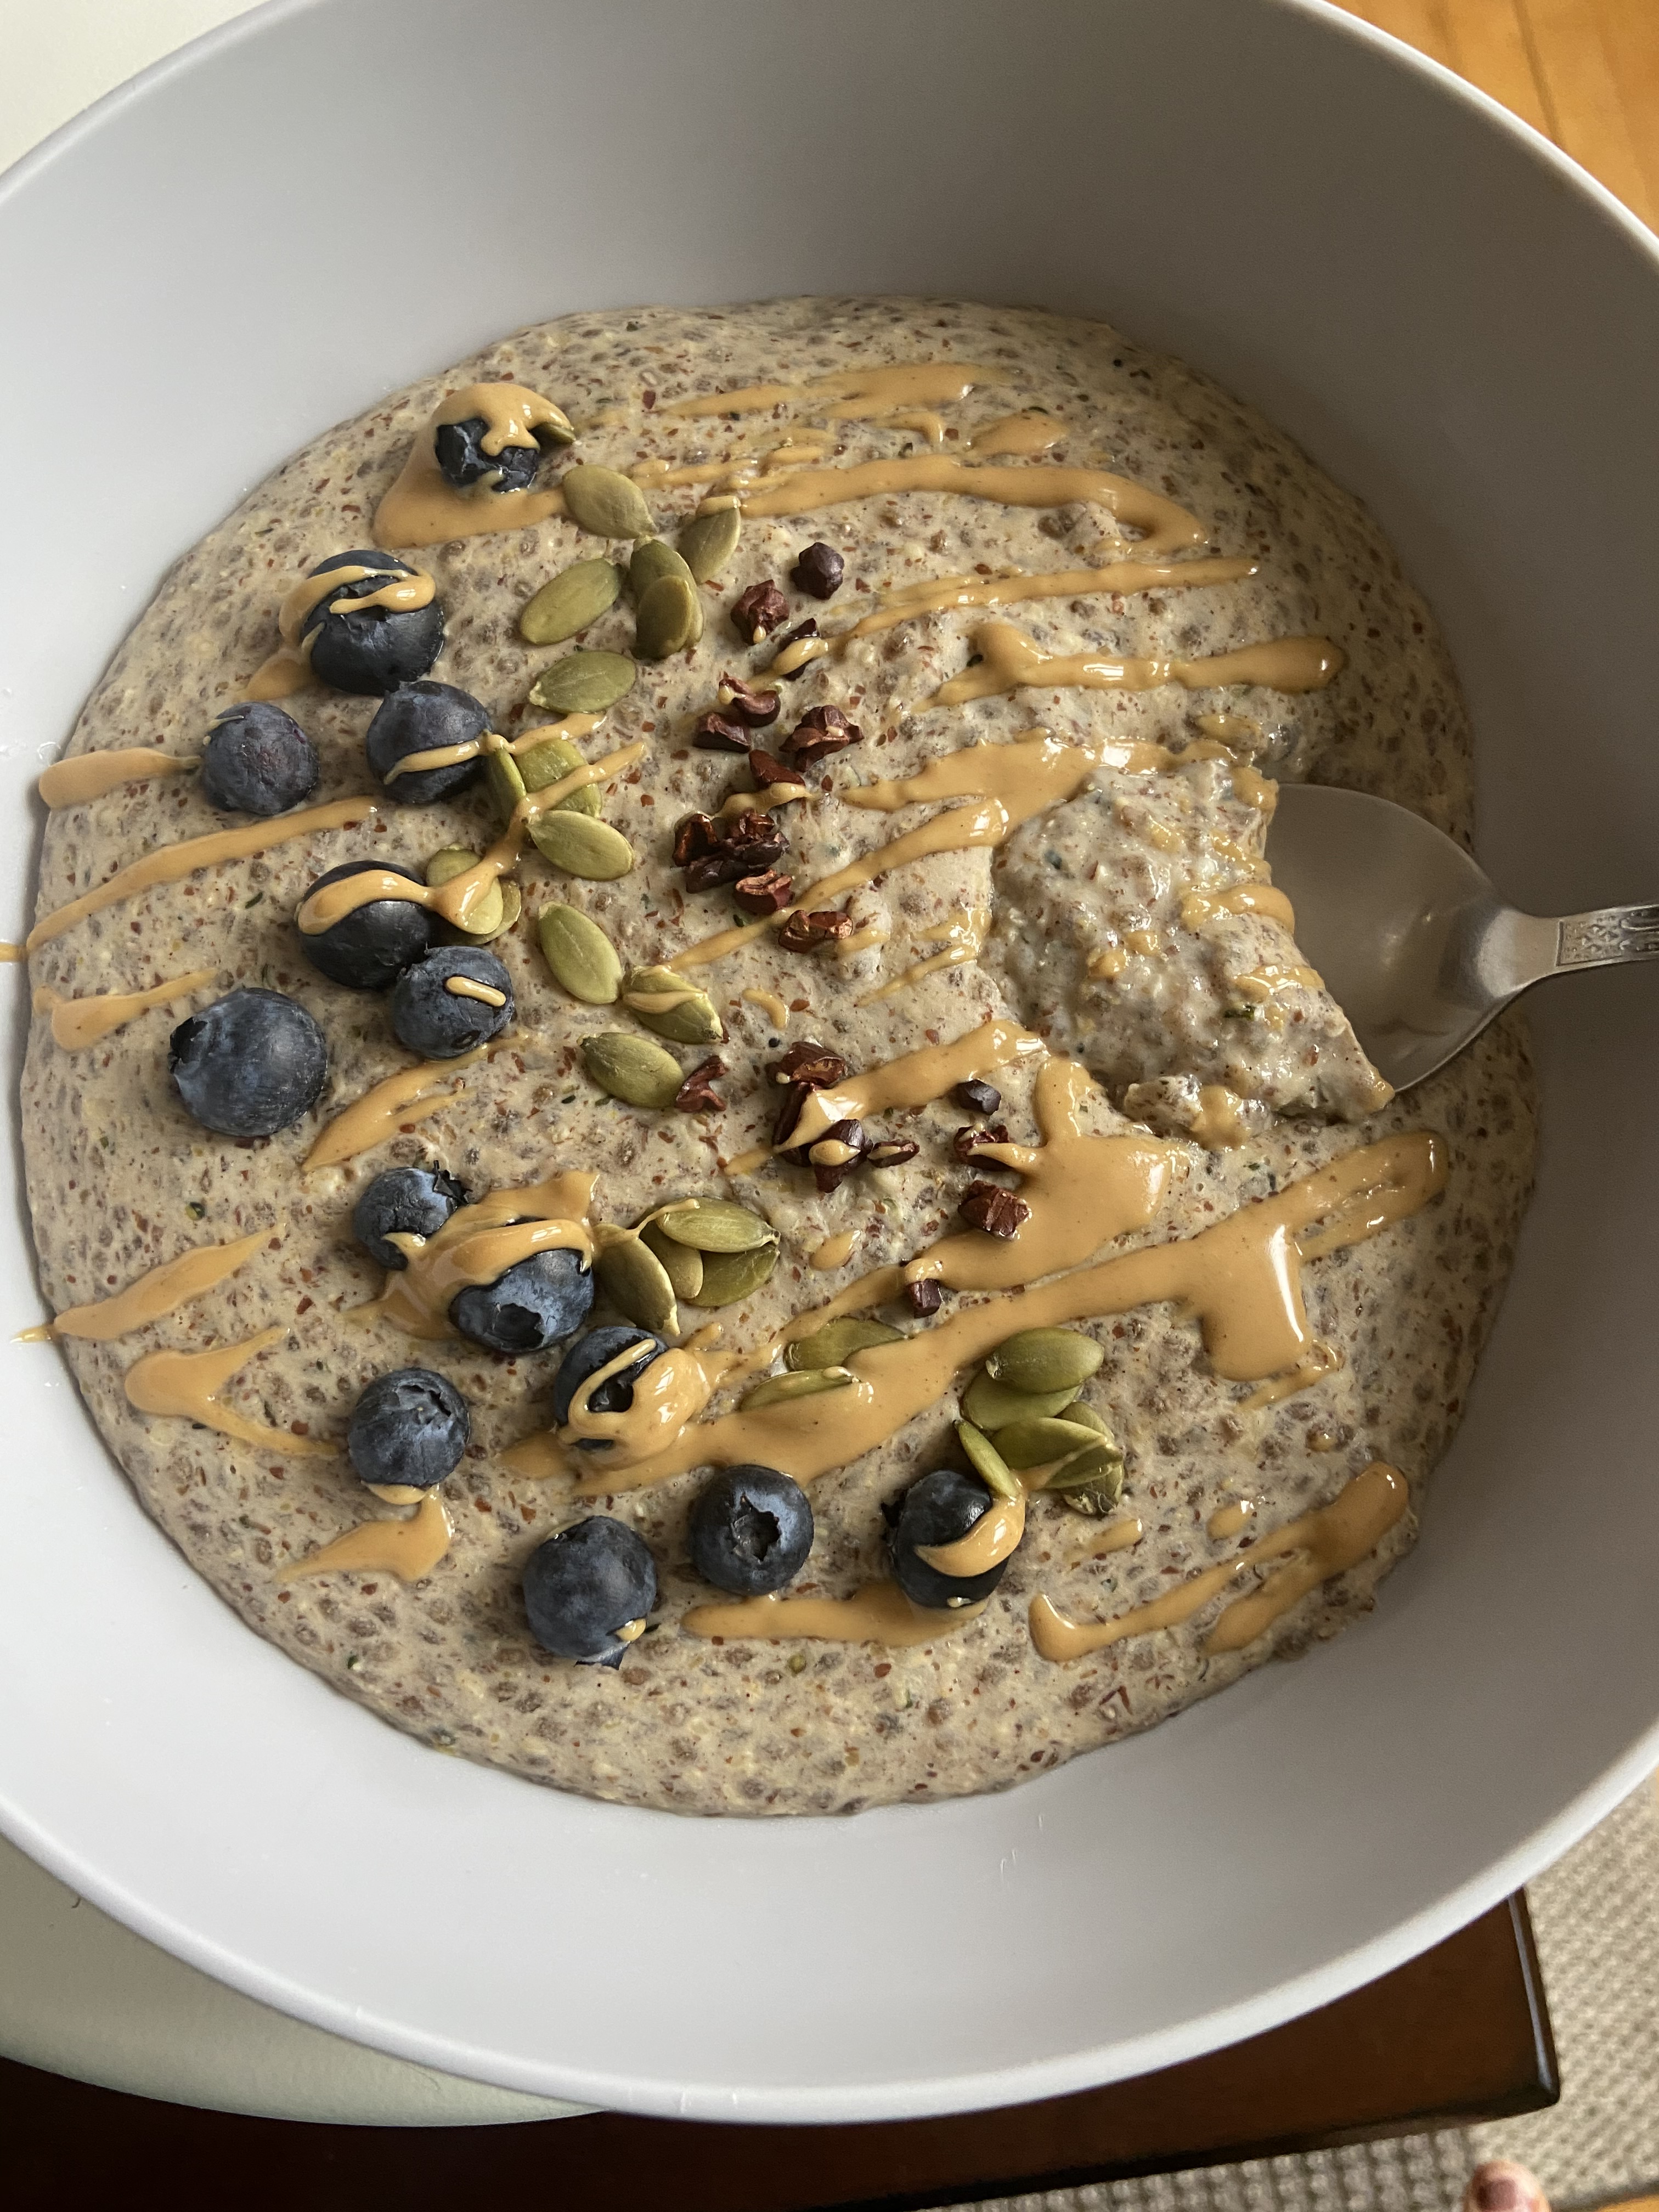
I like to have my porridge warm and topped with blueberries, peanut butter, pumpkin seeds and cacao nibs for that extra crunch and flavor that wont put you in a sugar come (hellooo blood sugar balance)! This is definitely a versatile dish and I think coconut chips would be great with the blueberries or even warmed apples sautéed in cinnamon and coconut oil! I’d love to hear what topping combinations you come up with! This can also be prepped in advance to have later in the week. Simply let it cool completely and store in the refrigerator and enjoy cold or warm it back up! 


File_003 (6)File_001 (14)File_002 (15)file_004-8File_006 (4)

Ingredients

  • 1 1/2 cups almond milk/milk of your choice
  • 1 scoop of high quality protein powder
  • 1.5 tbsp flax meal
  • 1.5 tbsp chia seeds
  • 1.5 tbsp hemp seeds
  • 1/2 tsp cinnamon
  • 1 tsp vanilla

Toppings

  • 1/2 tbsp peanut butter
  • 1 tsp cocoa nibs
  • 1 tbsp pumpkin seeds
  • Fresh fruit of choice

Directions

  1. In a small sauce pan whisk together your almond milk, protein powder, vanilla and cinnamon. 
  2. Whisk until the protein powder has dissolved.
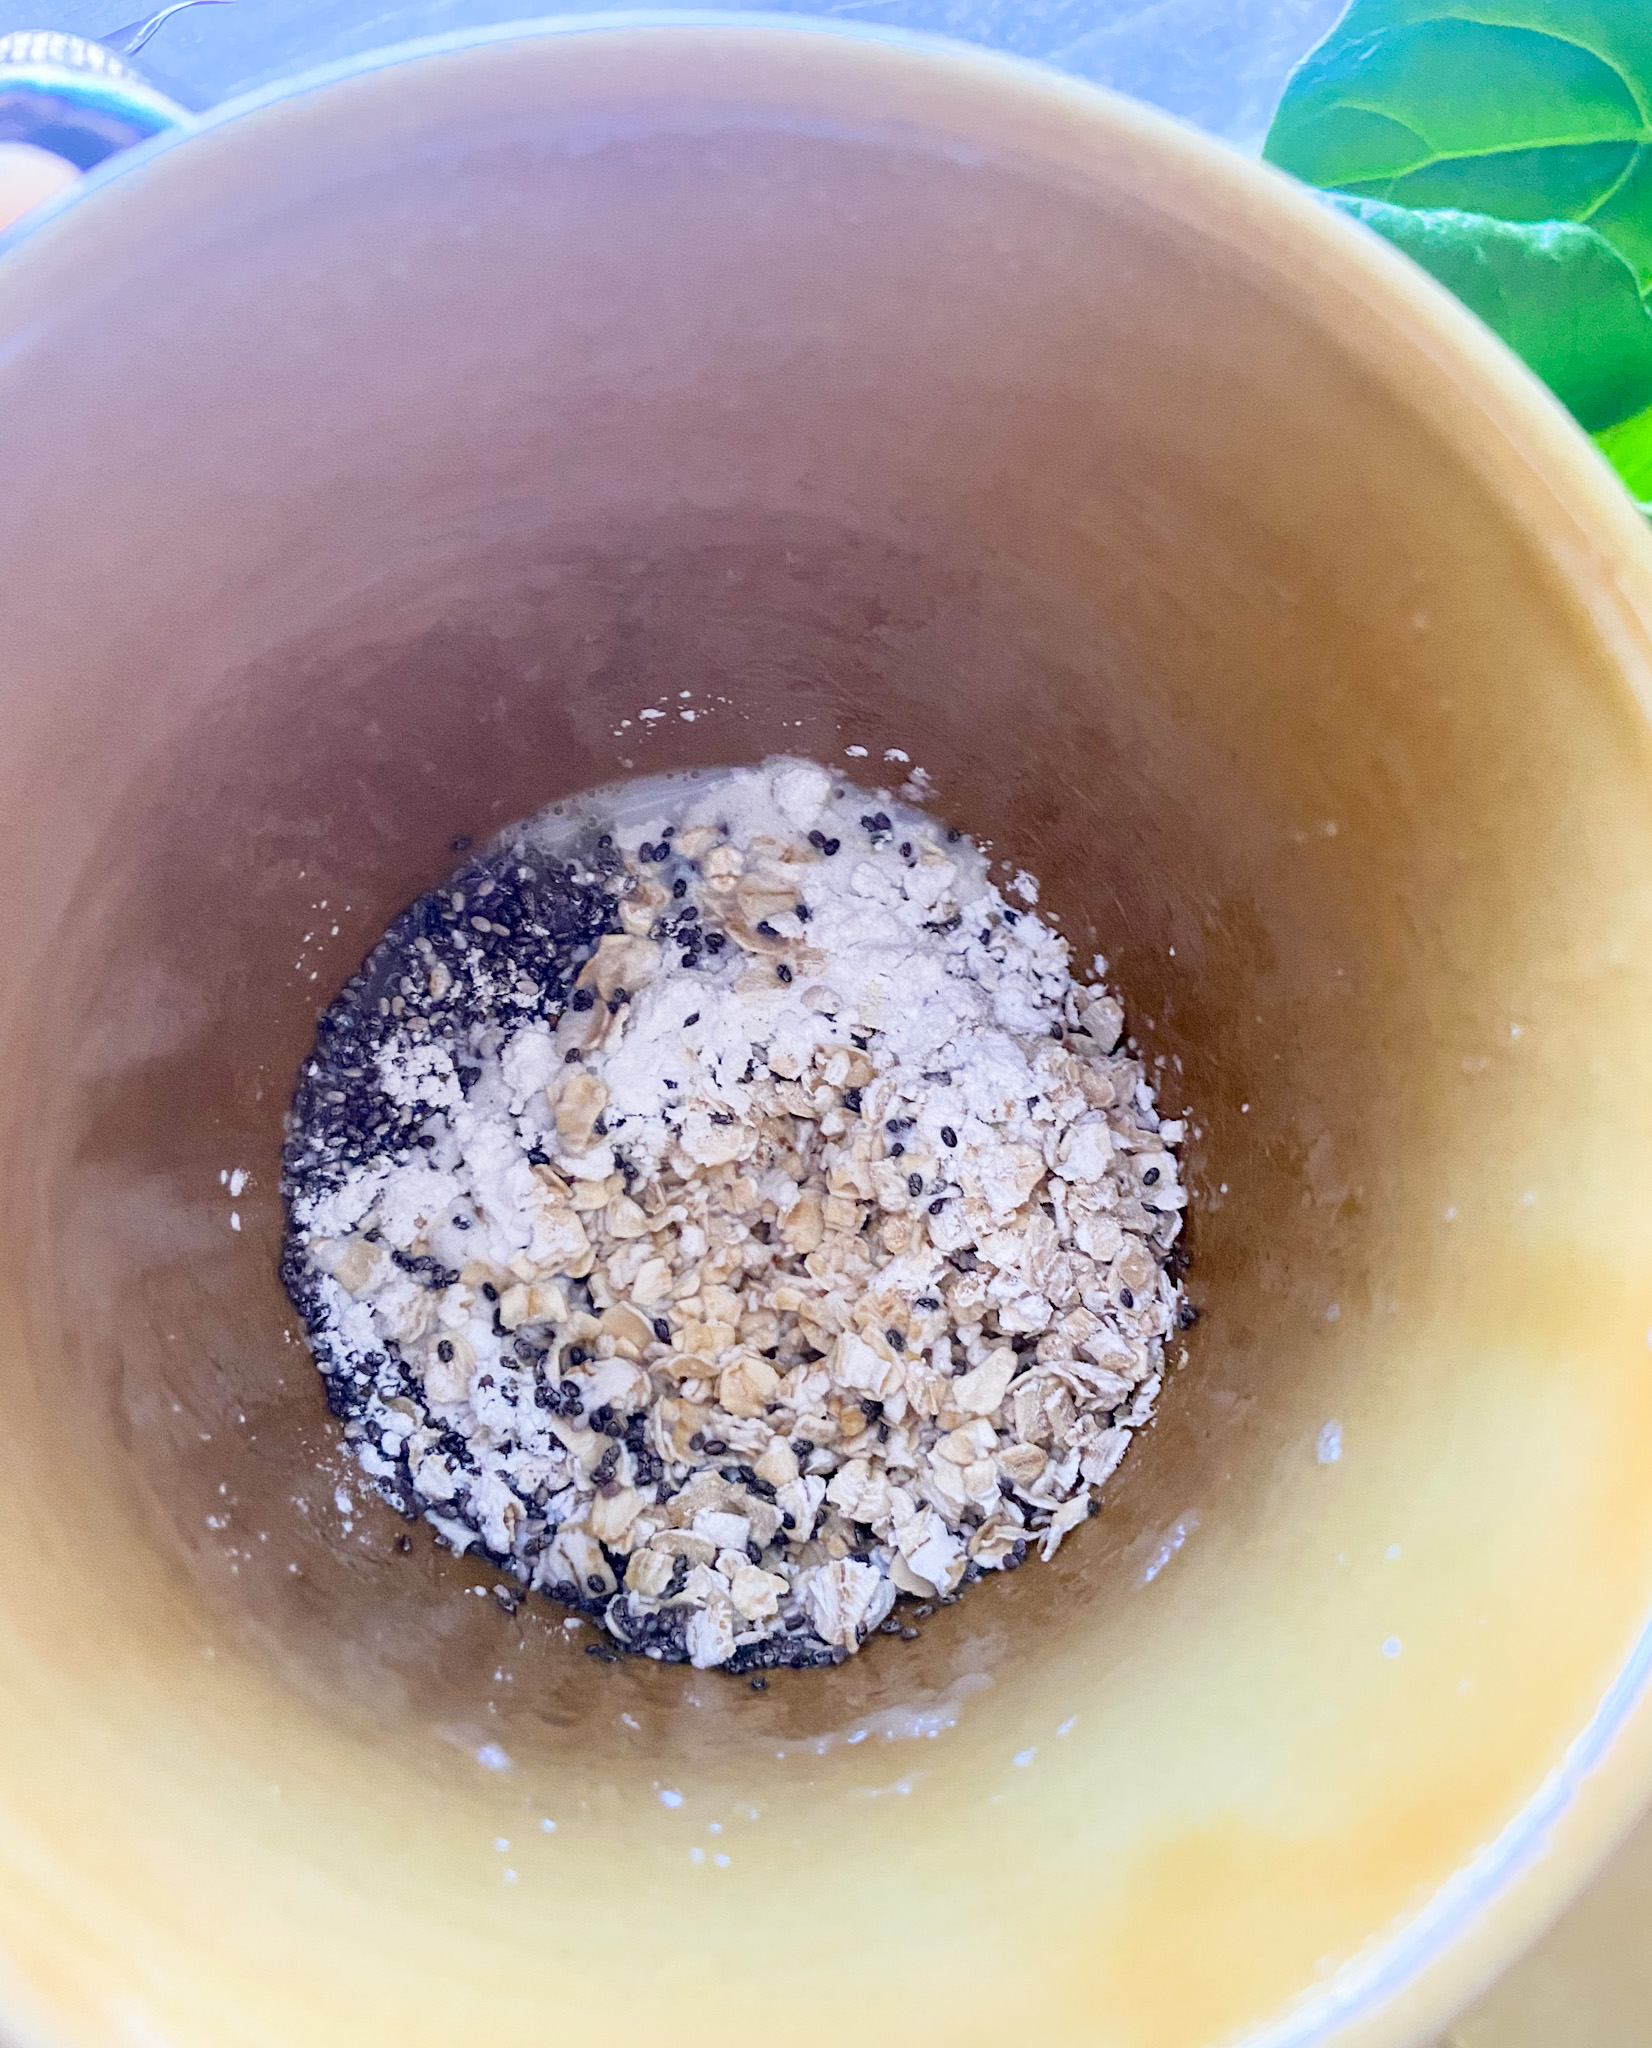
  3. Add in your chia, flax, and hemp seeds.
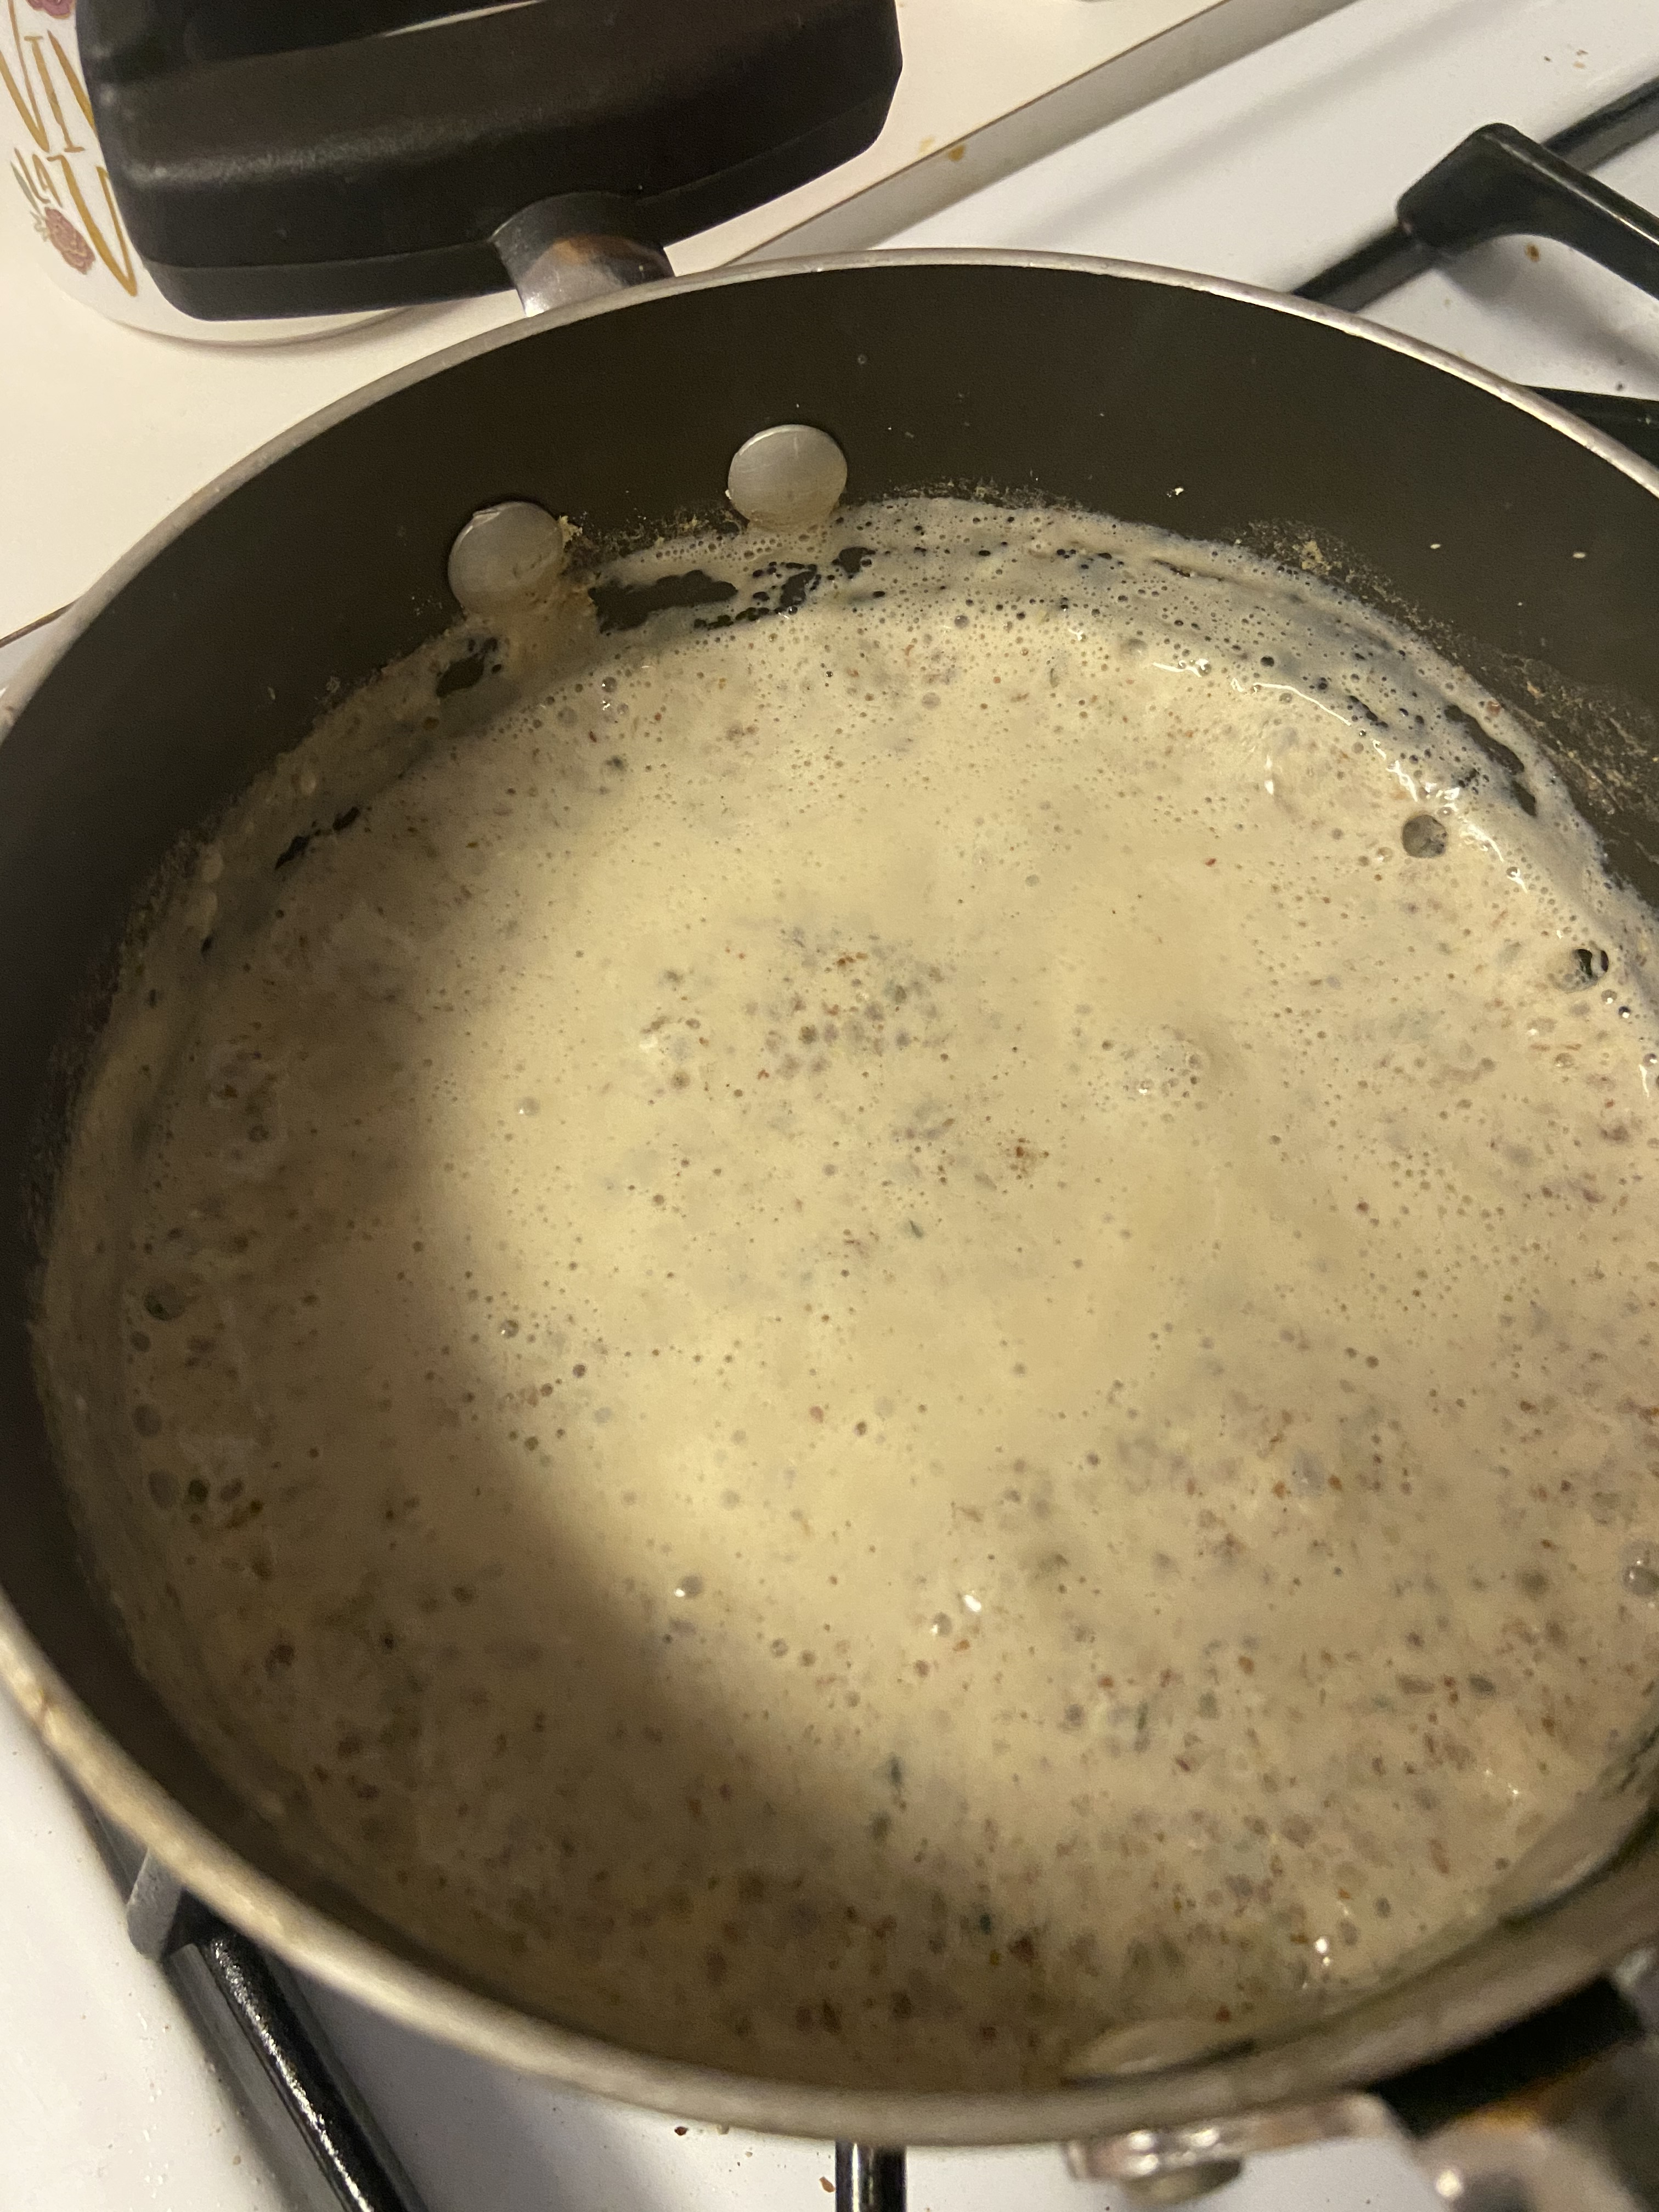
  4. Whisk together for 5-6 minutes over low-medium heat. The mixture will begin to bubble and thicken up. Continue whisking.
  5. After 6 minutes, turn off the heat and let it cool for a couple of minutes. The porridge will thicken up a bit more.
  6. Pour into your bowl and add your toppings! Enjoy!

Gingerbread Banana Bread (Oat Flour)

In the spirit of the holiday season, here is a delicious banana bread recipe but this one comes with some holiday flavors! I wanted to make a special banana bread that blended in the winter spices and flavors of gingerbread.

The addition of molasses, ginger, allspice, and the Wild Friends gingerbread peanut butter makes this banana bread extra special. If you don’t have that flavor peanut butter feel free to sub in regular peanut butter or almond butter and just add a few extra shakes of the spices. I also made this with oat flour – if you are gluten free make sure to check that your oats are certified gluten free! This bread comes together super easily and makes a delicious breakfast, snack or dessert! 

Tip: Oat Flour

  • Oat flour can be easily be made by whizzing up rolled oats in a blender if you don’t have the flour on hand. Simple run the oats until they are a fine flour.
  • If the recipe calls for 2 cups of flour blend 2 cups of oats.

I love topping it with some extra peanut butter! Feel free to add in your favorites mix-ins into the batter to make it extra special- dark chocolate chips or walnuts would be great in this!


Ingredients

Dry Ingredients

  • 2 cups oat flour
  • 1 tsp baking powder
  • 1 ½ tsp cinnamon
  • ½ tsp ginger
  • ¼ tsp allspice 

Wet Ingredients

  • 3 bananas 
  • 1 ½ tablespoon molasses
  • 1 tbsp gingerbread Wild Friends peanut butter
  • 1 egg
  • 1 tbsp flax meal mixed with 2 tbsp water
  • ⅓ cup melted coconut oil
  • 1 tsp vanilla
  • ⅓ cup coconut sugar

Directions

  1. Preheat your oven to 350 and line a loaf pan with parchment paper. 
  2. In a small little bowl/mixing saucer mix your ground flax meal with water, set aside for a few minutes to allow it to thicken. 
  3. In a large bowl mix your dry ingredients together : oat flour, baking powder, cinnamon, ginger, and allspice. 
  4. In a separate bowl mash your bananas. Then add in flax mixture, egg, molasses, peanut butter, vanilla, and coconut oil (melted). After well combined using a hand mixer, add in the coconut sugar. Mix again. 
  5. Then add in your dry ingredients to your wet ingredients. Using a hand mixer just until well combined, do not over mix. 
  6. If you’d like to add in any additional fun ingredients like chocolate chips, walnuts, cranberries- fold them in at this point. 
  7. Then add the batter to your lined loaf pan and bake for 45- 50 minutes, until the toothpick comes out clean. Let cool for 10 minutes before slicing. This bread is pretty moist and I recommend storing in the refrigerator. 

Tip: If you only have plain peanut butter that is fine, just increase slightly the spices. 

Apple Pumpkin Oatmeal Cookies

These cookies came about due to my love for my favorite cookie – Oatmeal Raisin Cookies– and I think they may be the ultimate FALL COOKIE!

I wanted to play around with my go-to recipe by adding some apples to it because apples, cinnamon and oats are such a great combo. While I was setting up more baking area and prepping my ingredients, I found a can of pumpkin puree in my pantry and I knew I had to add it to the mix. I have never had an apple-pumpkin baked good, but I knew these two classic fall flavors would make a delicious oatmeal cookie and it did not disappoint.

Pumpkin adds some great nutrients to these cookies like vitamin A, antioxidants, and extra fiber! Since I knew adding the pumpkin would add some extra moisture to these cookies, I decided to cut down the amount of butter in these and they turned out perfect! 

These come together quickly and also go just as fast. You’ll get about 18 cookies in a batch and I originally only baked 9 of them and they were gone in 24 hrs. I like to only bake half the batch and freeze the rest of the dough to have on hand and easily pop in the oven for fresh baked cookies whenever I’m in the mood. 

Freeze and Bake Later
  • To freeze cookie dough, scoop your cookie dough into your desired sized  portions. Line a plate or cookie tray with parchment paper that will fit in your freezer and place the pre-portioned cookie dough scoops on your tray/plate.
  • Freeze your cookie dough for at least an hour. Once they have set/are frozen, you can transfer them to a freezer safe container!
  • By following this step your cookie dough won’t stick together and you’ll be able to pull out individual cookie dough balls!
  • You can bake them straight out the freezer, just add a few minutes to the baking time. You can also let them come to room temperature and bake as directed!

IMG_3218 (1)IMG_3221 (1)img_4002-1


I hope you give these cookies a chance and add them to your fall baking round up! Let me know what you think! 


Ingredients

Wet Ingredients
  • 1 egg – room temperature 
  • ¼ butter – room temperature
  • ¼ cup pumpkin puree (not sweetened)
  • 1 tsp vanilla 
  • ½ cup brown sugar
  • ¼ cup white sugar
  • 1 tbsp molasses

Dry Ingredients

  • 1 ¾ cup rolled oats
  • ¾ cup all-purpose flour 
  • 2 tsp cornstarch 
  • 1 ¼ tsp cinnamon
  • ½ tsp pumpkin spice
  • ½ tsp baking soda
  • ¼ tsp salt
  • 1 scoop of vanilla/cinnamon protein powder (optional)

Mix-ins 

  • ½ cup chopped apples
  • ⅓ cup raisins
  • ¼ cup chopped walnuts

Directions

  1. Preheat your oven to 350F and line a baking sheet with parchment paper.
  2. Peel and cut your apple. You want your apple pieces to be about the size of a raisin. If the apple pieces are too big they may release too much liquid/moisture into your cookies.
  3. Cream together your butter, brown sugar and white sugar.
  4. Add in your egg, pumpkin puree, and vanilla and continue mixing until it comes together.
  5. In a separate bowl mix your dry ingredients together: oats, flour, cornstarch, baking soda, cinnamon, pumpkin spice, and salt. If you are adding in protein powder mix it in as well.
  6. Add in your dry ingredients to your wet ingredients and mix until well combined.
  7. Gently fold in your apples, raisins, and walnuts.
  8. Let your dough chill in the refrigerator for at least 30 minutes.
  9. Scoop your cookie dough onto your prepared baking sheet. I like making scoops about 1 ½- 2 tbsp big. Gently press down on the dough with the back of your scoop/spoon.
  10. These cookies will not spread a lot so you do not need a lot of space in between.
  11. Bake for 12 – 15 minutes until just golden brown. Since they are a big orange because of the pumpkin, you can check the bottom of the cookies to see if they are a golden brown.
  12. Let cool for 5 – 10 minutes on a cooling rack and enjoy! Store in an air-tight container for up to four days or you can freeze part of your cookie dough for later!

Vegan [ Cranberry Pecan ] Banana Bread

Banana bread has been on repeat lately, I love how versatile it can be when it comes to what you mix into it and how it can come together with minimal ingredients and falls into the realm of healthy baking. I was going to do make my classic cinnamon swirl banana bread when it suddenly occurred to me that I didn’t have a vegan banana bread up on the blog yet. Although I am not vegan ( I do keep a vegetarian diet) I find myself drawn to lots of vegan baked goods and have baked up a lot of vegan treats, I’m just not the best at keeping track of what I do in the kitchen … well until now!

IMG_3517

So I decided to do some experimenting and bake up a vegan banana bread and for a fun twist I wanted to add in some cranberries and pecans – perfect for the upcoming season.. F A L L – I see you around the corner. However, this can be enjoyed without the pecans/cranberries or they can be switched out for chocolate chips, walnuts, even some blueberries!

IMG_3523

This cup calls for two cups of flour. I made this loaf with both all purpose flour and whole wheat flour. I love the slight nuttiness that comes with using whole wheat flour however sometimes when using just whole wheat flour baked goods can come out too dense so I cut it half all purpose flour. You can also just use all purpose flour if you’d like. I haven’t tested out gluten free flours but will update this post once I have. Whichever flour you use, make sure to measure out your flour correctly, not doing so can drastically change your bread’s texture!

IMG_3515


How to Measure Flour

  1. Grab your measuring cup and a spoon. 
  2. Gently scoop your flour with a spoon into your measuring cup. 
  3. Once filled to the top, level off any excess flour over your flour bag with a flat edge like a knife.  
  4. Following these steps, rather than scooping the flour out of the big directly with your measuring cup will ensure you are not over-packing your flour. Over-packing it would result in much more flour than what is needed. 

Ingredients

Wet Ingredients

  • 4 medium bananas – super ripe
  • ½ cup brown sugar 
  • ¼ cup coconut oil, melted 
  • ¼ cup plus 1 tbsp almond milk 
  • 1 tbsp vanilla
  • 1 tbsp ground flax/flax meal 

Dry Ingredients

  • 1 cup all purpose flour
  • 1 cup whole wheat flour
  • 2 tsp cinnamon 
  • 1 tsp baking powder
  • ½ tsp baking soda
  • Pinch of salt 

Add-ins 

  • ¼ cup crushed pecans
  • ¼ cup cranberries 

Directions

  1. Preheat your oven to 350F and line a loaf pan with parchment paper. I love using this parchment paper for all my baking, Thrive Market has a great deal on it! 
  2. In a mixing bowl, mash your bananas well. Then add in the following ingredients: brown sugar, coconut oil, almond milk, and vanilla. After all the ingredients are well incorporated, add in your flax meal and give it a good stir. 
  3. In a separate bowl combine your dry ingredients: whole wheat flour, all-purpose flour, baking soda, baking powder, cinnamon, and salt. Make sure you measure your flour correctly as outlined above!
  4. Add your dry ingredients to your wet ingredients and mix until just combined. Do not over mix, you just want to make sure the flour is incorporated. Your batter will likely be thicker than other banana bread batters. 
  5. Fold in your cranberries and pecans. Feel free to swap them out for other nuts of chocolate chips, but again, don’t over mix!
  6. Pour your batter into your prepared loaf pan and bake for 50 minutes. After the baking time, check the loaf with a toothpick and if it comes out clean after inserting it is all done. 
  7. Let your loaf cool for 15 minutes before slicing. Enjoy!
  8. Store in an airtight container. You can also pre-slice your loaf and freeze some slices for another time! Simply defrost and warm it up in your microwave for 30 – 60 seconds.

Almond Banana Sea Salt Chocolate Chip Oat Mug Muffin

Raise your hand if you are ready for a delicious 5 minute recipe!!! I’m all about being efficient in the mornings and getting the most done with my time BUT that doesn’t mean I can’t enjoy a delicious breakfast! AND that’s where this mug muffin comes in! I’ve seen many recipes for mug muffins/mug cakes but so many of them are full of ingredients that I know will leave me feeling sluggish and have minimal nutrients.

I set out to make a healthier mug muffin that can be enjoyed as a healthy breakfast but that can also be dressed up to satisfy a sweet tooth craving! I also polled on my Instagram for flavor combination requests and chocolate was a clear winner so that inspired me to make this almond-banana-sea salt-chocolate chip oat muffin! 

I loved how quickly this came together and how versatile I know this recipe can be. I plan on making more with fun combinations and also a mug muffin with a plant based protein powder – stay tuned! PLUS this may be the best part – it can all be mad in just one mug – that’s just one dirty dish to clean! If that’s not a sure win, I don’t know what is!

IMG_3557 (1)

IMG_3565

IMG_3572


Recipe

Ingredients

  • 1/4 cup quick oats
  • 1 egg white
  • 1/2 mashed banana
  • 1/2 tsp chia seeds
  • 1 tbsp almond milk
  • 1 tsp vanilla
  • 1 tsp baking powder
  • 1/4 tsp cinnamon
  • 1 tsp honey/maple syrup (optional)
  • 1 tsp almond butter
  • 1 tbsp chocolate chips
  • pinch of flaky sea salt

Directions

  1. Spray your mug with nonstick spray. 
  2. Mash the banana in the mug and then add the egg white.
  3. Give it a good whip with a fork.
  4. Add in the rest of the ingredients and give it a good mix. 
  5. Microwave for 2 minutes, at 30 second intervals. You will know it is ready when you see the sides pull away from the mug. 
  6. Top with a pinch of sea salt.
  7. Eat it straight out the mug or flip it on to a plate.
  8. Add your additional toppings! I topped mine with almond butter, greek yogurt, almond slices and banana slices! 

Notes

  1. A wide set mug works best for this recipe. 
  2. Best enjoyed the day that it’s made!
  3. I opted for just the egg white in this recipe because I didn’t want it to taste too “eggy” but it would still turn out if you use the entire egg. 
  4. If you don’t have quick oats, you can just pulse your rolled/old fashioned oats in a blender/food processor for a few seconds – no need to make them into an oat flour for this. 

Coconut Flour Banana Bread

(gluten free, no added sugar, dairy free)

Coming at ya with a super simple banana bread that is naturally sweetened with ripe bananas as in it has no added sugar and it’s made gluten free with coconut flour. This is made with simple ingredients and can be made in one bowl. It comes together so quickly and makes the perfect snacking bread for any time of the day. Also goes great with a nice layer of peanut butter spread on top!

IMG_2987


I added an optional oat topping on top which does have coconut sugar in it but like I said totally optional. You could leave it without the topping and swap it in for some chocolate chips, walnuts, or even   ⅓ cup of blueberries!


IMG_2979


Recipe

Ingredients

Wet Ingredients

  • 3 bananas (about 1 c. mashed banana) img_2981
  • 3 eggs
  • 1/3 cup creamy peanut butter
  • 1 tsp pure vanilla extract
  • 1/3 cup melted coconut oil 

Dry Ingredients

  • 1/2 cup packed coconut flour 
  • 1 tbsp cinnamon
  • ¾ tsp baking soda
  • 1 tsp baking powder
  • ¼ tsp salt

Optional Oat Topping

  • 1/4 cup rolled oats
  • 1 tbsp coconut sugar
  • 1 tbsp melted coconut oil
  • 1/2 tsp cinnamon 

Instructions

  1. Preheat your oven to 350F and line your loaf pan with parchment paper, set aside. 
  2. In a large bowl, mash your spotty ripe banana and then add in wet ingredients until well combined: eggs, peanut butter, vanilla, and coconut oil. I used a stand mixer but feel free to use a hand mixer. 
  3. Add in dry ingredients: coconut flour, cinnamon, salt, baking powder and baking soda. You can mix these first in a separate bowl to ensure they are well combined or add directly to the wet ingredients. Just make sure to mix really well!
    1. If incorporating any mix-ins like chocolate chips, nuts, berries, etc- fold those in to the batter at this step. 
  4. If you want to add the oat topping,  mix the oats, cinnamon, coconut oil, cinnamon and coconut sugar together in a small bowl. 
  5. Pour your batter into your prepared loaf tin.
    1. If adding the oat topping, sprinkle on top of your batter at this point. Gently press the oat topping into the batter to ensure it sticks to the top!
  6. Bake for 40 – 45 minutes, until it passes the clean toothpick test. 
  7. Let your bread cool for 10-15 minutes before slicing! Can be stored in the fridge for 4-5 days!

Notes:

  1. Coconut flour is not a direct 1:1 sub with other flours therefore do not substitute in other flours. 
  2. Feel free to use any nut butter of your choice, however, if you use sunflower seed butter it may change the color of your bread. It’ll be fine to eat, just don’t be alarmed if it’s not the usual banana bread color!
  3. Use both baking soda and baking powder!!

Double Chocolate Banana Bread

Whenever I make this double chocolate banana bread I can’t help but think that somehow I have won the day and I’ll get to snack on the most decadent tasting bread ever yet most of the ingredients could also come together to make a tasty health bowl of oatmeal. So yes, when I go back for my second or third slice I do tell myself it’s okay, it’s like I’m eating oatmeal. Except its super delicious moist double chocolate banana bread that has the most delicious gooey chocolate chunks studded throughout the entire loaf.

IMG_2293


I first made a variation of this recipe a couple years ago but made a few tweaks and I think it’s perfect now. Lately I’ve been loving adding plain greek yogurt to my recipes. I feel like all the breads I have made with it come out super moist and delicious. Secondly, I have been super into cutting some of the oil in the recipe with unsweetened applesauce. Not only does the applesauce help keep down some of the oil, it also brings another source of natural sweetness which helps keep the processed sugar low, which is always a plus, even if it is coconut sugar. I also love using the Enjoy Life Chocolate Chunks to top my breads, which are great if you’re looking for dairy free/vegan chips! You can find these on Thrive Market!

IMG_2301


This recipe also comes together in a pinch and requires your usual ingredients, nothing special you’ll need to purchase. I like to use the Enjoy Life chocolate chunks in my breads but feel free to use any chips that you’d like, mini chips are a great option. I also think the adding in some peanut butter chips to this recipe would be amazing! I like topping mine with almond butter!IMG_2312


IMG_2320


Recipe

Ingredients

Wet Ingredients

  • 2-3 very ripe bananas – 1 cup mashed                  IMG_2312
  • 1 egg, room temperature 
  • 2 tbsp plain Greek yogurt 
  • 1 tsp vanilla 
  • 2 tbsp oil – melted coconut oil/olive oil
  • 2 tbsp applesauce
  • ½ cup coconut sugar 
  • ¾ cup chocolate chips + additional for topping

Dry Ingredients

  • 1 cup gluten free oat flour
  • ½ cup almond flour
  • ¾ tsp baking soda
  • ½ tsp baking powder
  • ½ cup cocoa powder
  • Pinch of salt 

Directions 

  1. Preheat your oven to 350F and line your loaf pan with parchment paper, set aside. 
  2. In a large bowl, mash your spotty ripe banana and then add in wet ingredients until well combined: egg, Greek yogurt, vanilla, melted coconut oil, and apple sauce. Once well combined, add in coconut sugar and mix well.
  3. In a separate bowl, mix dry ingredients together until well combined: oat flour, almond flour, cocoa powder, baking soda, baking powder, and salt.
  4. Add in dry ingredients to the wet ingredient bowl. Mix until well combined and there are no clumps of flour left. 
  5. Fold in chocolate chips!
  6. Pour batter into your prepared loaf pan. I like to top my loaf with additional chocolate chips at this stage. 
  7. Bake for 40-45 minutes, just until your toothpick comes out clean. You may need to poke it with the toothpick in a few different spots if you run into any chocolate chips while checking if it is done.
  8. Let cool for 10-15 minutes before slicing! Can be stored in a air-tight container for 4-5 days, I recommend storing it in the refrigerator. 

Carrot Zucchini Muffins

Confession, sometimes I have a hard time falling asleep because I have so many recipe ideas running through my head or I’m super excited to bake something the next day (pretty strange I know!). Well that was definitely the case with this recipe. I knew I had some zucchinis in the fridge that I needed to use up and I originally thought to make a zucchini walnut loaf which I was pretty excited about but then I decided to switch it up to muffins.

IMG_2369


The next day I wanted to add a carrot cake vibe to these muffins and decided to add in shredded carrots, raisins and lots of spices! After tasting the first one I was hooked – a little butter and honey took them to the next level. These muffins are not too sweet that they could make the perfect breakfast complement to some fruit or a quick snack. 

IMG_2364


IMG_2368

However I knew they could also be a great sweet treat or dessert with a little frosting. Going with the carrot cake inspo, I decided I’d go with a cream cheese frosting. If you would like a sweeter muffin, this cream cheese frosting perfectly complements these muffins. This frosting recipe below is just enough for 4-5 muffins, so if you would like them all frosted just double the recipe! 

IMG_2453


Recipe

Ingredients

Wet Ingredients

  • 1 cup shredded zucchiniIMG_2388
  • ½ cup shredded carrot
  • 3 medium eggs (can use 2 large eggs)
  • 3 tbsp applesauce 
  • 2 tbsp olive oil or melted coconut oil
  • 1 tsp vanilla
  • ½ cup coconut sugar

Dry Ingredients

  • 1 ½ cup gluten free flour (I like Bob’s Red Mill)
  • 1 tbsp cinnamon
  • ½ tsp nutmeg
  • ½ tsp ground ginger
  • ¾ tsp baking soda
  • 1 tsp baking powder
  • ¼ tsp salt
  • ½ cup walnuts
  • ¼ cup raisins

Maple Cinnamon Cream Cheese Frosting

  • ¼ cup cream cheese – softened
  • 1 tsp cinnamon
  • 1 tbsp maple syrup
  • 1 tsp vanilla
  • Walnuts for topping

Instructions

  1. Preheat your oven to 350F and line a muffin tin. You should have 12 standard muffins from this recipe. 
  2. First you will want to remove excess liquid from your shredded zucchini. I like to leave the skin on the zucchini for some extra color! Once you measure out a cup of shredded zucchini you will wring it out to remove extra liquid. You can do this by using a cheesecloth or lining up a couple of paper towels and placing the zucchini in the middle of them, bundle it up and squeeze. Once you have the zucchini wrung out, place it in a large bowl with your shredded carrots. 
  3. Add in wet ingredients to shredded carrots and zucchini: eggs, applesauce, oil, and vanilla until well combined. 
  4. Add coconut sugar to the wet ingredient mixture and mix until well combined.
  5. In a separate bowl, whisk together the dry ingredients: flour, baking soda, baking powder, cinnamon, nutmeg, ginger, and salt. Combine until you can tell the spices are evenly mixed into the flour. 
  6. Add in dry ingredients to the wet ingredients. Do not overmix. The batter will be a bit thick. 
  7. Fold in your walnuts and raisins. 
  8. Use a ¼ c measuring cup to fill your muffin tin. This recipe makes 12 muffins, but you can definitely make 9-10 larger ones. 
  9. Bake for  25 – 28 minutes, around 25 minutes, check to see if they are done with a toothpick, if it comes out clean, they are done. If there is still batter on the toothpick, leave in the oven for a few more minutes. 
  10. Let cool for a few minutes. Store in an airtight container for 4-5 days.

Optional frosting:

First make sure your cream cheese is softened/room temperature. Using a hand blender or stand mixer, mix together all frosting ingredients until it is smooth and creamy: cream cheese, maple syrup, vanilla, and cinnamon. Make sure your muffins have completely cooled before frosting them. I like to top my muffins with extra muffins. 

Superseed Pecan Banana Bread

This banana bread features an amazing banana bread mix made by Simple Mills. Simple Mills is a Chicago based brand that makes such a great and ever expanding line of cake and bread mixes, cookies, crackers, and frostings with REAL ingredients that you can actually pronounce.

When I first looked at the ingredient lists of a few different products I couldn’t believe how short and not confusing the ingredient list was. When I got my hands on the Banana Bread and Muffin Mix I was excited to spruce it up and enhance its already goodness! 

IMG_2107 (1)

I added some of the typical seeds I would throw into my other baked goods and topped it with an additional banana and pecans for that extra flavor! I followed the baking instructions from the box. I usually don’t cover my loafs with foil halfway through the cooking process, in fact I try not to open the oven at all while something is baking, but I figured they knew what they were talking about and they sure did! The loaf came out great when baked as instructed!

Superseed banana bread batter

IMG_2094

This loaf did take a little longer to cook but that can be expected since it was in the oven at 325F. I typically cook my baked goods at 350F, but again, I followed what the Simple Mills’ experts directed me to do! It was well worth the wait!

IMG_2113


Recipe

Ingredients

Dry Ingredients

  • 1 Simple Mills Banana Bread and Muffins box
  • ½ c ground flax meal  IMG_2110
  • 1 ½ tsp cinnamon
  • 1 tbsp hemp seeds 
  • 2 tbsp chopped pecans 

Wet Ingredients

  • 1 ripe banana
  • 2 eggs
  • ½ c + 2 tbsp unsweetened almond milk 
  • 2 tbsp melted coconut oil
  • 1 tsp vanilla extract 
  • 1 tbsp chia seeds

Toppings (optional)

  • 1 whole banana 
  • Pinch of coconut sugar 
  • 1 tbsp chopped pecans

Instructions

  1. Preheat your oven to 325F and line your loaf pan with parchment paper, set aside. 
  2. In a large bowl, mash your spotty ripe banana and then add in wet ingredients until well combined: eggs, almond milk, vanilla, and melted coconut oil. Mix in chia seeds and let sit for a couple minutes to let the chia seeds expand a bit. 
  3. In a medium size bowl, mix your dry ingredients together: Simple Mills mix, cinnamon, flax meal, cinnamon, and hemp seeds. Mix until well combined. 
  4. Add your dry ingredients to your wet ingredients. Mix until just well combined and there are no clumps of dry ingredients. Gently fold in chopped pecans. The batter will be a bit thick but that’s okay!
  5. Pour your batter into your prepared baking pan. I like to top mine with a sliced banana and a few more pecans. You can slice your banana lengthwise in half or into medallions – have fun with it! I also sprinkle a little bit of coconut sugar on the banana to help caramelize and deepen the flavor a bit more – completely optional! Feel free to add more chopped pecans on top. 
  6. Bake for 30 minutes and then take it out of the oven and cover it with aluminum foil (you can cover your foil with nonstick spray).
  7. Bake your loaf for an additional 25 minutes and then test it with a toothpick, if it comes out clean you are good to go, if it does not, bake for an additional 5 minutes. 
  8. After removing from the oven, uncover your loaf and let it cool for 15-20 minutes before slicing. Enjoy on its own or slather some peanut butter on it 🙂 

Notes

  1. If your almond milk is cold you may notice that your coconut oil solidifies a bit. For this recipe that should not be an issue but it can be avoided if you leave your almond milk and eggs out to reach room temperature!
  2. Room temperature eggs work best when baking but don’t worry if you don’t have time to let them sit out!
  3. Store in an airtight container and can keep in the fridge for 5 days (although unlikely there will be any leftovers past day two)!

Lemon Blueberry Poppy Seed Bread

Looking for a spring time inspired recipe? Then this Lemon Blueberry Poppy Seed loaf is perfect for you! Loaded with fresh lemon juice, lemon zest and bursting blueberries, this is perfect for anyone looking for something bright and sweet but with a nice tart bite of lemon!

This recipe is also made gluten free by using a mix of Bob’s Red Mill Gluten Free Flour and almond flour. I have not tested other flours but I suspect you could use all-purpose flour as a direct substitute, however, do not sub in coconut flour. I also snuck in some chia seeds which mix perfectly with the poppy seeds while adding some extra nutrients into the mix.

If you want a lighter bread that’s less sweet, you could easily leave off the lemon glaze but in my opinion it adds the perfect amount of sweetness and ups the lemon flavor with another punch of fresh lemon juice and zest. Let me know what you think!


Recipe

Ingredients

Wet Ingredients

  • 2 eggs
  • 1/2 cup Greek Yogurt
  • 1 tsp vanilla  IMG_2010 (1)
  • 1/2 tsp almond extract
  • 1/2 tsp lemon extract (not lemon oil!)
  • Juice of 1 lemon (use fresh, not the bottled stuff)
  • Zest of 2 lemons
  • 1/3 cup honey 
  • 1 tsp chia seeds

Dry Ingredients

  • 1 tbsp poppy seeds 
  • 1 cup gluten free flour
  • 1 cup almond flour 
  • 3/4 tsp baking soda
  • 1/2 tsp baking powder
  • pinch of salt
  • 1/2 cup blueberries (fresh or frozen) – dusted in cornstarch or arrowroot powder 
  • slivered almonds – optional

Glaze

  • 1 cup powdered sugar
  • Juice of 1 lemon
  • Zest of 1/2 lemon

Instructions

  1. Preheat your oven to 350F and prepare your pan. I use this pan (9” x 5”)and line it with parchment paper (love this one from Thrive Market!). Set aside.
  2. In a large bowl mix together your wet ingredients until well combined: eggs, Greek yogurt, vanilla extract, lemon extract, almond extract, lemon juice, and honey. Once everything is combined, mix in chia seeds and let sit for 2 minutes. 
  3. In a separate bowl mix together your dry ingredients: gluten free flour, almond flour, baking soda, baking powder, salt, and poppy seeds. 
  4. Carefully fold in your dry ingredients into your wet ingredients. You just want to mix until well combined – do not over mix!
  5. Cover your blueberries with a thin layer of cornstarch and then gently fold them into your batter. 
  6. Pour into your prepared loaf tin and bake for 35 minutes. Check the loaf with a toothpick and if it comes out clean take out to cool. If the toothpick comes out wet, bake for an additional five minutes. 
  7. While your loaf cools, prepare your glaze. Mix together your ingredients until you have a smooth glaze. If you want your glaze thinner, you can add more lemon juice or a teaspoon of water. For a thicker glaze, add less lemon juice or more powdered sugar. 
  8. Once your loaf cools, add the glaze and add optional almond slivers if you’d like.

Notes:

  1. This is also totally delicious without the glaze!
  2. If you’re adding the slivered almonds do it while the glaze is still wet so they stick to your loaf. 
  3. If you are using frozen blueberries I recommend giving them a rinse for a minute or so and then drying them with a paper towel. This helps prevent them from bleeding through the loaf and preserves the nice yellow color of the lemon loaf.
  4. I think this would also be delicious if you swap out blueberries for raspberries! 

Recipe adapted from Ambitious Kitchen