Vegan [ Cranberry Pecan ] Banana Bread

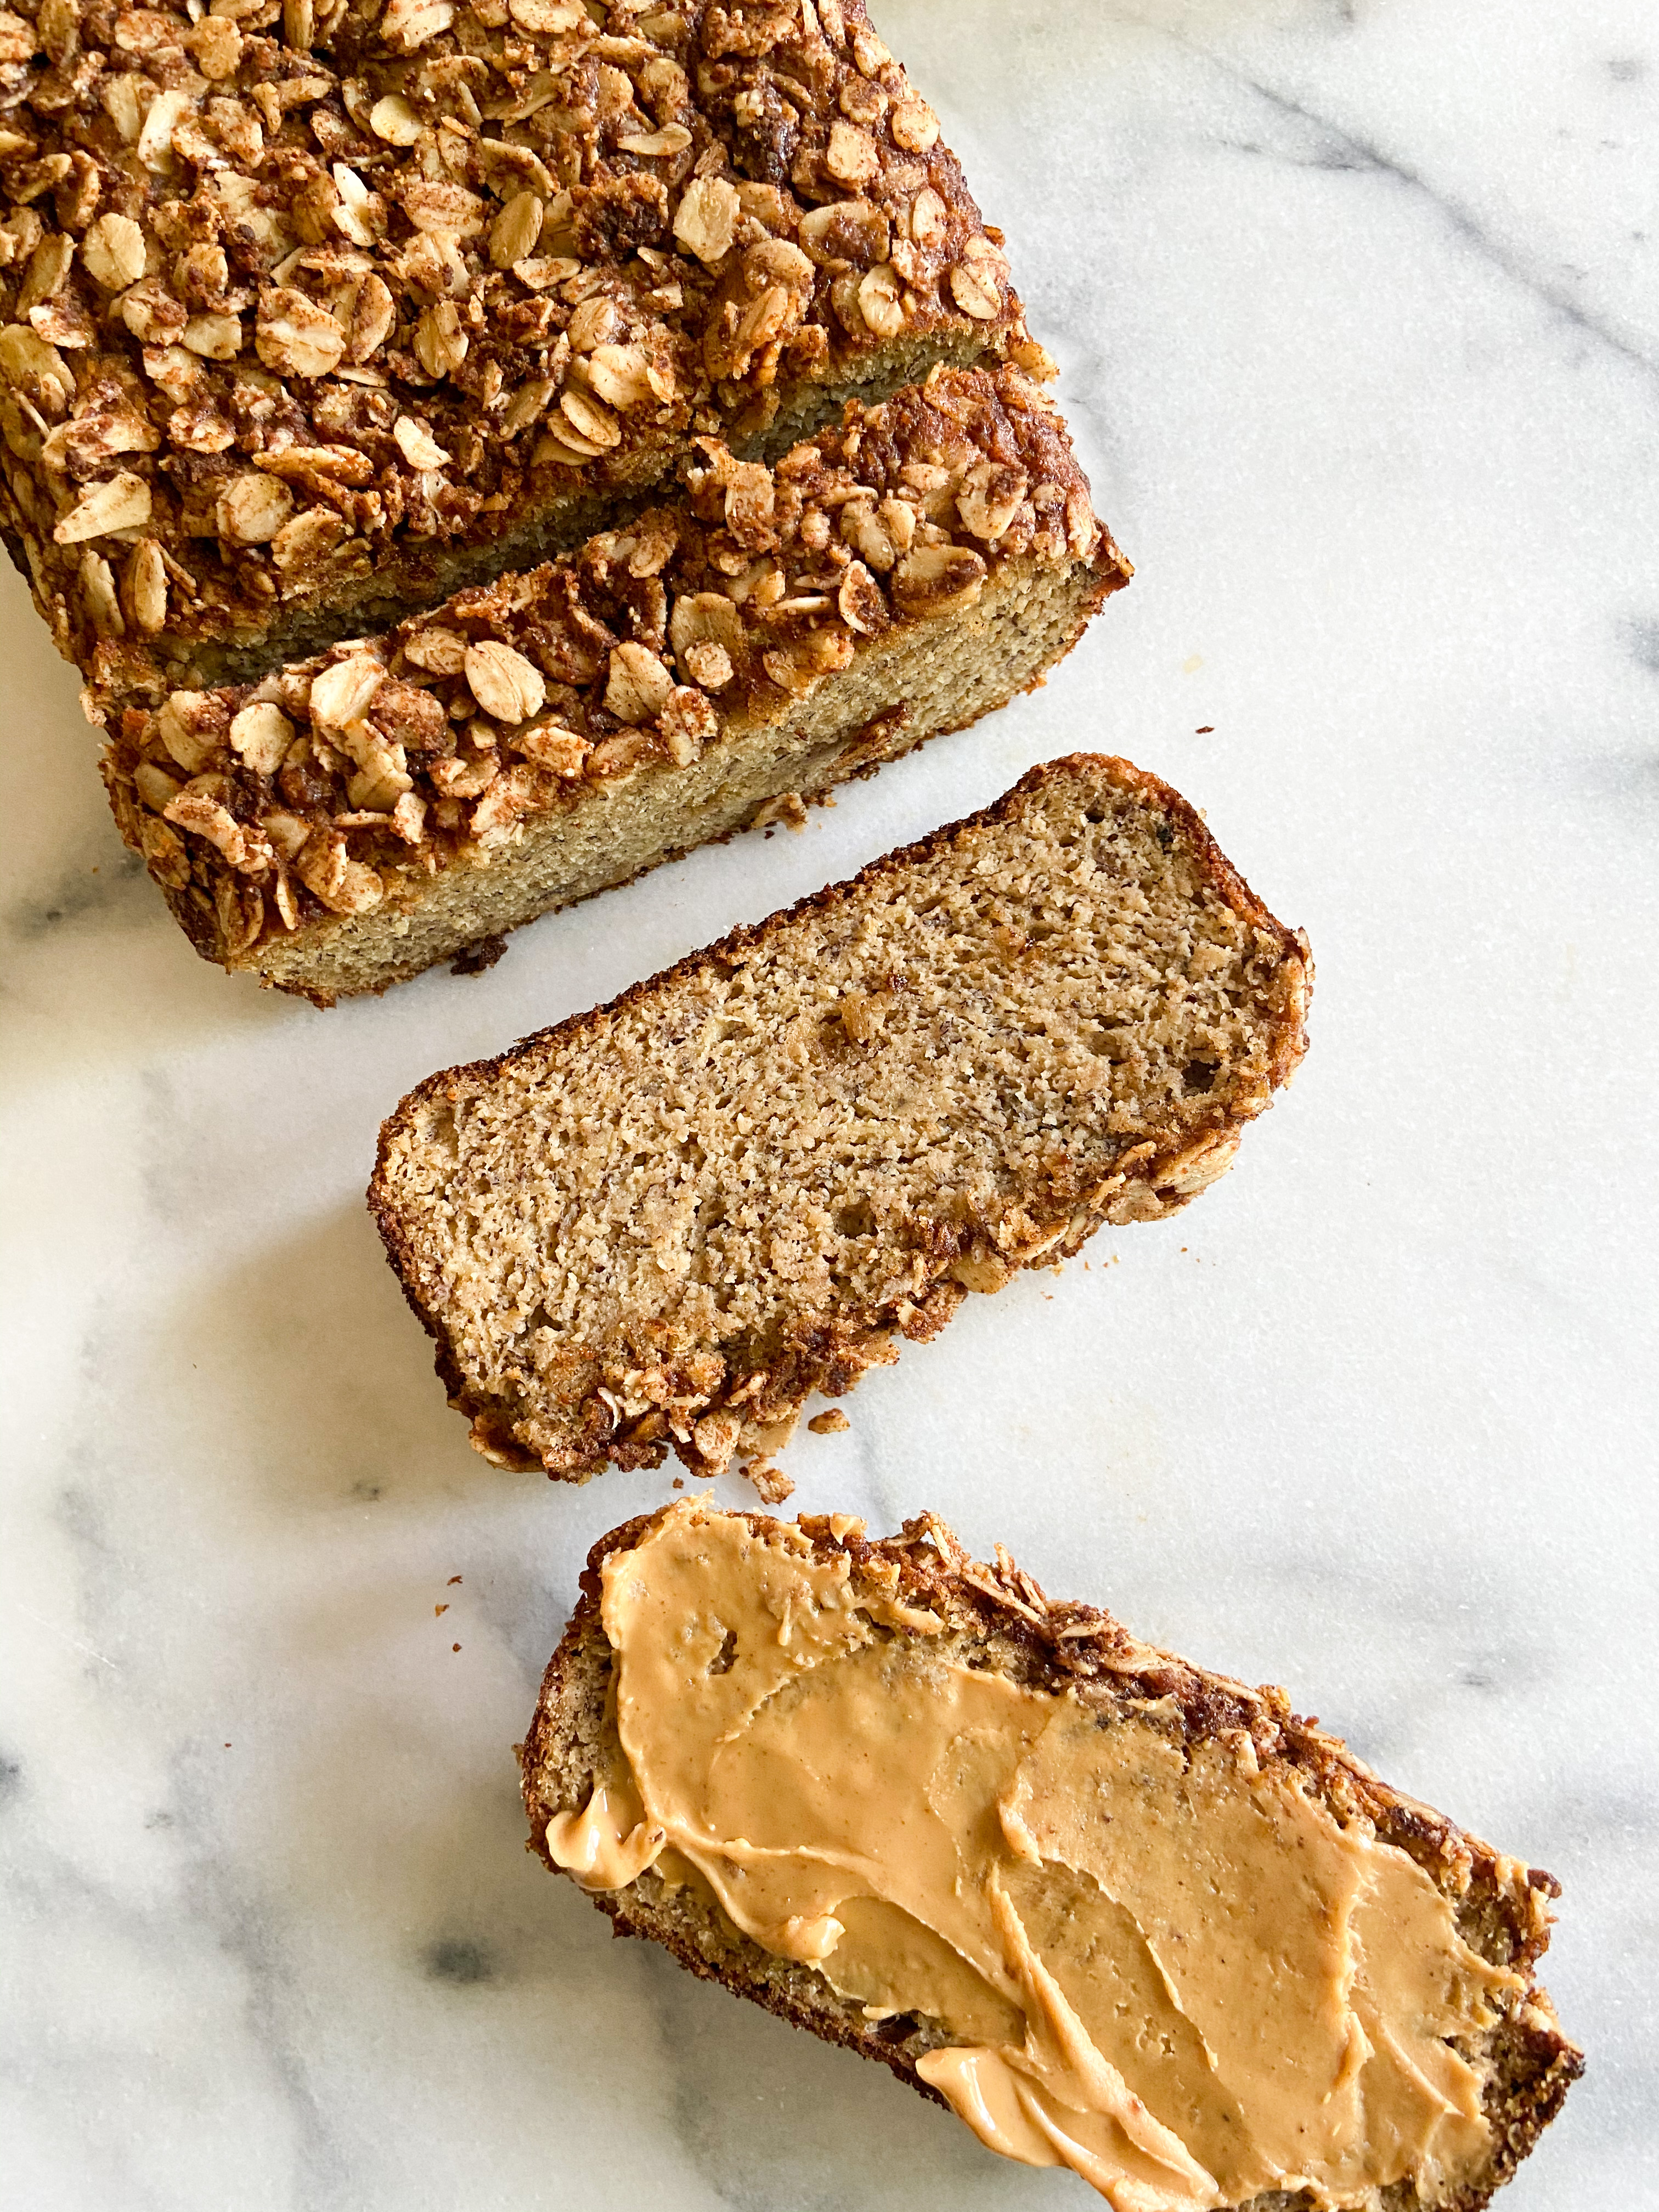
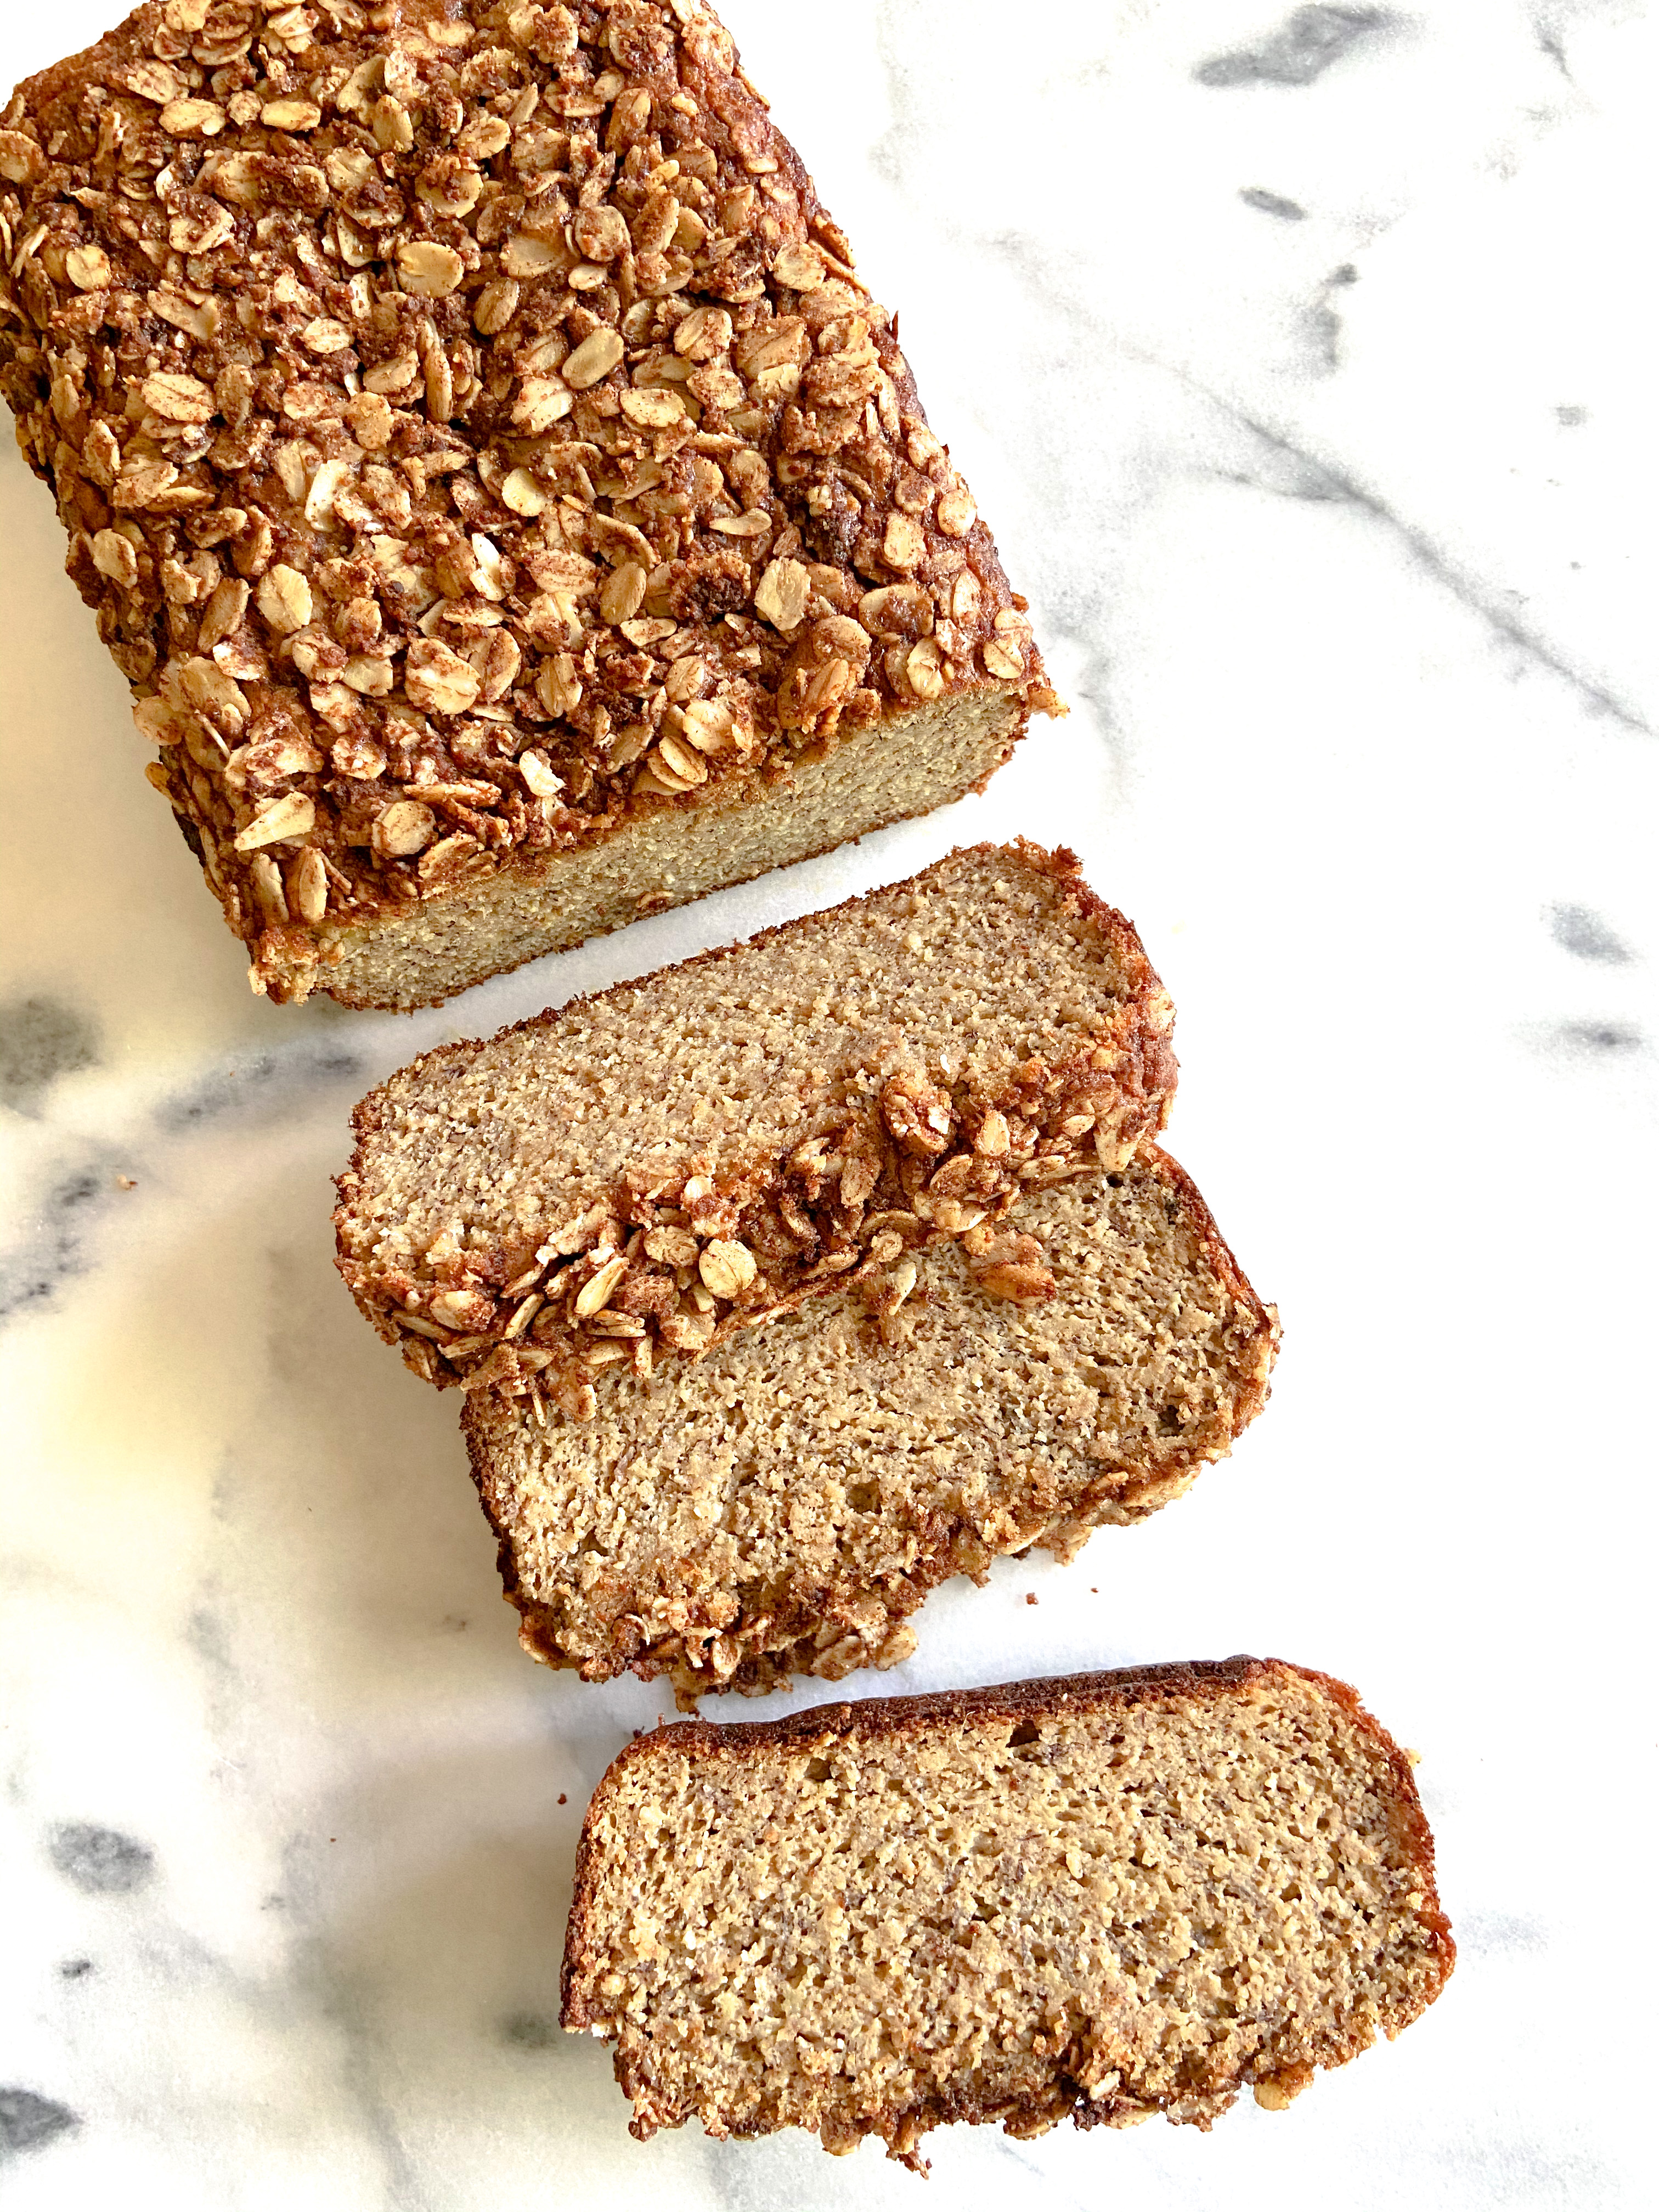
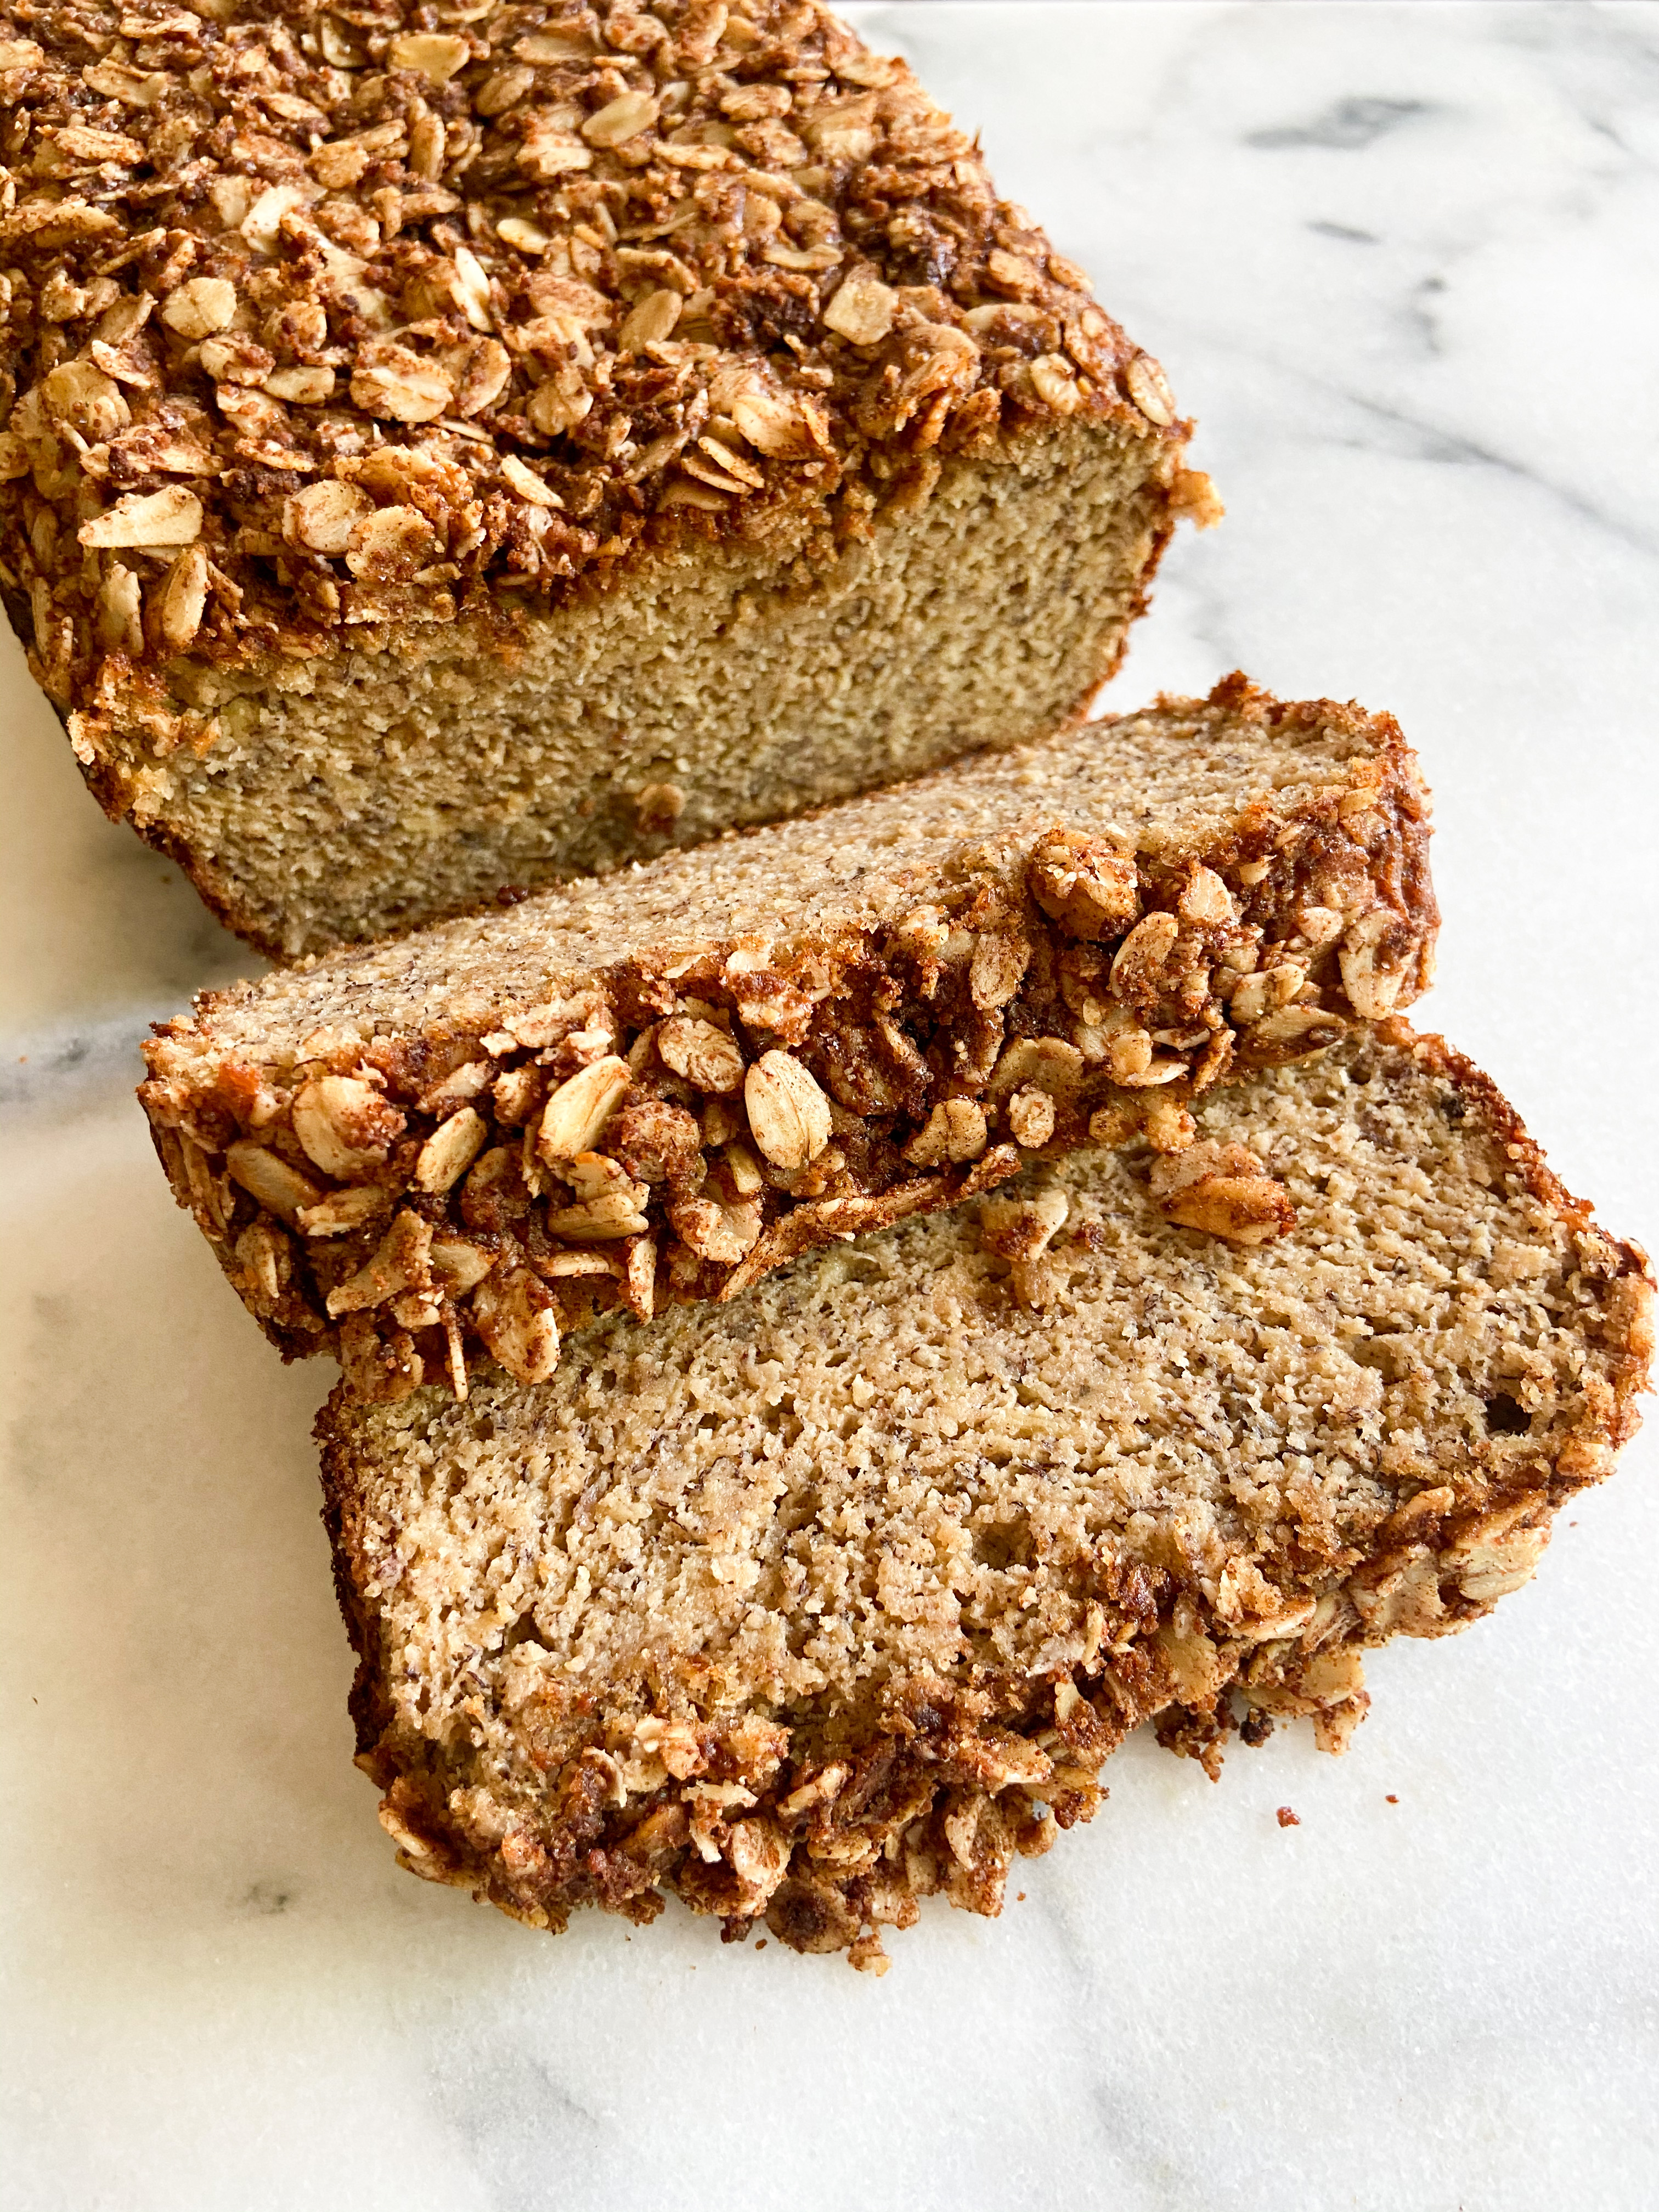
Banana bread has been on repeat lately, I love how versatile it can be when it comes to what you mix into it and how it can come together with minimal ingredients and falls into the realm of healthy baking. I was going to do make my classic cinnamon swirl banana bread when it suddenly occurred to me that I didn’t have a vegan banana bread up on the blog yet. Although I am not vegan ( I do keep a vegetarian diet) I find myself drawn to lots of vegan baked goods and have baked up a lot of vegan treats, I’m just not the best at keeping track of what I do in the kitchen … well until now!

IMG_3517

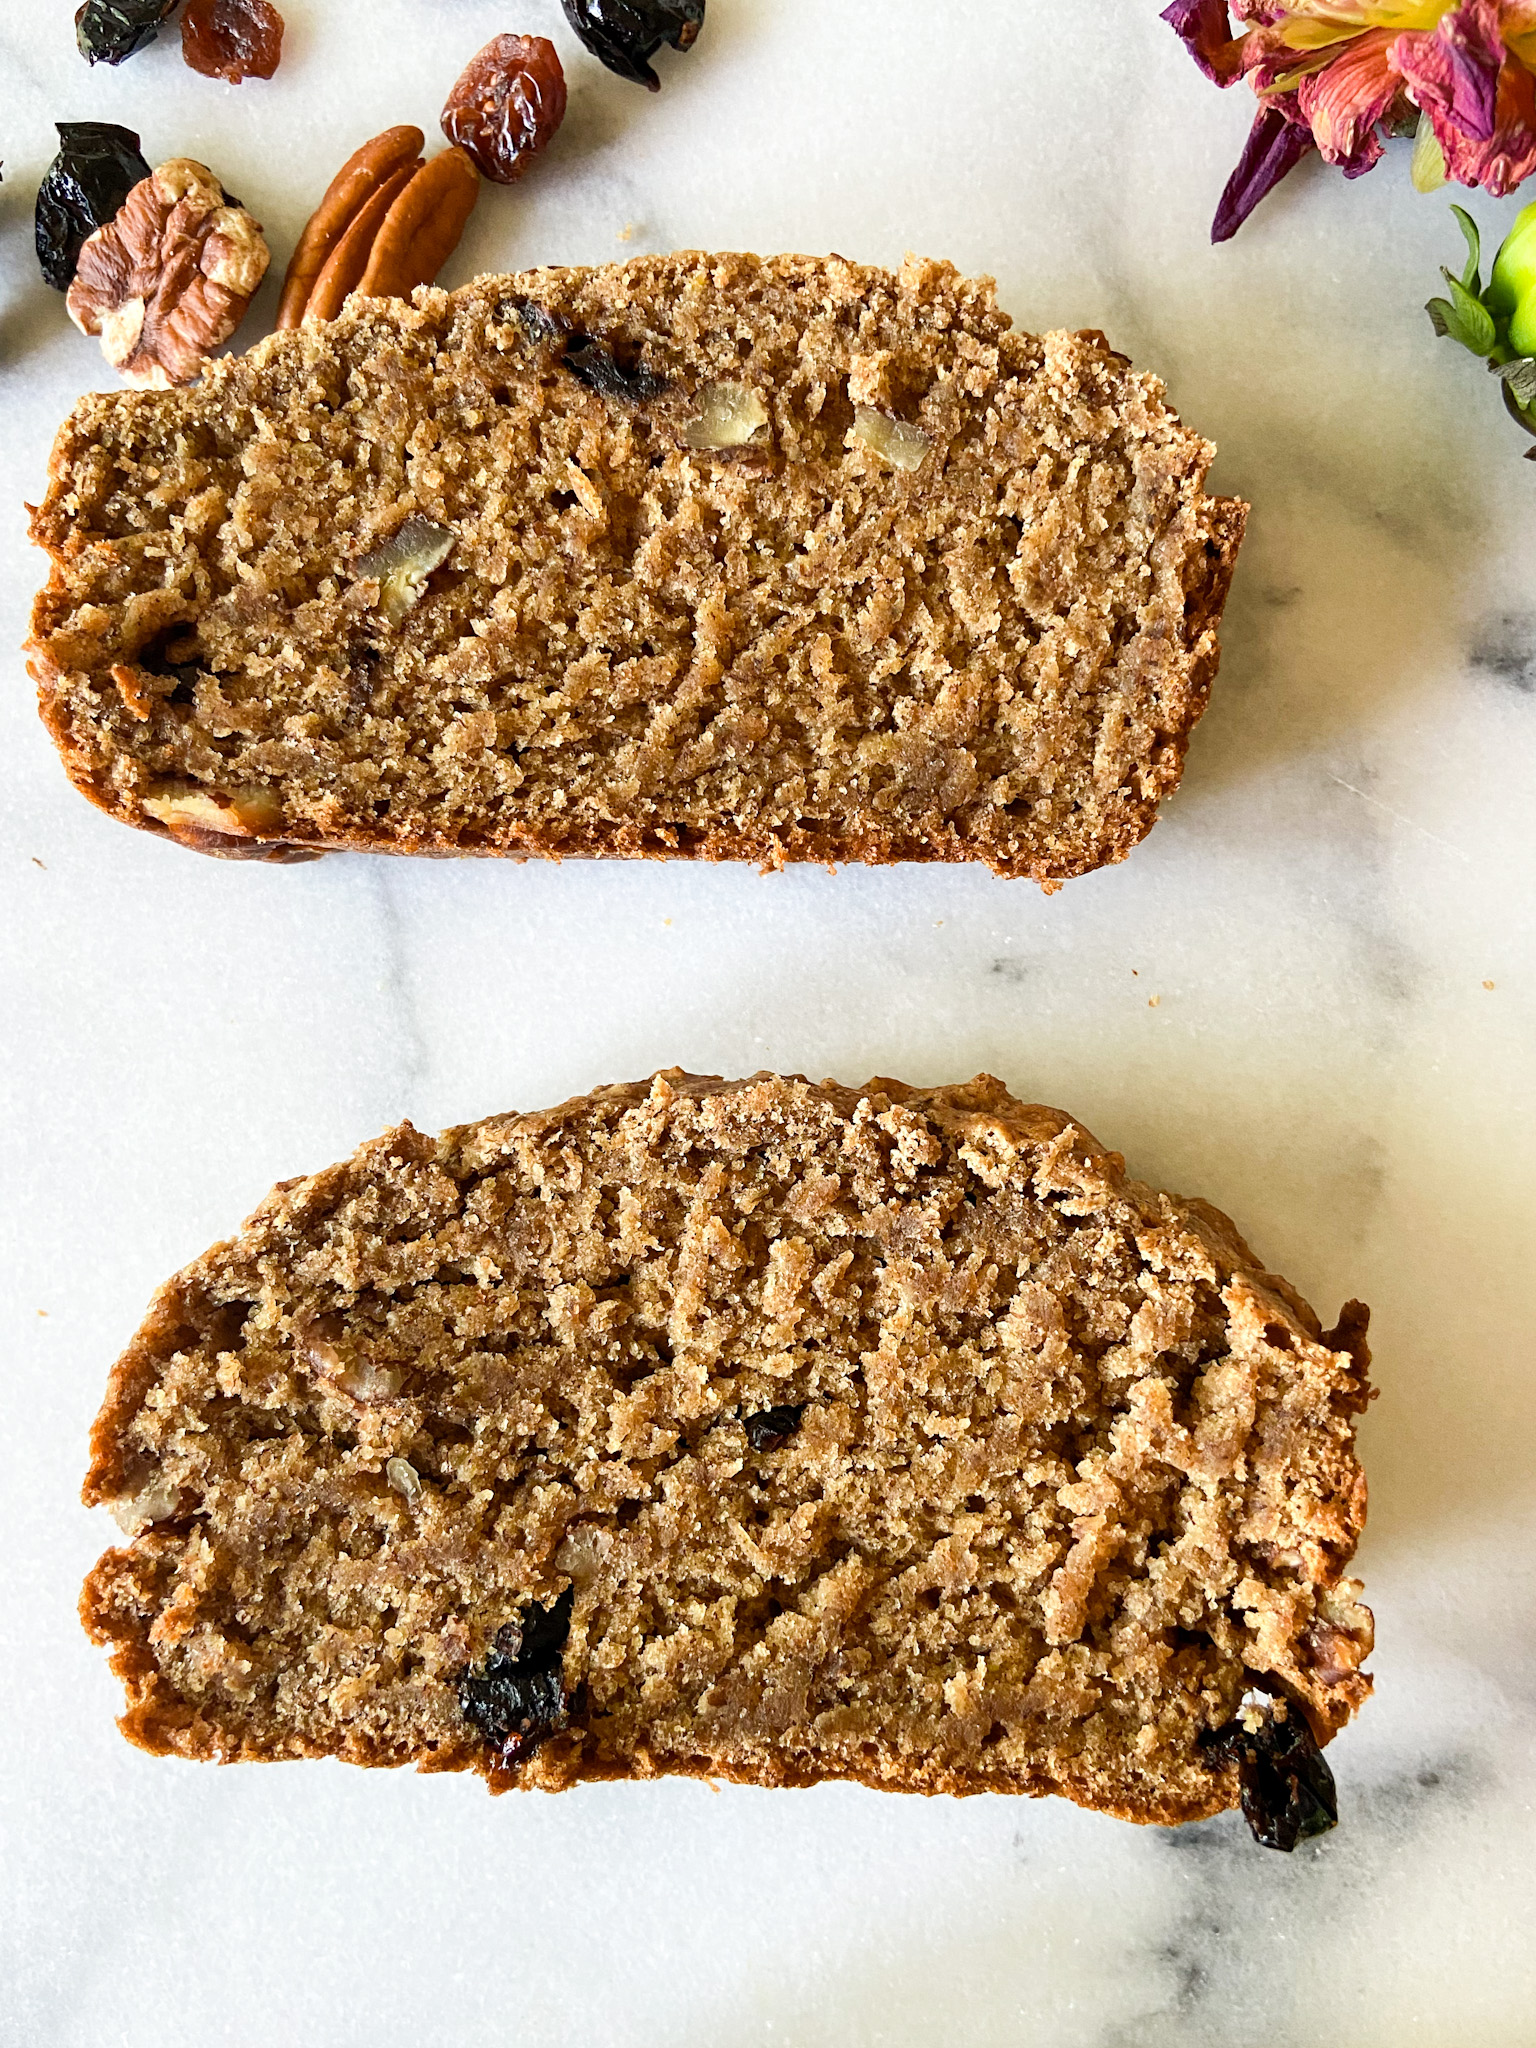
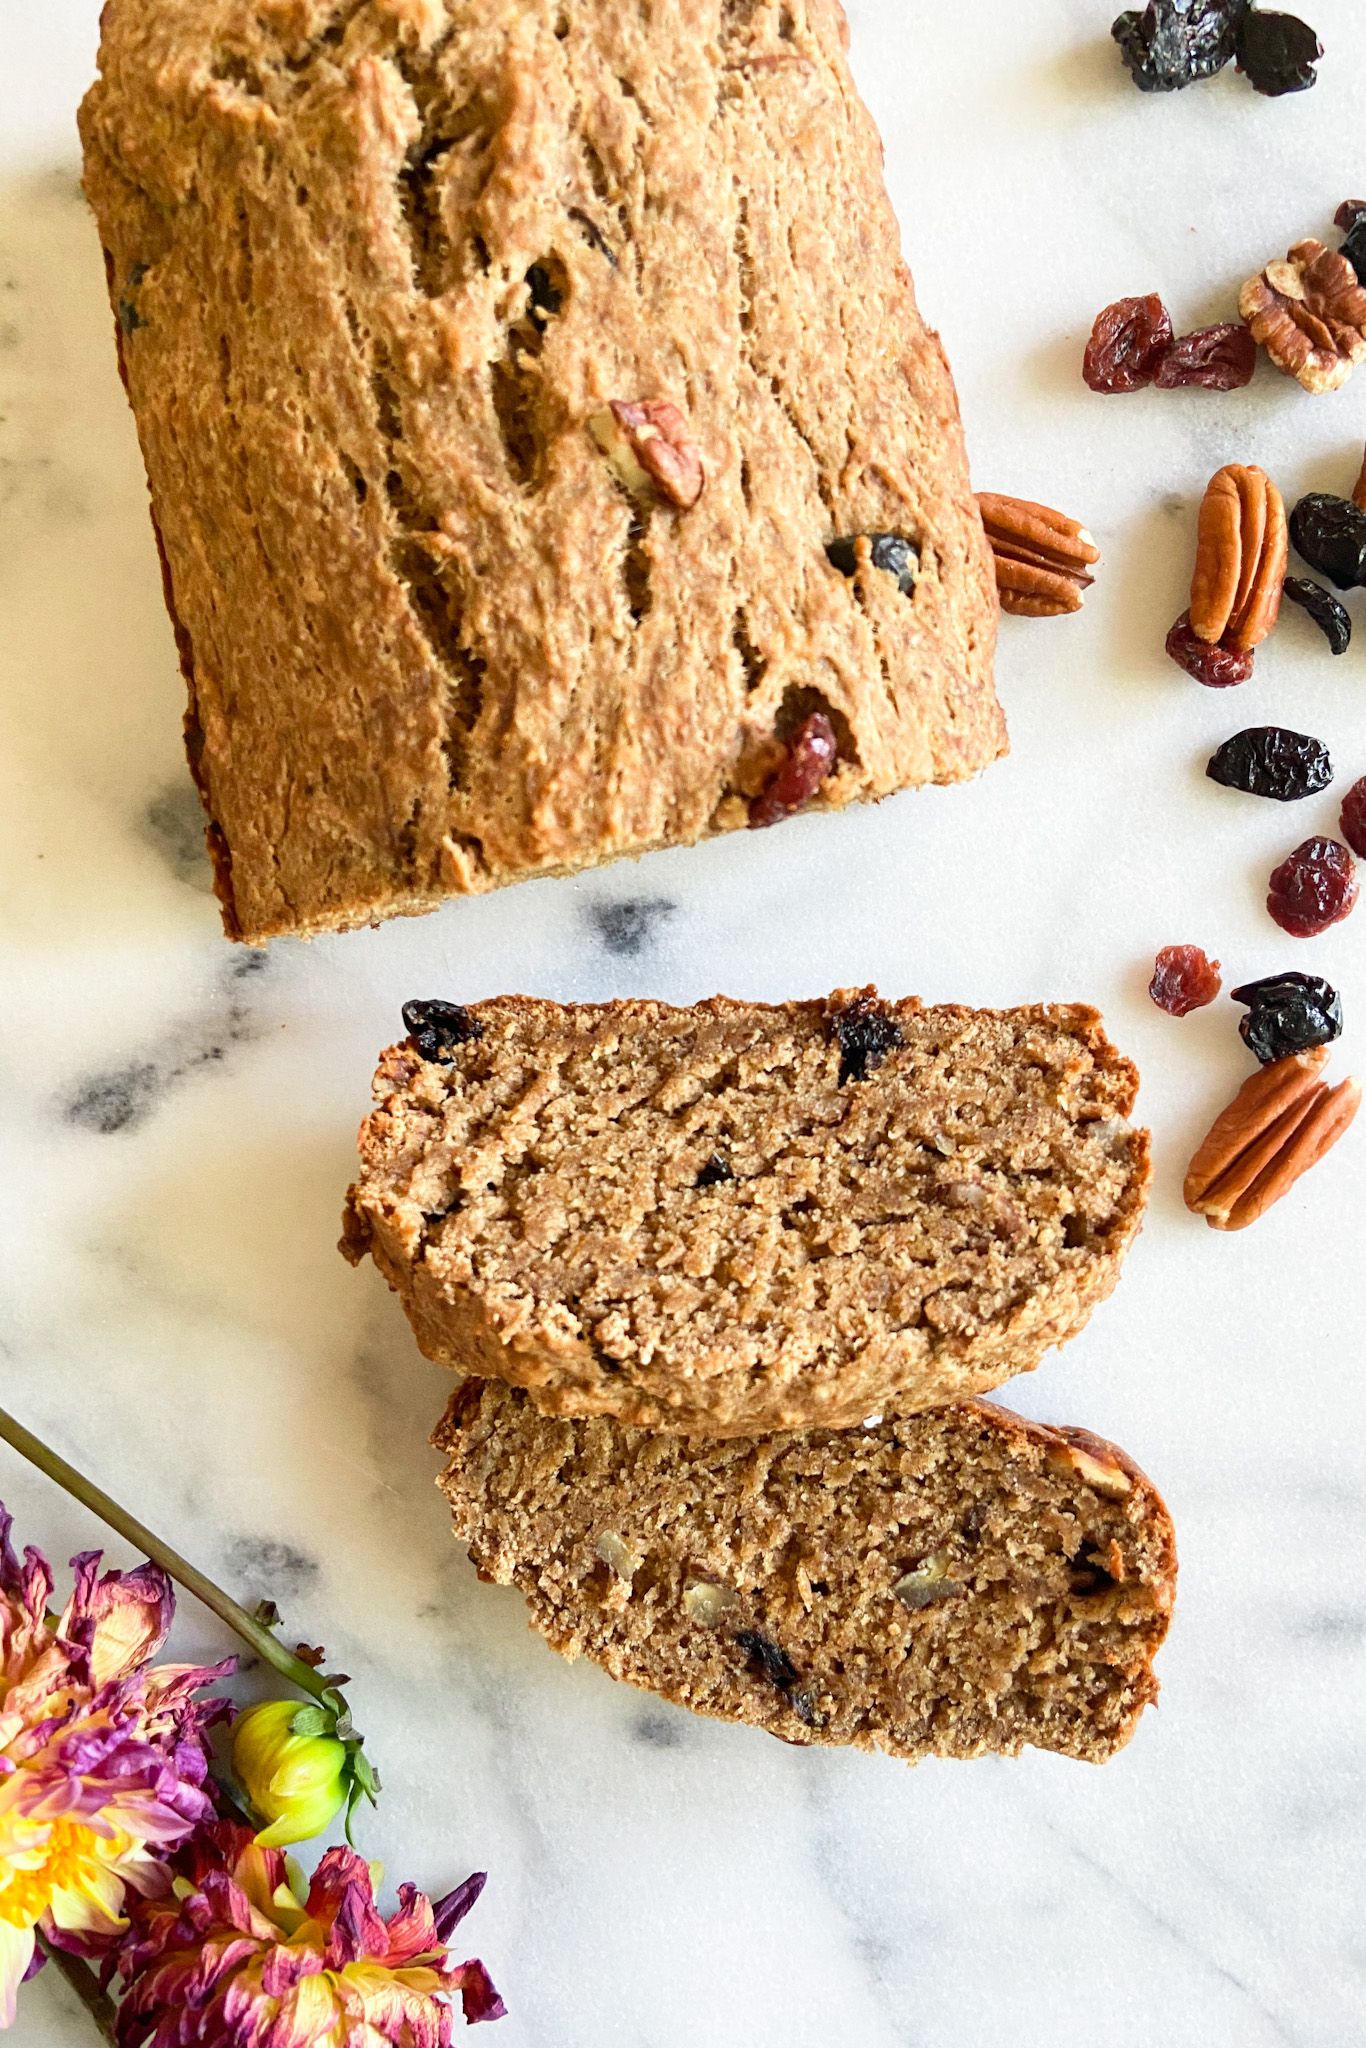
So I decided to do some experimenting and bake up a vegan banana bread and for a fun twist I wanted to add in some cranberries and pecans – perfect for the upcoming season.. F A L L – I see you around the corner. However, this can be enjoyed without the pecans/cranberries or they can be switched out for chocolate chips, walnuts, even some blueberries!

IMG_3523

This cup calls for two cups of flour. I made this loaf with both all purpose flour and whole wheat flour. I love the slight nuttiness that comes with using whole wheat flour however sometimes when using just whole wheat flour baked goods can come out too dense so I cut it half all purpose flour. You can also just use all purpose flour if you’d like. I haven’t tested out gluten free flours but will update this post once I have. Whichever flour you use, make sure to measure out your flour correctly, not doing so can drastically change your bread’s texture!

IMG_3515


How to Measure Flour

  1. Grab your measuring cup and a spoon. 
  2. Gently scoop your flour with a spoon into your measuring cup. 
  3. Once filled to the top, level off any excess flour over your flour bag with a flat edge like a knife.  
  4. Following these steps, rather than scooping the flour out of the big directly with your measuring cup will ensure you are not over-packing your flour. Over-packing it would result in much more flour than what is needed. 

Ingredients

Wet Ingredients

  • 4 medium bananas – super ripe
  • ½ cup brown sugar 
  • ¼ cup coconut oil, melted 
  • ¼ cup plus 1 tbsp almond milk 
  • 1 tbsp vanilla
  • 1 tbsp ground flax/flax meal 

Dry Ingredients

  • 1 cup all purpose flour
  • 1 cup whole wheat flour
  • 2 tsp cinnamon 
  • 1 tsp baking powder
  • ½ tsp baking soda
  • Pinch of salt 

Add-ins 

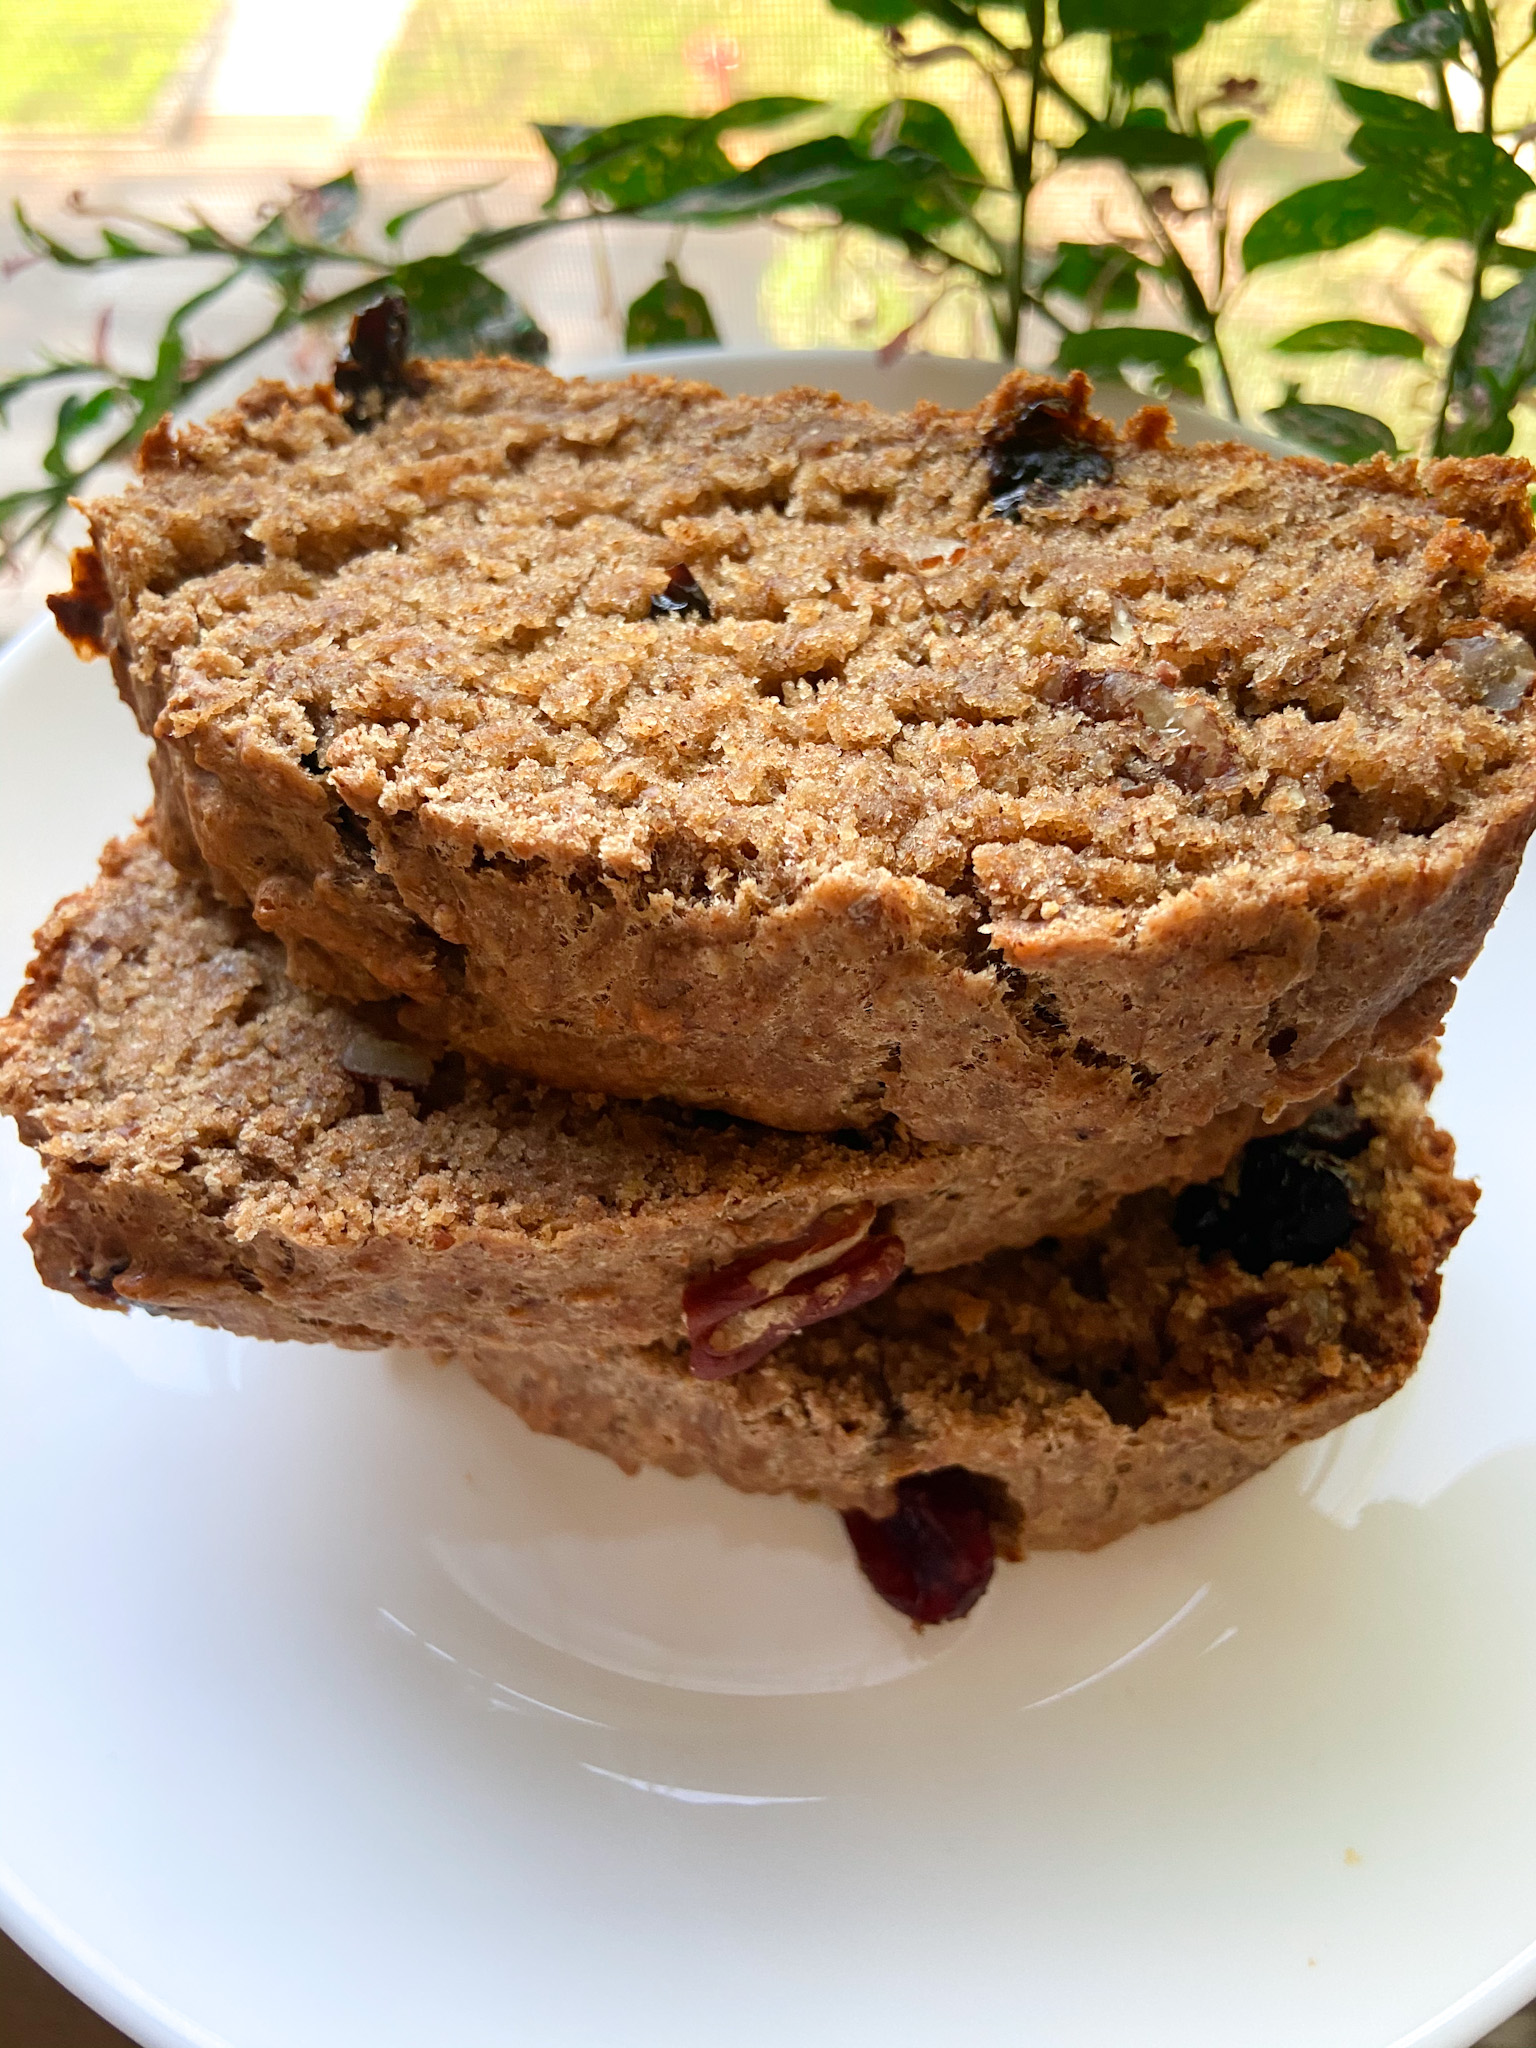
  • ¼ cup crushed pecans
  • ¼ cup cranberries 

Directions

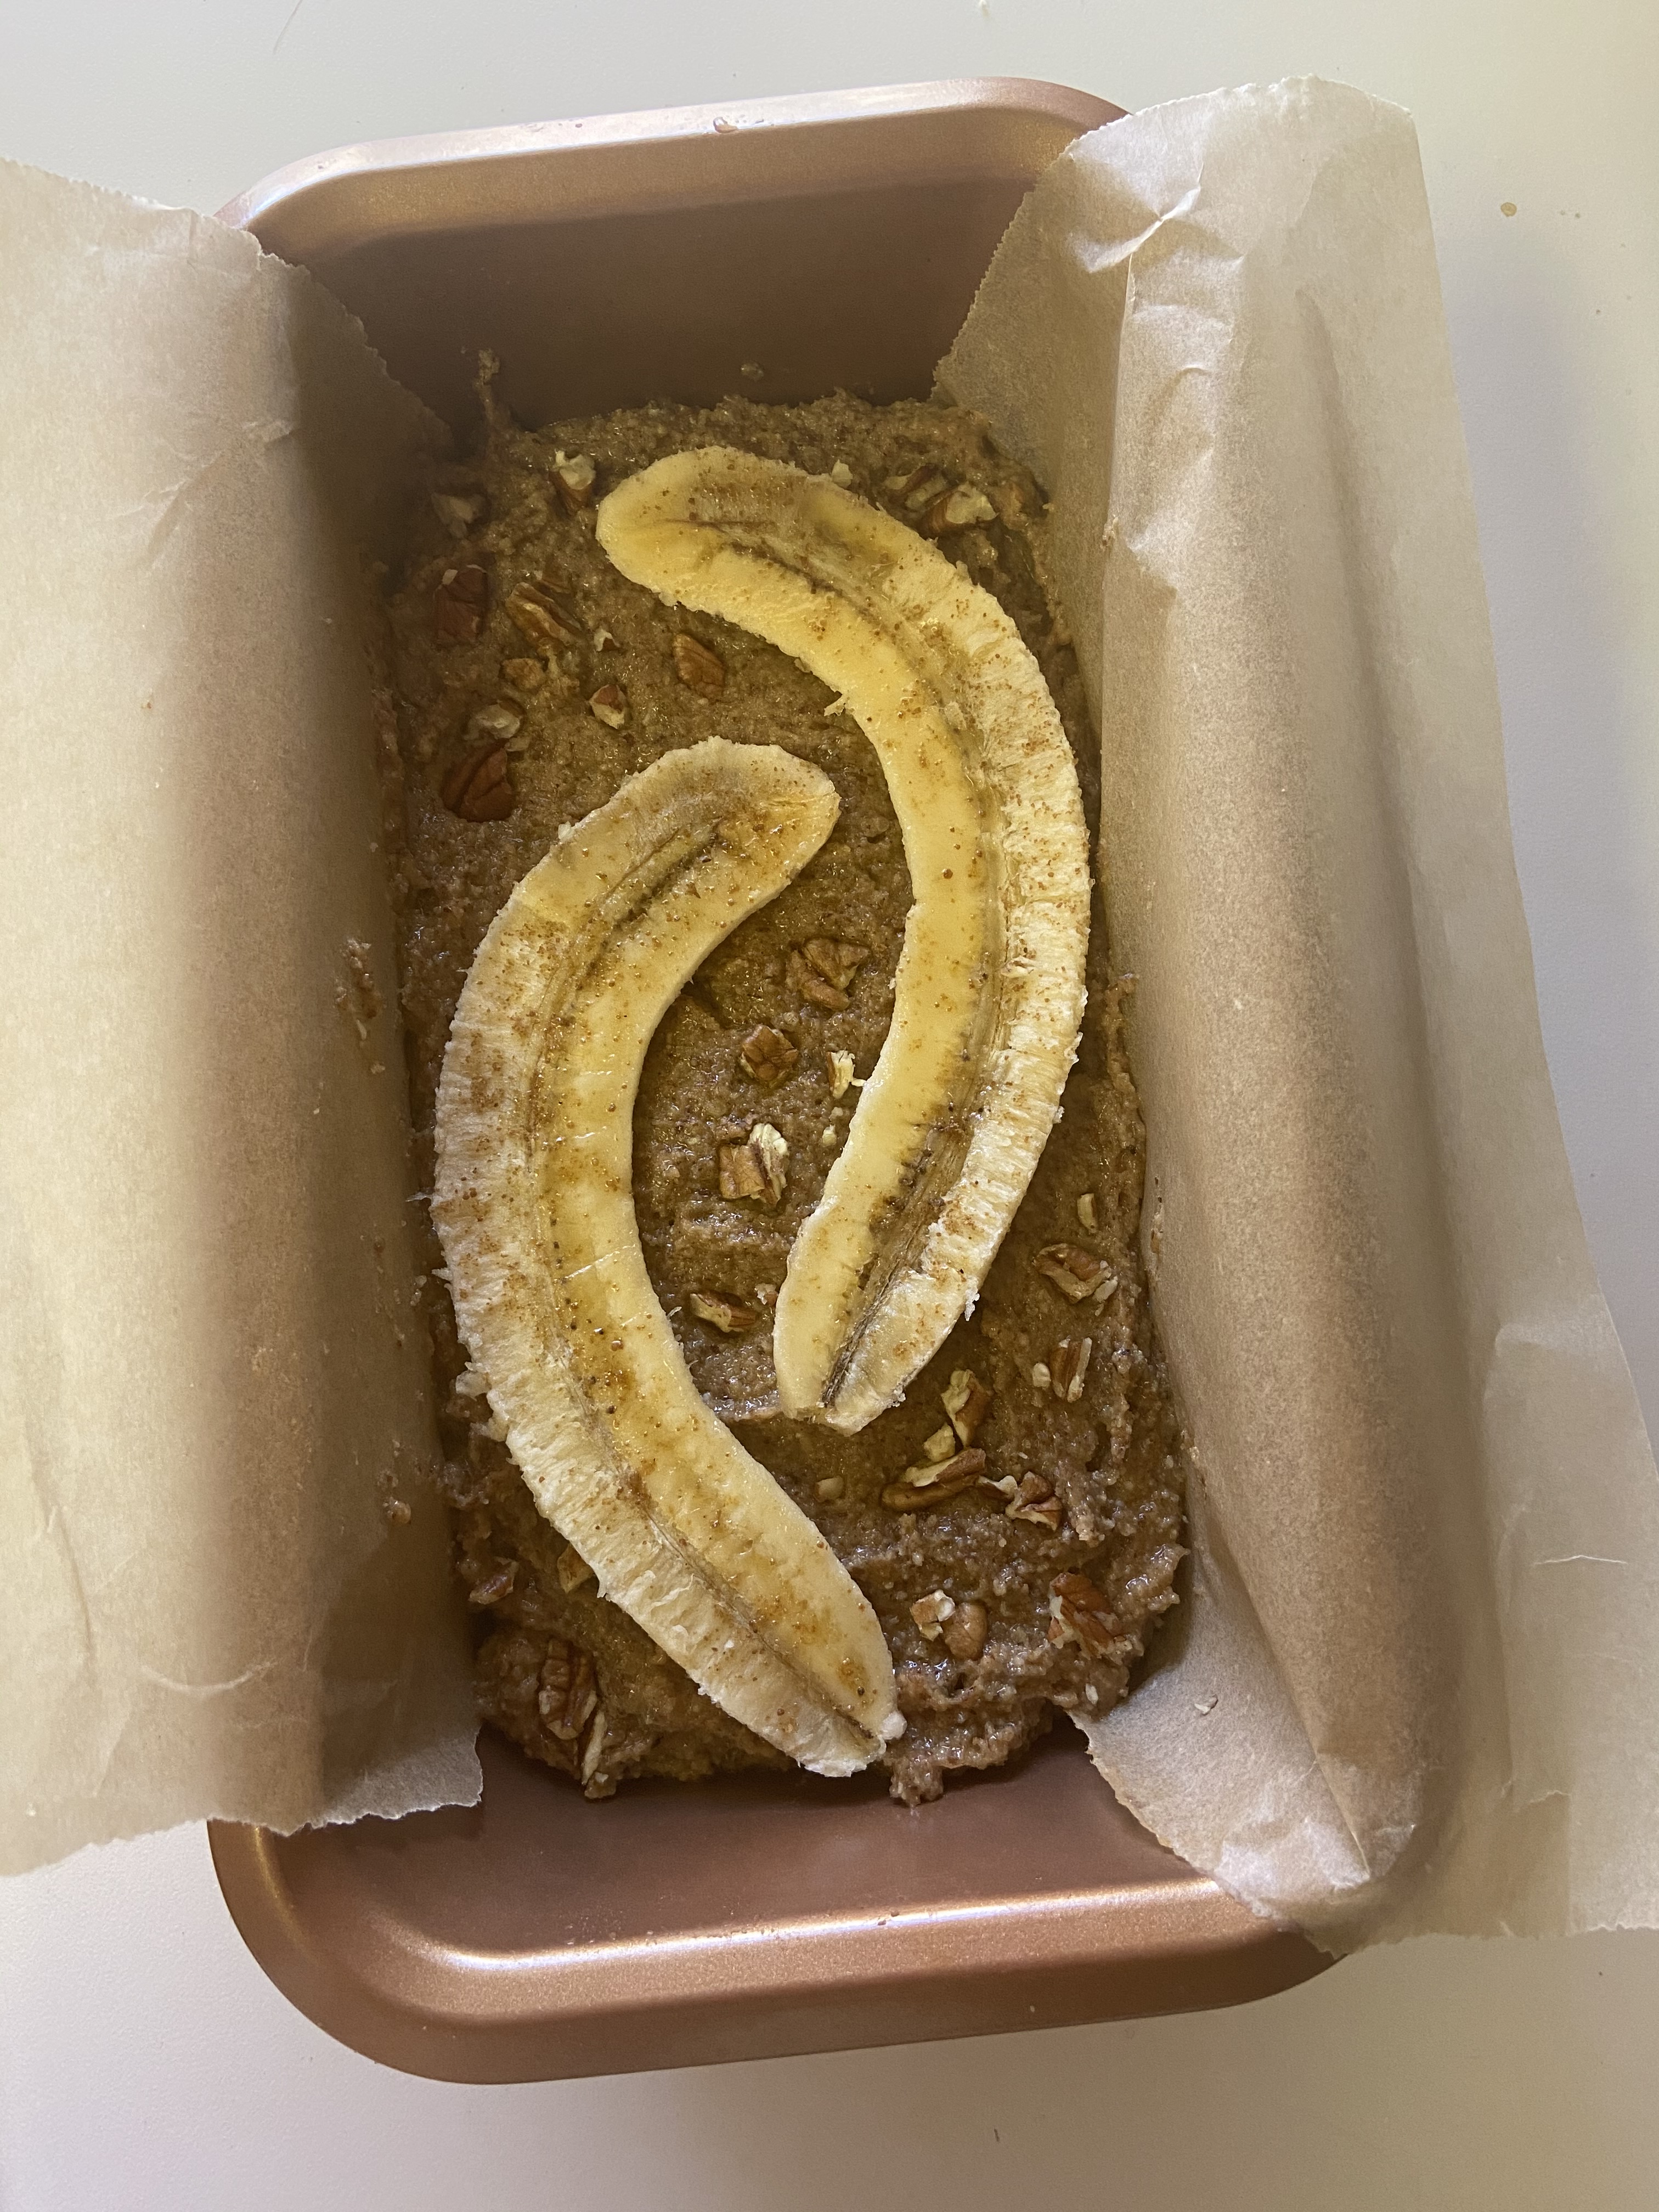
  1. Preheat your oven to 350F and line a loaf pan with parchment paper. I love using this parchment paper for all my baking, Thrive Market has a great deal on it! 
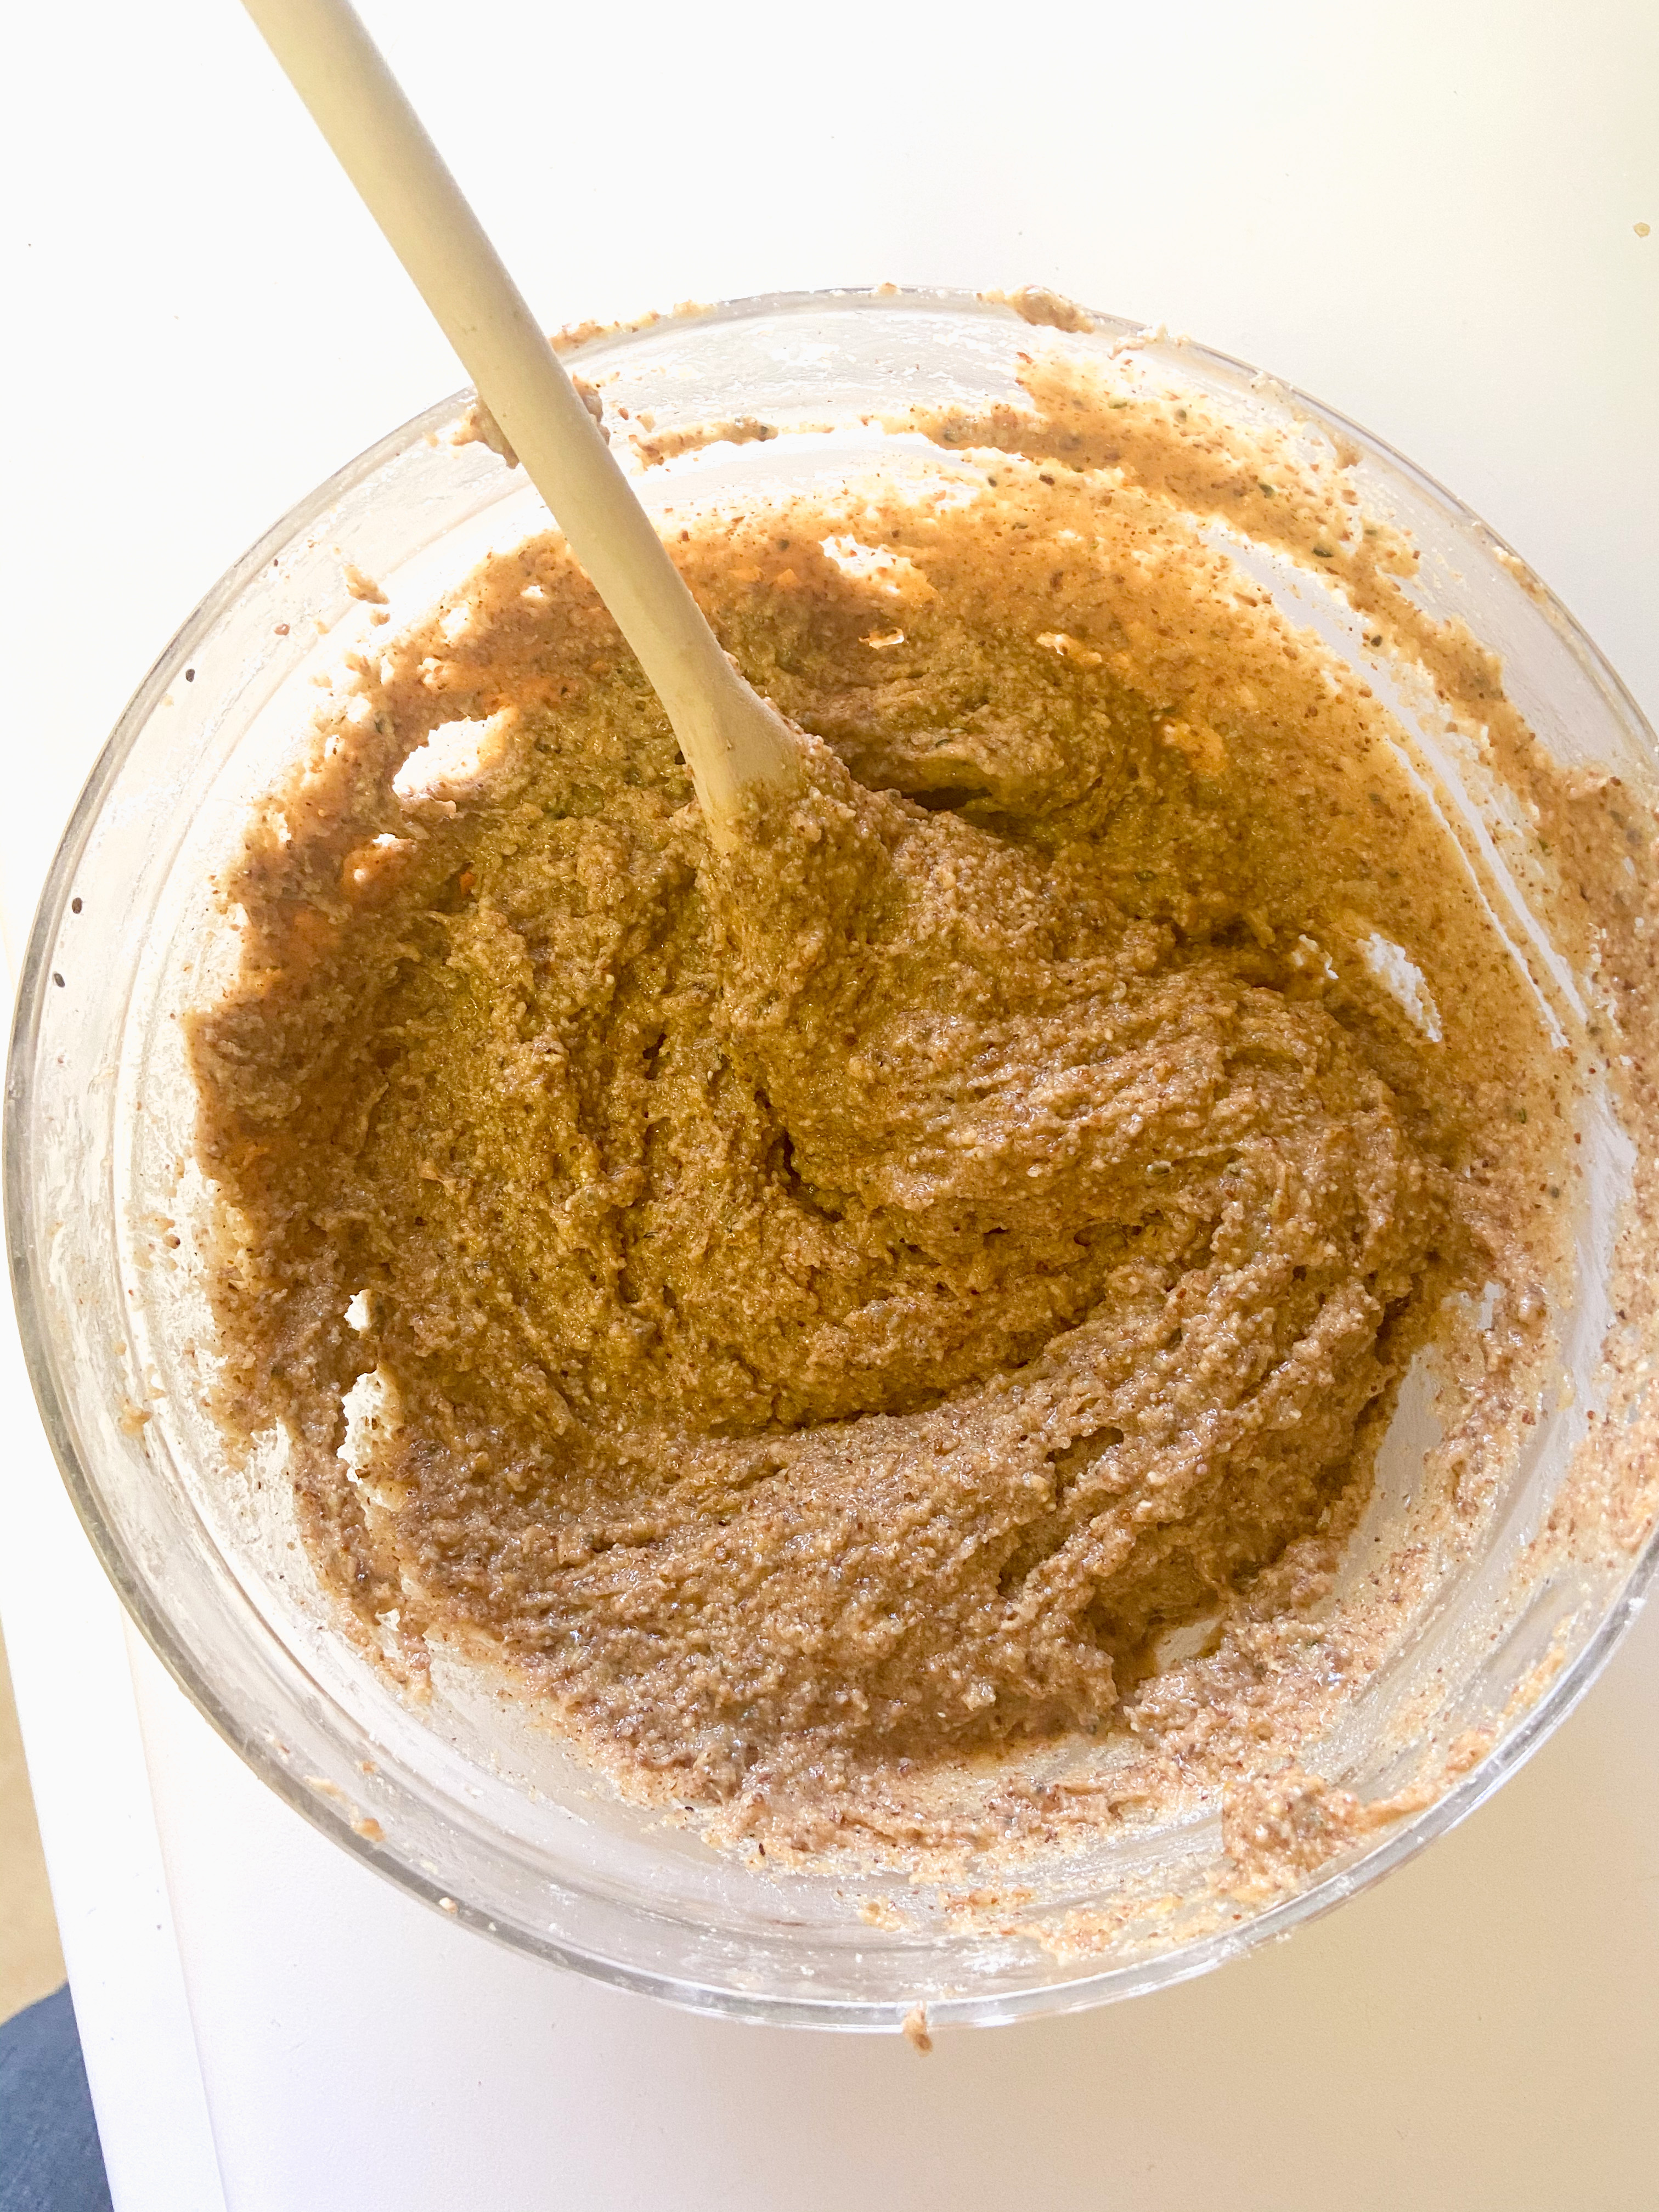
  2. In a mixing bowl, mash your bananas well. Then add in the following ingredients: brown sugar, coconut oil, almond milk, and vanilla. After all the ingredients are well incorporated, add in your flax meal and give it a good stir. 
  3. In a separate bowl combine your dry ingredients: whole wheat flour, all-purpose flour, baking soda, baking powder, cinnamon, and salt. Make sure you measure your flour correctly as outlined above!
  4. Add your dry ingredients to your wet ingredients and mix until just combined. Do not over mix, you just want to make sure the flour is incorporated. Your batter will likely be thicker than other banana bread batters. 
  5. Fold in your cranberries and pecans. Feel free to swap them out for other nuts of chocolate chips, but again, don’t over mix!
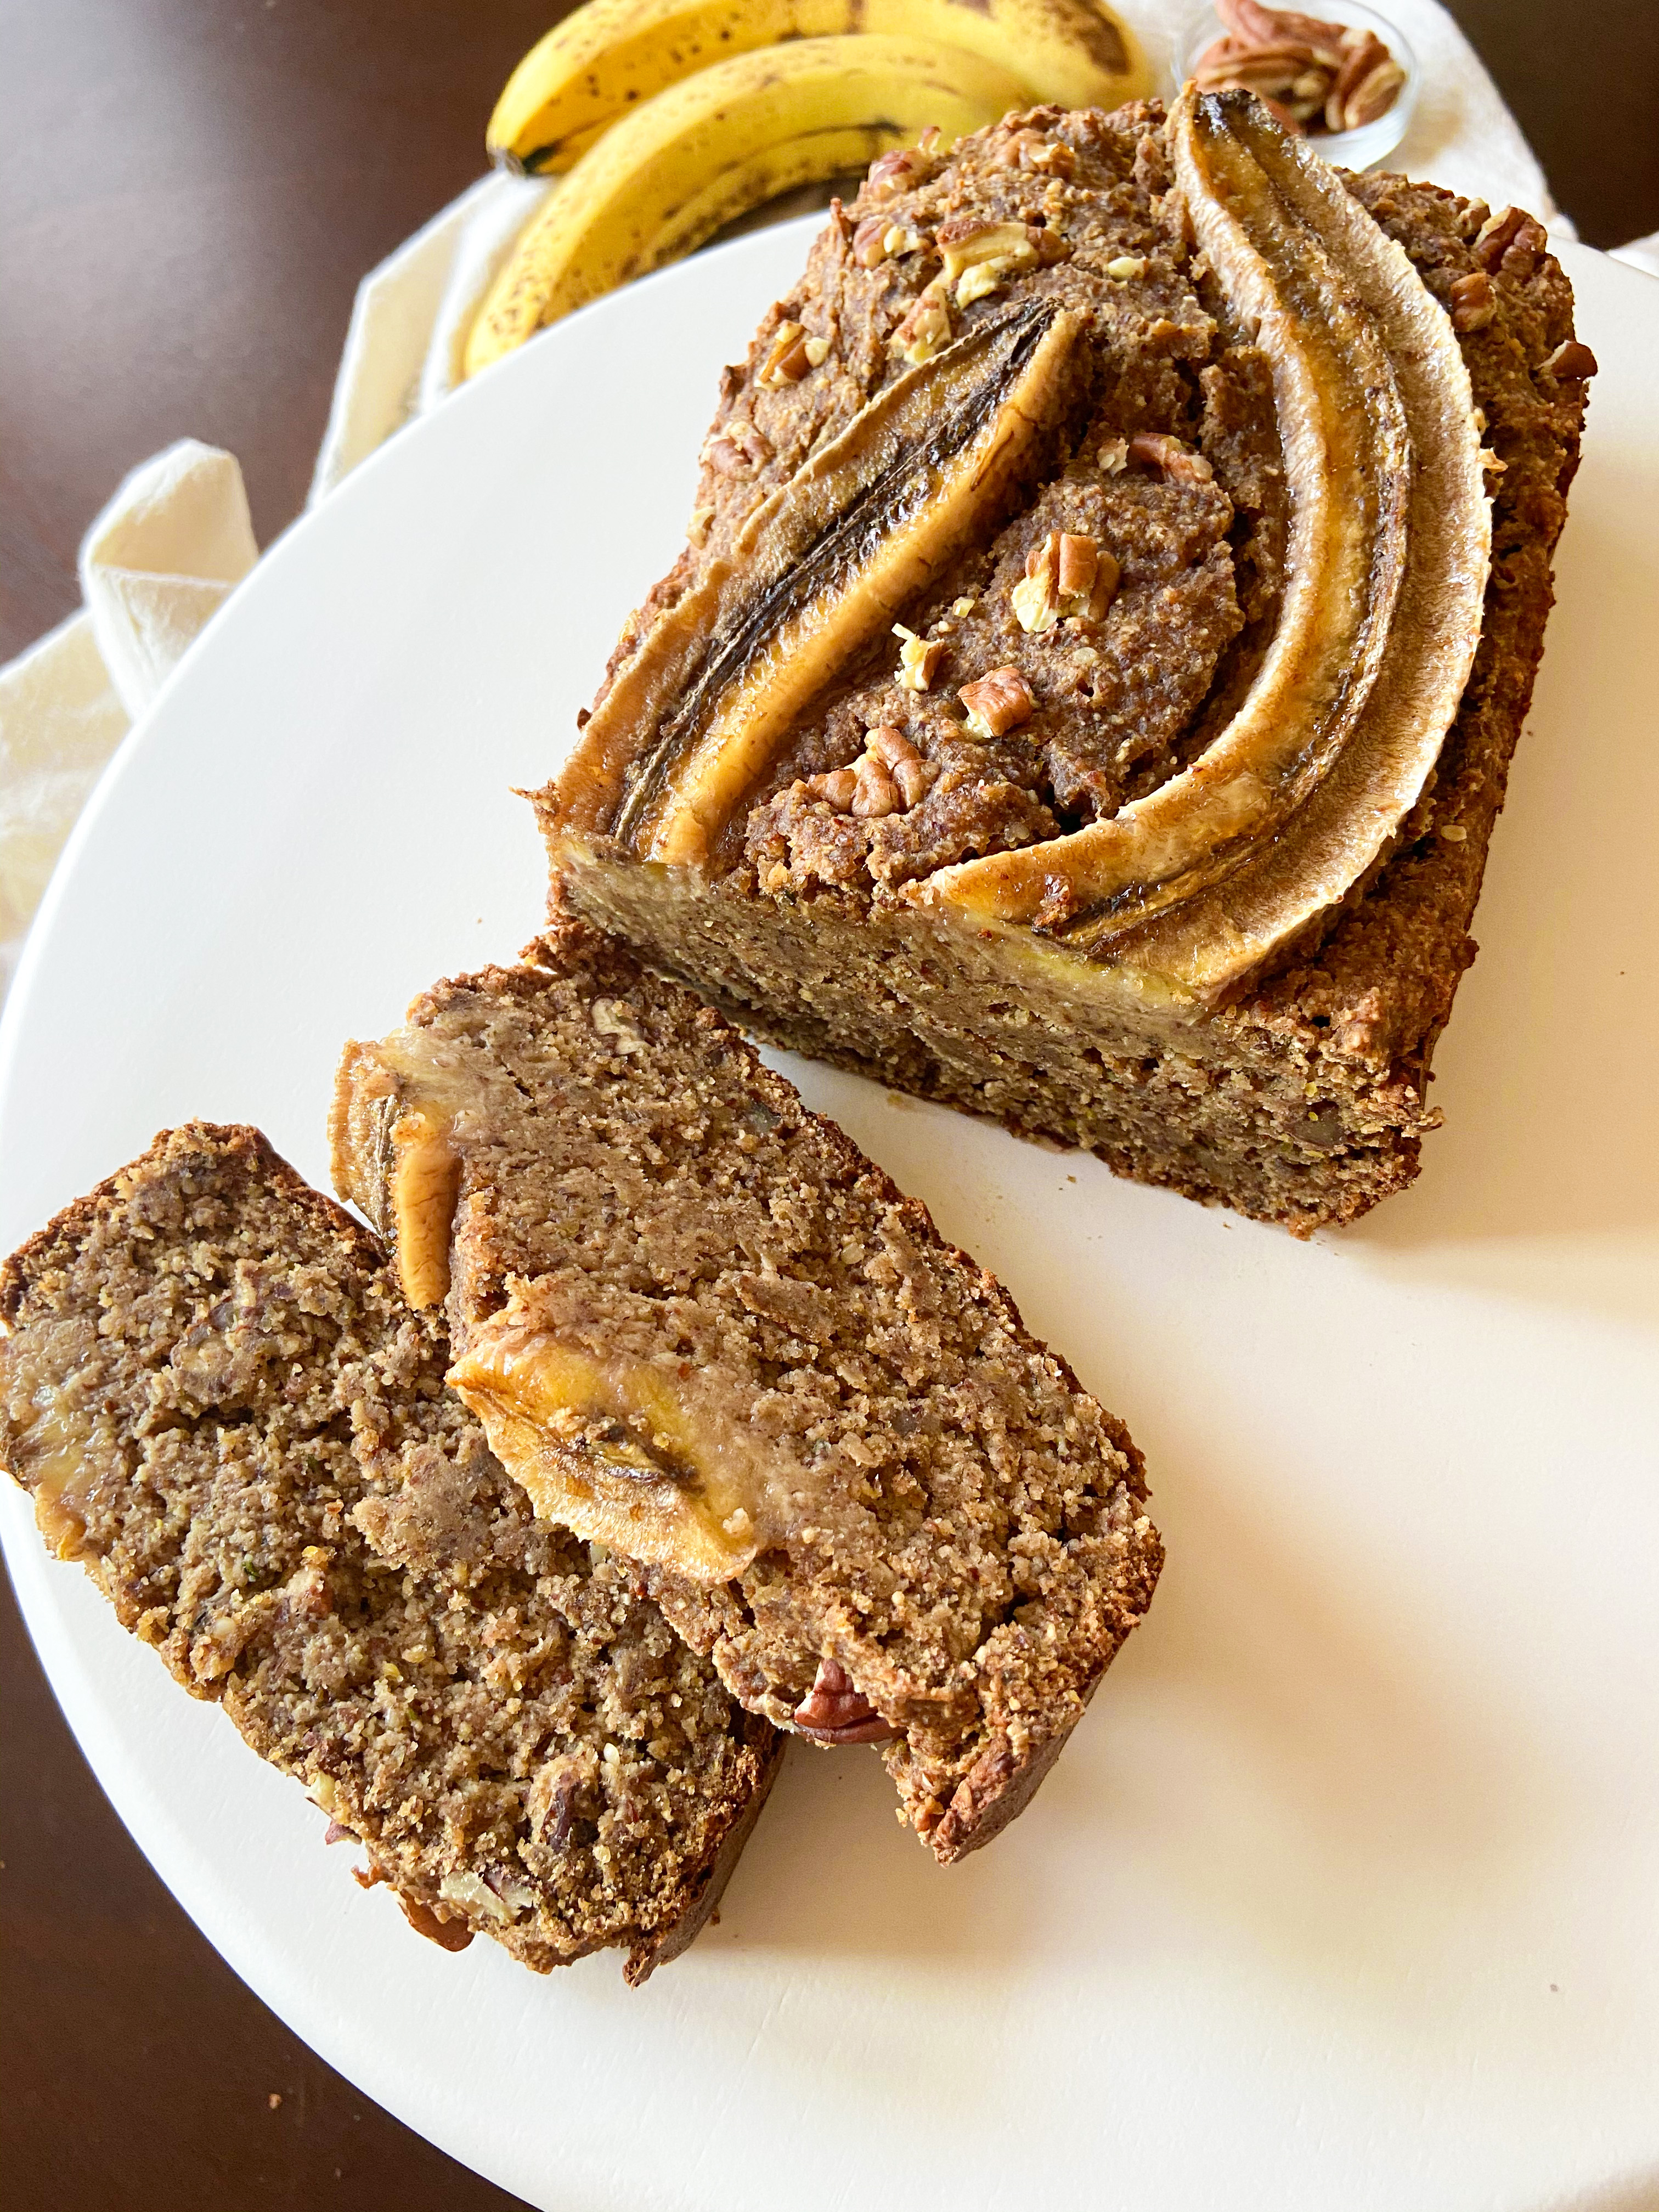
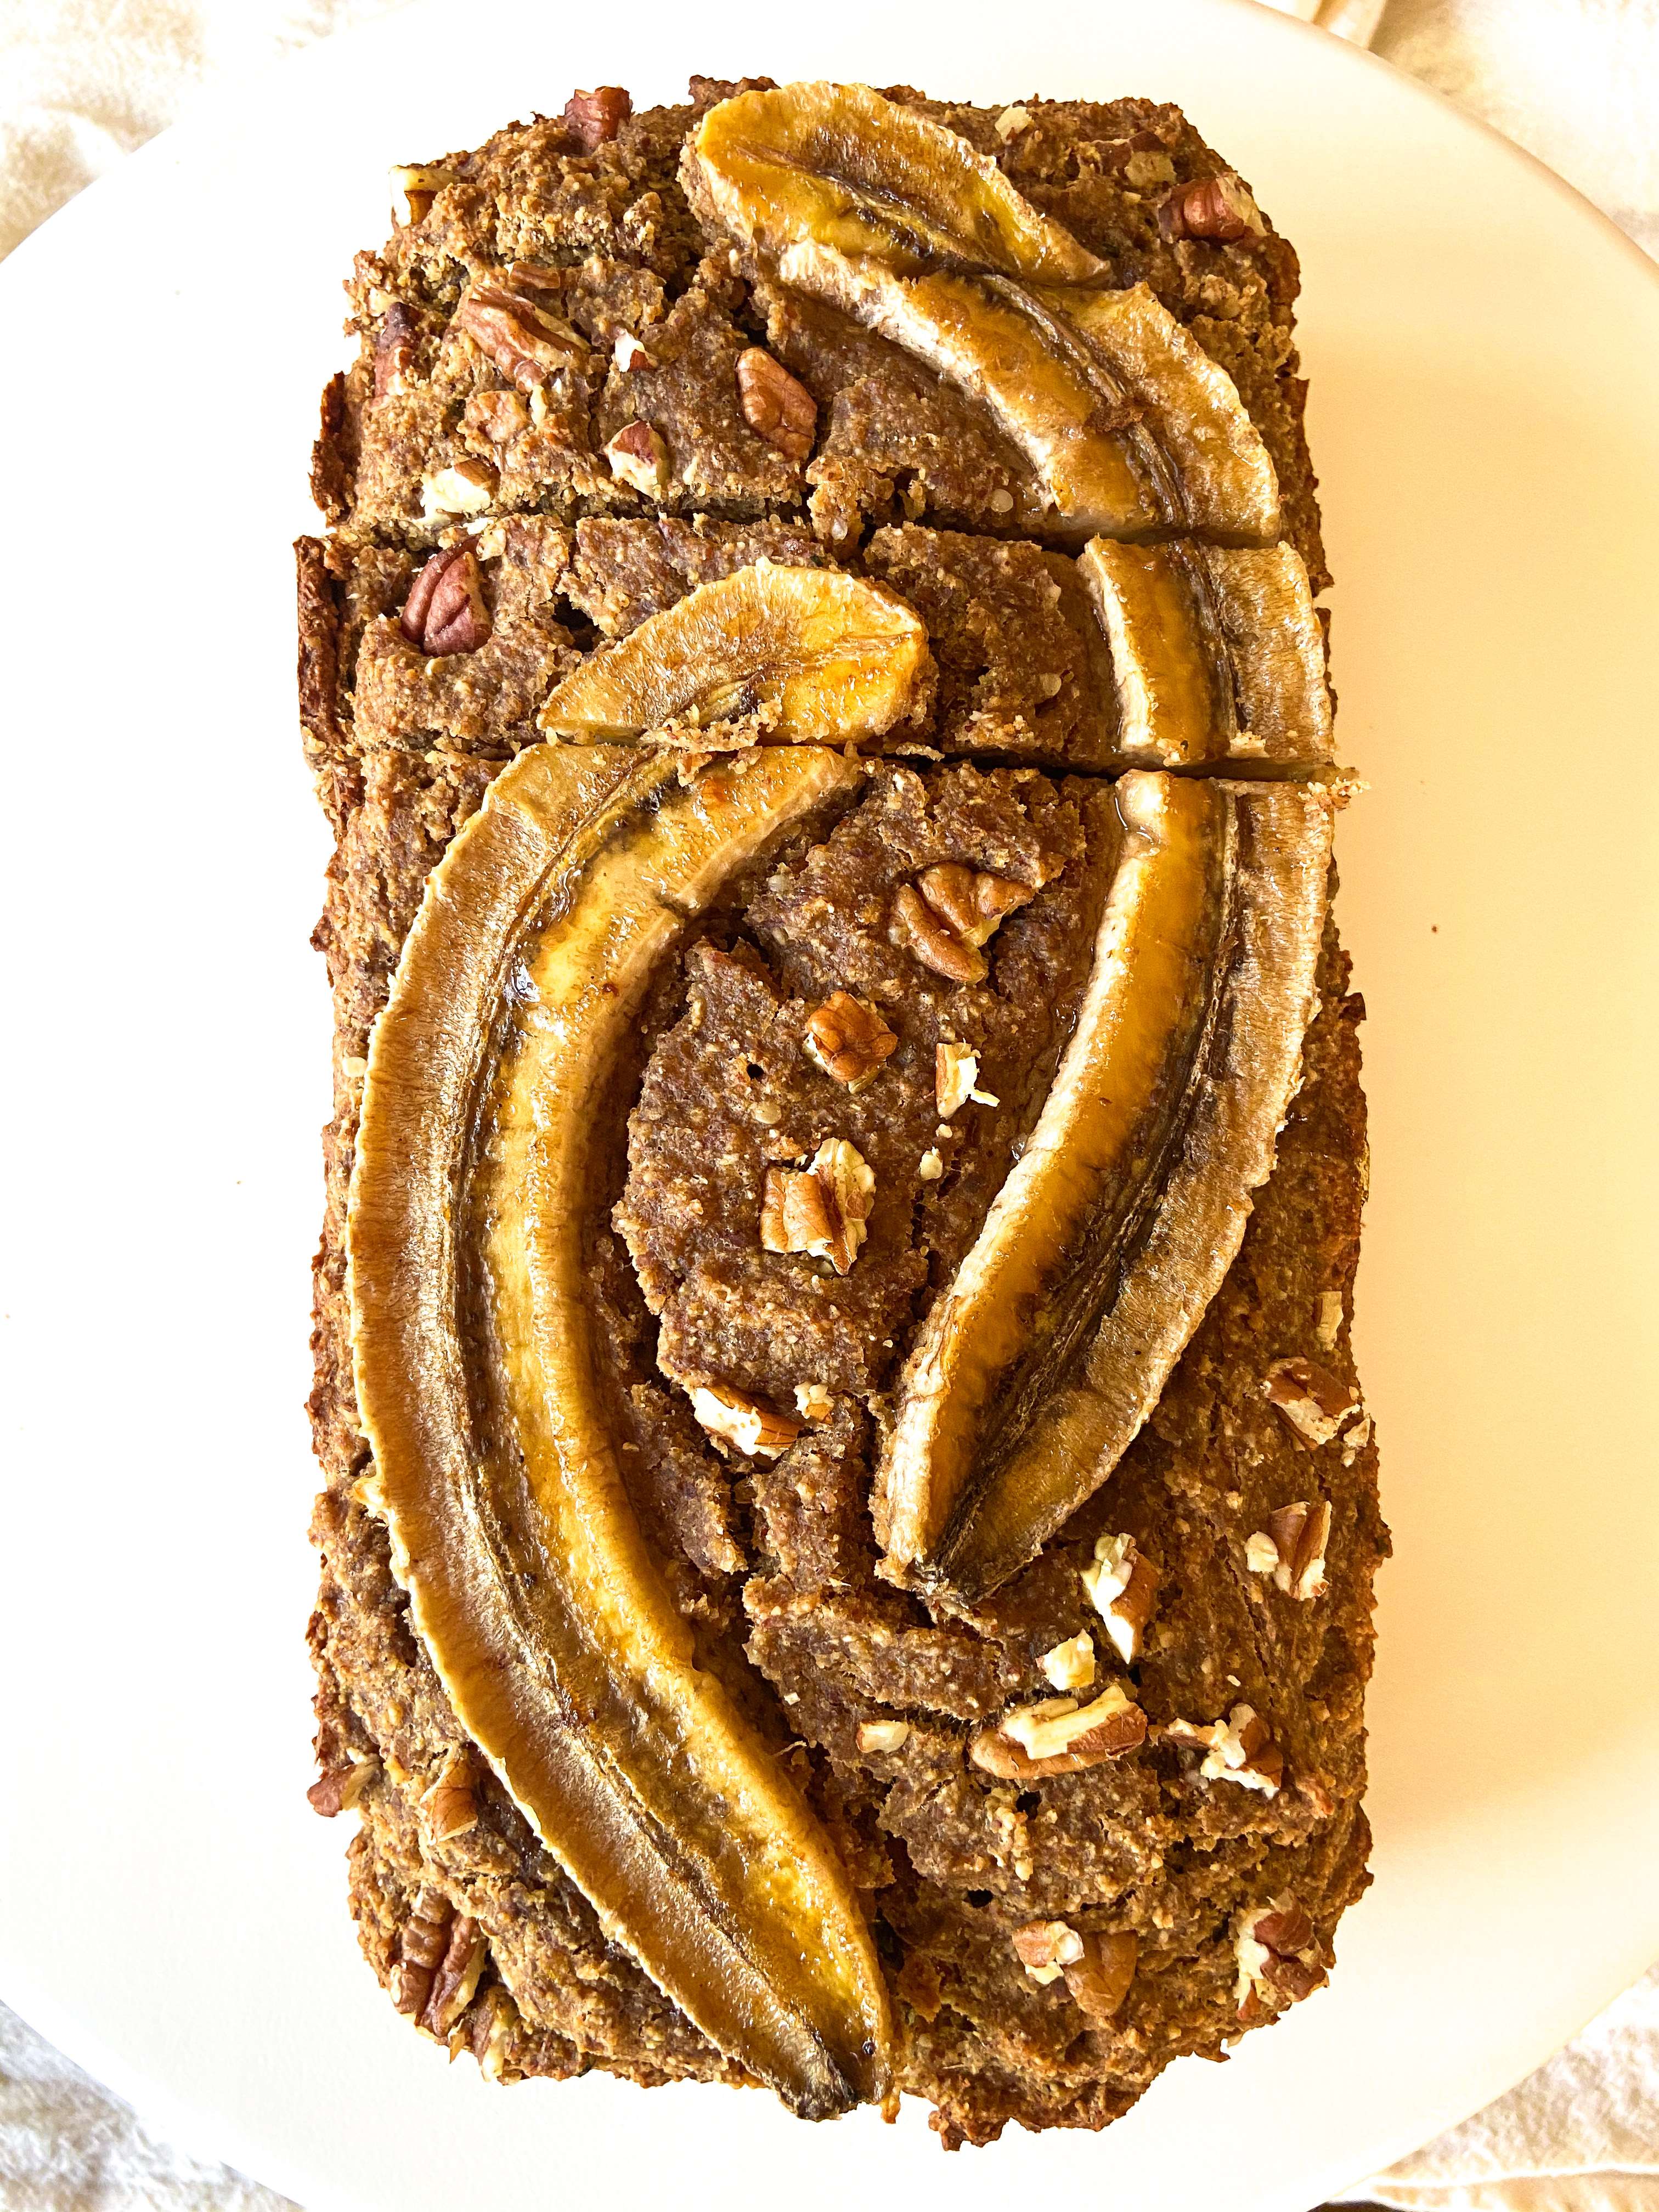
  6. Pour your batter into your prepared loaf pan and bake for 50 minutes. After the baking time, check the loaf with a toothpick and if it comes out clean after inserting it is all done. 
  7. Let your loaf cool for 15 minutes before slicing. Enjoy!
  8. Store in an airtight container. You can also pre-slice your loaf and freeze some slices for another time! Simply defrost and warm it up in your microwave for 30 – 60 seconds.

Coconut Flour Banana Bread

(gluten free, no added sugar, dairy free)

Coming at ya with a super simple banana bread that is naturally sweetened with ripe bananas as in it has no added sugar and it’s made gluten free with coconut flour. This is made with simple ingredients and can be made in one bowl. It comes together so quickly and makes the perfect snacking bread for any time of the day. Also goes great with a nice layer of peanut butter spread on top!

IMG_2987


I added an optional oat topping on top which does have coconut sugar in it but like I said totally optional. You could leave it without the topping and swap it in for some chocolate chips, walnuts, or even   ⅓ cup of blueberries!


IMG_2979


Recipe

Ingredients

Wet Ingredients

  • 3 bananas (about 1 c. mashed banana) img_2981
  • 3 eggs
  • 1/3 cup creamy peanut butter
  • 1 tsp pure vanilla extract
  • 1/3 cup melted coconut oil 

Dry Ingredients

  • 1/2 cup packed coconut flour 
  • 1 tbsp cinnamon
  • ¾ tsp baking soda
  • 1 tsp baking powder
  • ¼ tsp salt

Optional Oat Topping

  • 1/4 cup rolled oats
  • 1 tbsp coconut sugar
  • 1 tbsp melted coconut oil
  • 1/2 tsp cinnamon 

Instructions

  1. Preheat your oven to 350F and line your loaf pan with parchment paper, set aside. 
  2. In a large bowl, mash your spotty ripe banana and then add in wet ingredients until well combined: eggs, peanut butter, vanilla, and coconut oil. I used a stand mixer but feel free to use a hand mixer. 
  3. Add in dry ingredients: coconut flour, cinnamon, salt, baking powder and baking soda. You can mix these first in a separate bowl to ensure they are well combined or add directly to the wet ingredients. Just make sure to mix really well!
    1. If incorporating any mix-ins like chocolate chips, nuts, berries, etc- fold those in to the batter at this step. 
  4. If you want to add the oat topping,  mix the oats, cinnamon, coconut oil, cinnamon and coconut sugar together in a small bowl. 
  5. Pour your batter into your prepared loaf tin.
    1. If adding the oat topping, sprinkle on top of your batter at this point. Gently press the oat topping into the batter to ensure it sticks to the top!
  6. Bake for 40 – 45 minutes, until it passes the clean toothpick test. 
  7. Let your bread cool for 10-15 minutes before slicing! Can be stored in the fridge for 4-5 days!

Notes:

  1. Coconut flour is not a direct 1:1 sub with other flours therefore do not substitute in other flours. 
  2. Feel free to use any nut butter of your choice, however, if you use sunflower seed butter it may change the color of your bread. It’ll be fine to eat, just don’t be alarmed if it’s not the usual banana bread color!
  3. Use both baking soda and baking powder!!

Superseed Pecan Banana Bread

This banana bread features an amazing banana bread mix made by Simple Mills. Simple Mills is a Chicago based brand that makes such a great and ever expanding line of cake and bread mixes, cookies, crackers, and frostings with REAL ingredients that you can actually pronounce.

When I first looked at the ingredient lists of a few different products I couldn’t believe how short and not confusing the ingredient list was. When I got my hands on the Banana Bread and Muffin Mix I was excited to spruce it up and enhance its already goodness! 

IMG_2107 (1)

I added some of the typical seeds I would throw into my other baked goods and topped it with an additional banana and pecans for that extra flavor! I followed the baking instructions from the box. I usually don’t cover my loafs with foil halfway through the cooking process, in fact I try not to open the oven at all while something is baking, but I figured they knew what they were talking about and they sure did! The loaf came out great when baked as instructed!

Superseed banana bread batter

IMG_2094

This loaf did take a little longer to cook but that can be expected since it was in the oven at 325F. I typically cook my baked goods at 350F, but again, I followed what the Simple Mills’ experts directed me to do! It was well worth the wait!

IMG_2113


Recipe

Ingredients

Dry Ingredients

  • 1 Simple Mills Banana Bread and Muffins box
  • ½ c ground flax meal  IMG_2110
  • 1 ½ tsp cinnamon
  • 1 tbsp hemp seeds 
  • 2 tbsp chopped pecans 

Wet Ingredients

  • 1 ripe banana
  • 2 eggs
  • ½ c + 2 tbsp unsweetened almond milk 
  • 2 tbsp melted coconut oil
  • 1 tsp vanilla extract 
  • 1 tbsp chia seeds

Toppings (optional)

  • 1 whole banana 
  • Pinch of coconut sugar 
  • 1 tbsp chopped pecans

Instructions

  1. Preheat your oven to 325F and line your loaf pan with parchment paper, set aside. 
  2. In a large bowl, mash your spotty ripe banana and then add in wet ingredients until well combined: eggs, almond milk, vanilla, and melted coconut oil. Mix in chia seeds and let sit for a couple minutes to let the chia seeds expand a bit. 
  3. In a medium size bowl, mix your dry ingredients together: Simple Mills mix, cinnamon, flax meal, cinnamon, and hemp seeds. Mix until well combined. 
  4. Add your dry ingredients to your wet ingredients. Mix until just well combined and there are no clumps of dry ingredients. Gently fold in chopped pecans. The batter will be a bit thick but that’s okay!
  5. Pour your batter into your prepared baking pan. I like to top mine with a sliced banana and a few more pecans. You can slice your banana lengthwise in half or into medallions – have fun with it! I also sprinkle a little bit of coconut sugar on the banana to help caramelize and deepen the flavor a bit more – completely optional! Feel free to add more chopped pecans on top. 
  6. Bake for 30 minutes and then take it out of the oven and cover it with aluminum foil (you can cover your foil with nonstick spray).
  7. Bake your loaf for an additional 25 minutes and then test it with a toothpick, if it comes out clean you are good to go, if it does not, bake for an additional 5 minutes. 
  8. After removing from the oven, uncover your loaf and let it cool for 15-20 minutes before slicing. Enjoy on its own or slather some peanut butter on it 🙂 

Notes

  1. If your almond milk is cold you may notice that your coconut oil solidifies a bit. For this recipe that should not be an issue but it can be avoided if you leave your almond milk and eggs out to reach room temperature!
  2. Room temperature eggs work best when baking but don’t worry if you don’t have time to let them sit out!
  3. Store in an airtight container and can keep in the fridge for 5 days (although unlikely there will be any leftovers past day two)!

Namibia Night!

A while back the random country generator pulled up Namibia! We were excited to see where this food adventure would lead us, low and behold – Namibia. We had previously cooked meals from other woldat141countries that I was somewhat familiar with in terms of food culture (Thailand & Argentina) but I really had no idea what the food scene was like in Namibia, or for that matter, I really did not know much about Namibia. Along with cooking up new meals and discovering new ingredients and flavors, learning about these countries’ histories, cultures, and traditions has been a great added benefit!

After browsing a few sites we saw that many of the recipes were meat heavy and called for different game meats that we do not have access to so we would have to improvise with what was available at our local grocery store. I also initially struggled a bit to find a vegetarian dish but I quickly found a sweet treat that I knew we would be making to end the night with – FAT CAKES! With a name like that I knew they would have to be good. They are basically just fried dough and reminded me a lot of New Orleans style beignets – super light and fluffy and dusted with powdered sugar!

IMG_0755

It was kind of ridiculous how easy these fat cakes were to make that in fact I have to actively forget how easy they are to keep me from making them a weekly event!


Menu

I really enjoyed making this meal. The recipes were straightforward and although they used ingredients I was familiar with, they were combined in new ways and left me feeling like I had added new attainable recipes into my rotation! 


Namibian Dinner is complete!

Tomato Sauce: I will say the tomato sauce flavors deepened the next day and it was great with scrambled eggs and toast. It reminded me of a shakshuka or huevos rancheros situation. The same goes for the soup, although I usually find soups to be tastier the next day as all the ingredients and spices come together. 

The Fat Cake recipes that I found were all pretty similar in ingredients and in the quantity they made! Since we were just cooking for two, I halved the recipe and it worked out great! I don’t recommend making more than what you will be having that day since they are fried and if you leave them overnight they may become too soggy/oily. 

With that said, I did have some dough leftover that I stored in the fridge overnight. The following morning I mixed in raisins, cinnamon and sugar into the dough and baked at 350F for 20-25 minutes and they came out like little tasty buns – delicious with jam and butter!

IMG_0754 (1)

Namibian Spicy Peanut Soup: This was so delicious and I loved that it included so many nutrient rich foods – pumpkin/squash, chickpeas, and kale (and of course my beloved peanut butter). I mostly followed along with what the recipe said but I used cubed butternut squash in place of pumpkin. You could totally substitute it with sweet potato as well. I added some of the oshifima into my soup and it went great with it. I loved how the oshifima soaked in some of the soup broth while it kept its thick consistency. This is definitely a filling soup or could be served as a delicious side.