Lemon Chess Pie

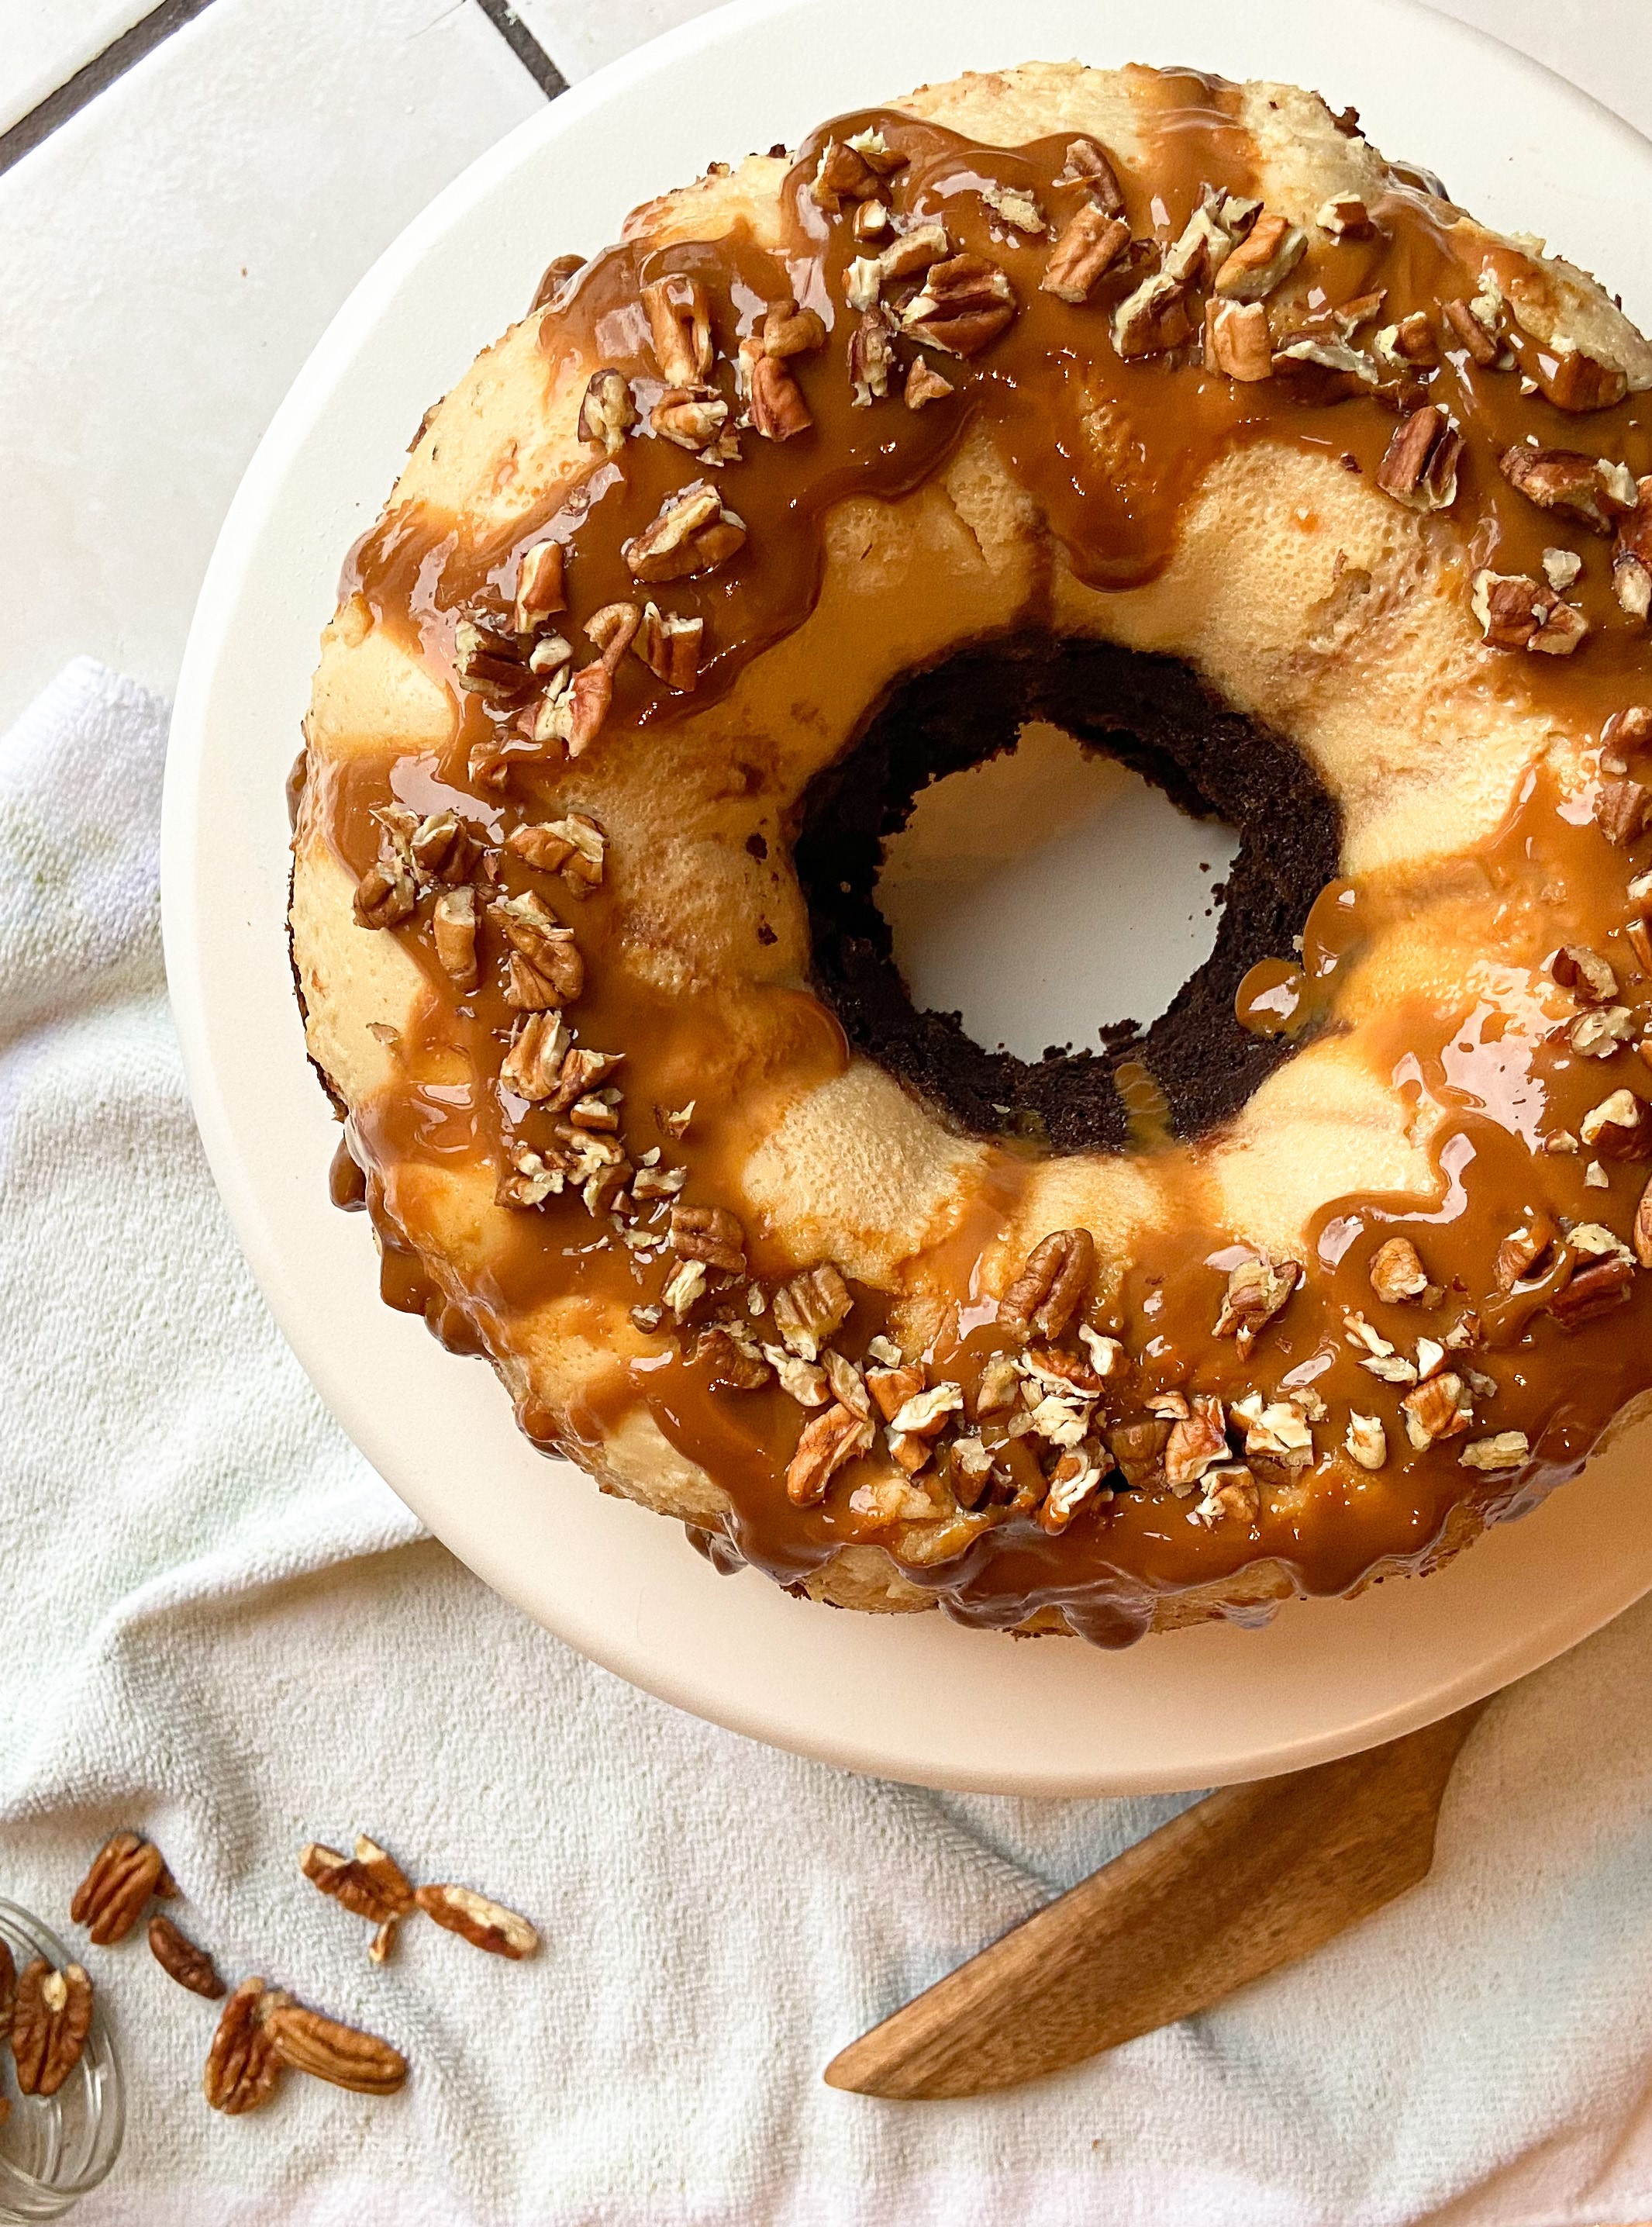
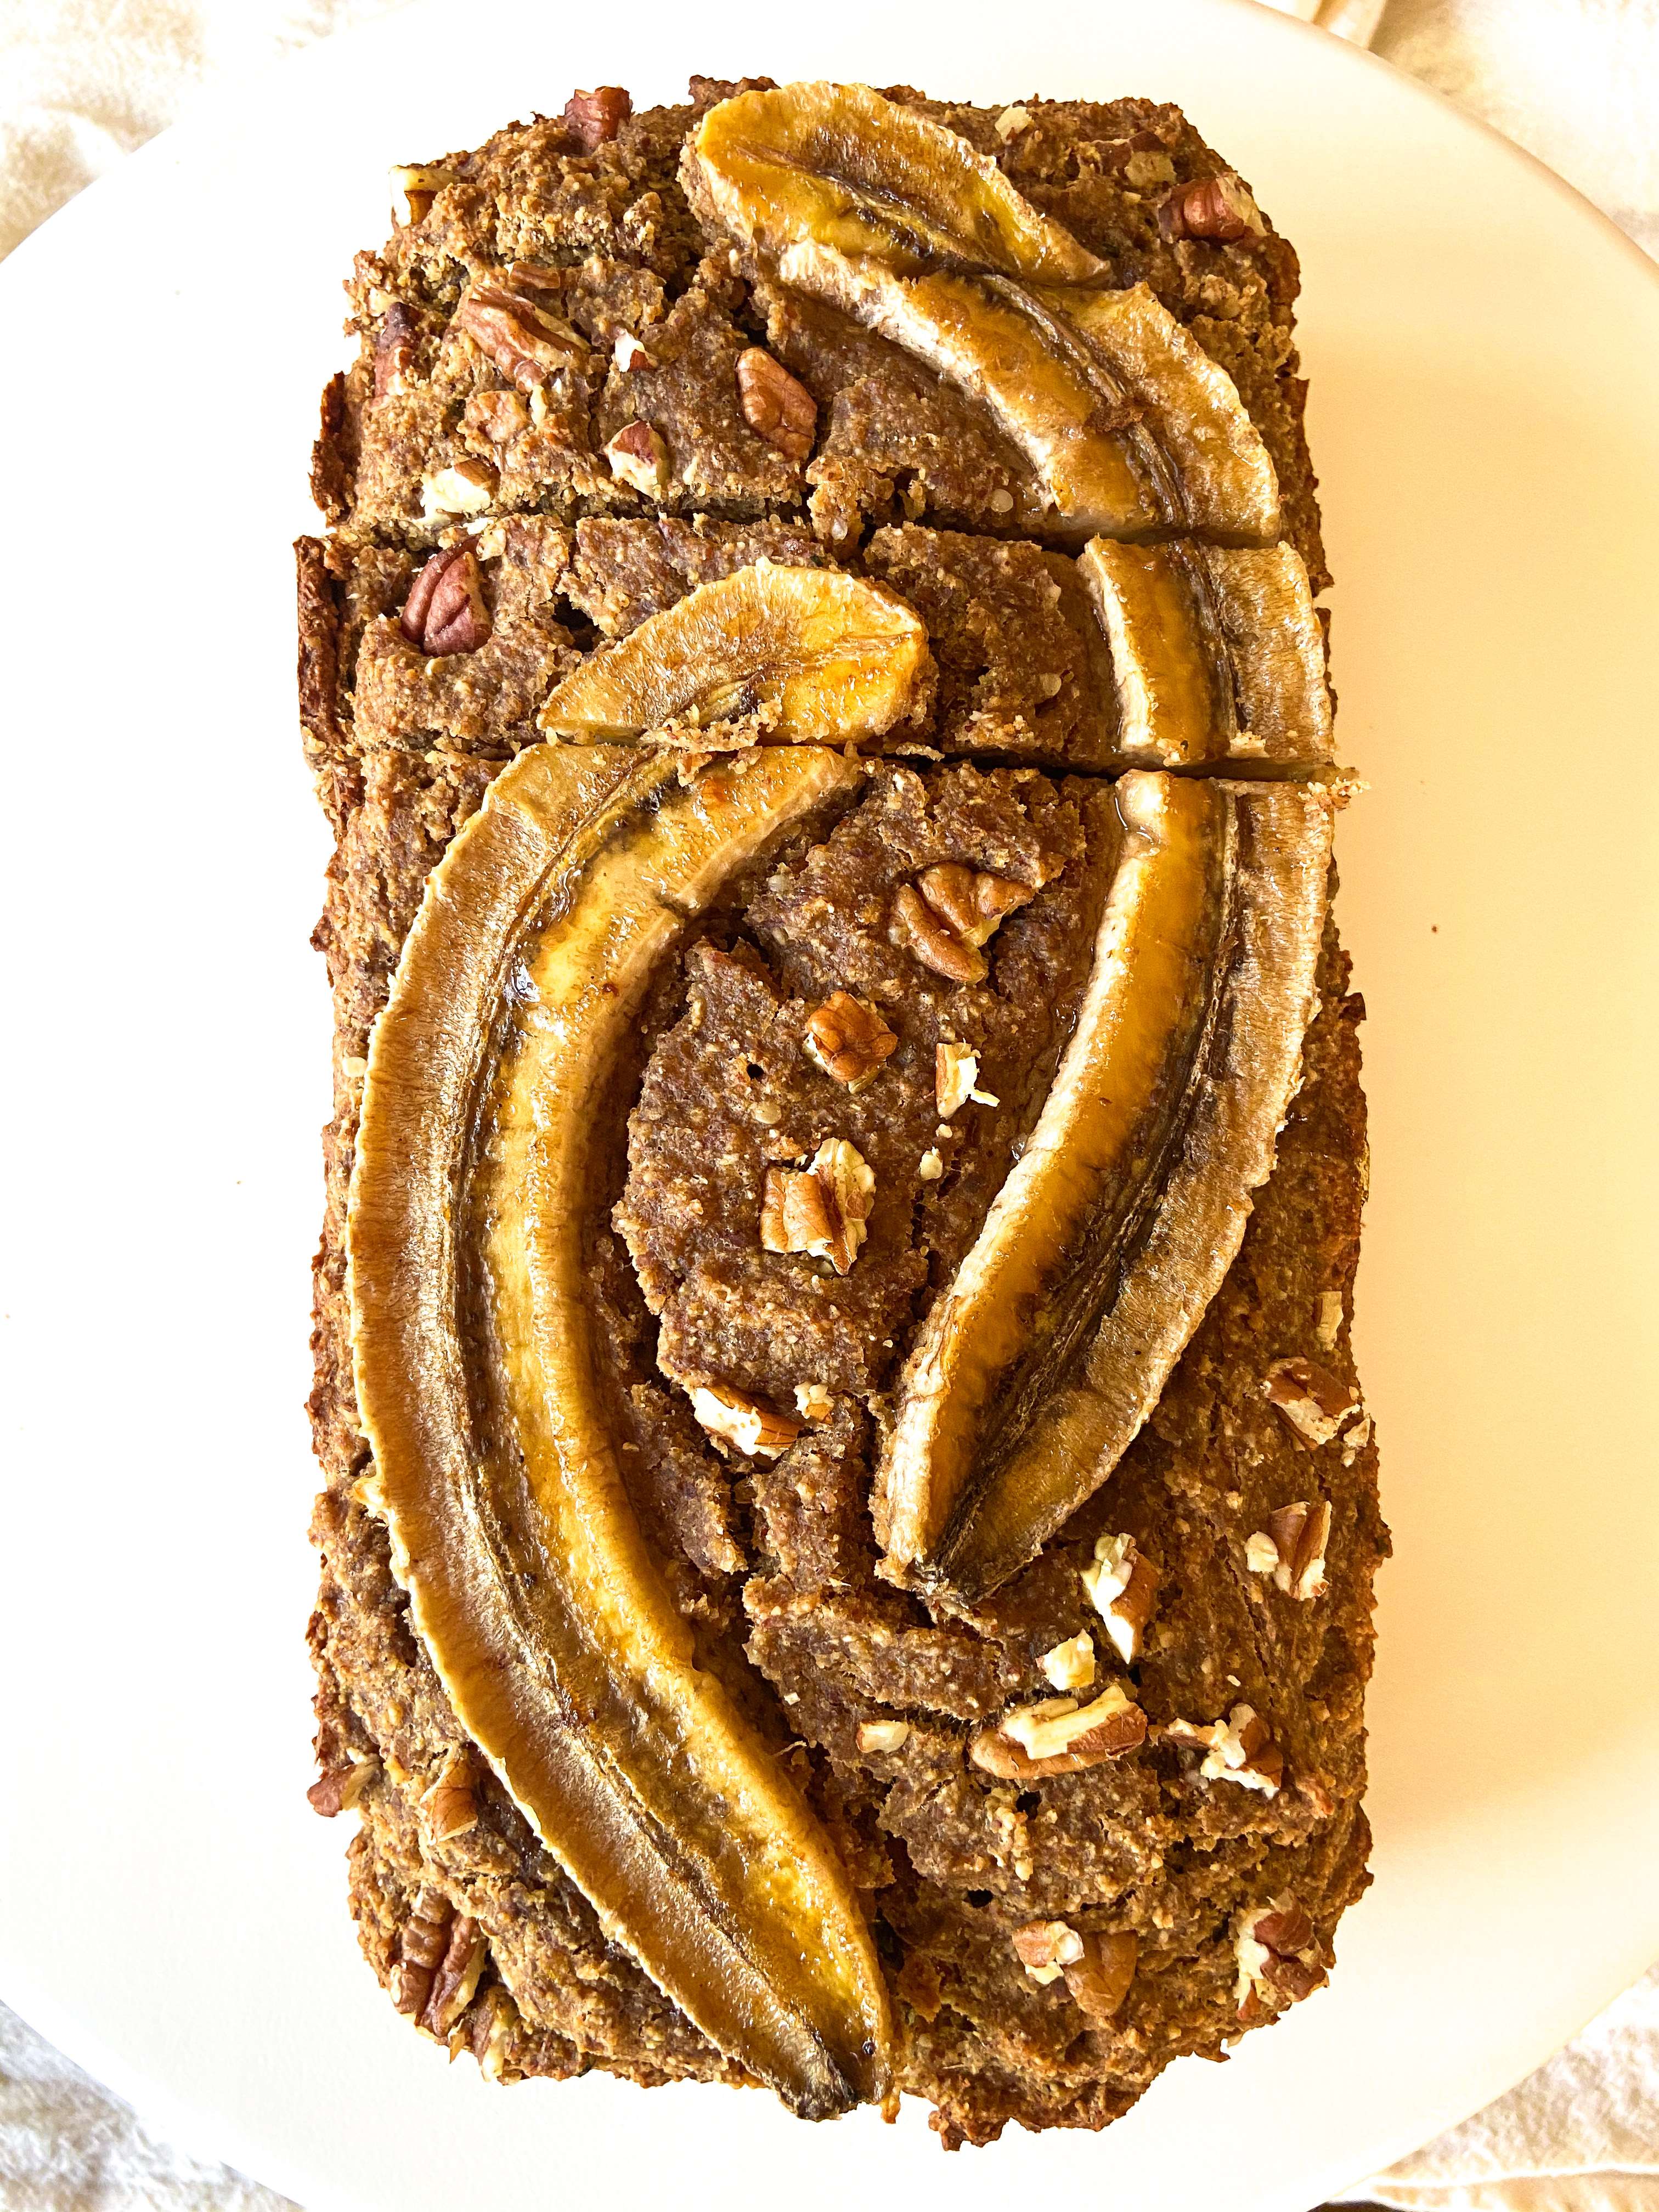
With a Mixed Berry Sauce

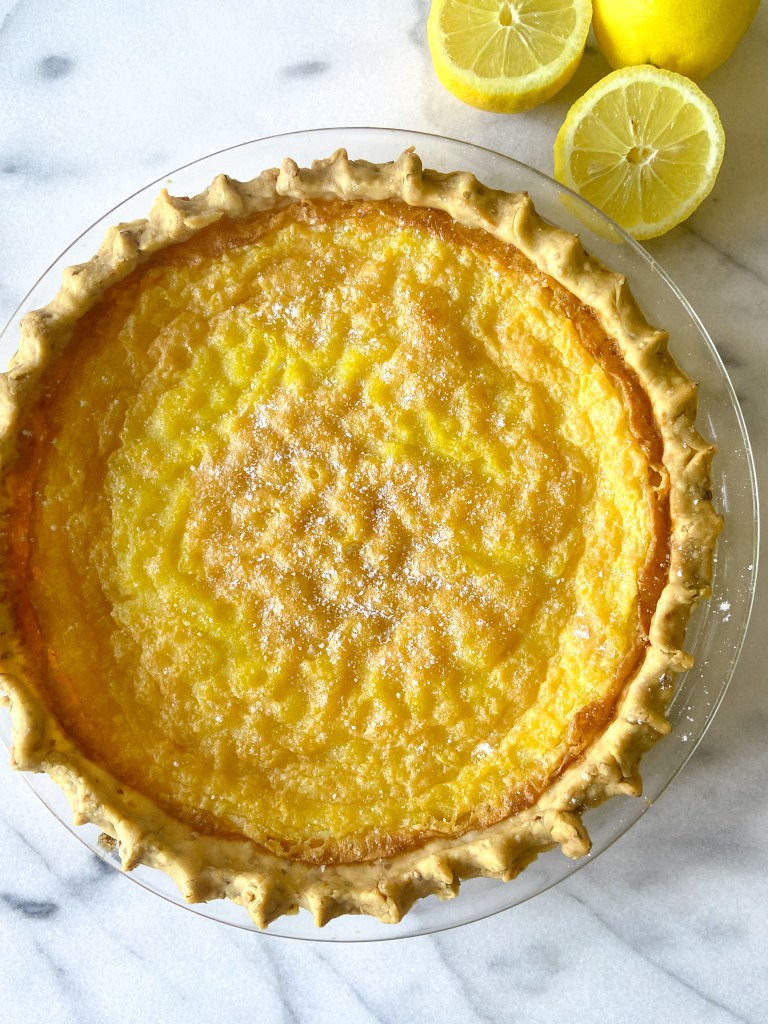
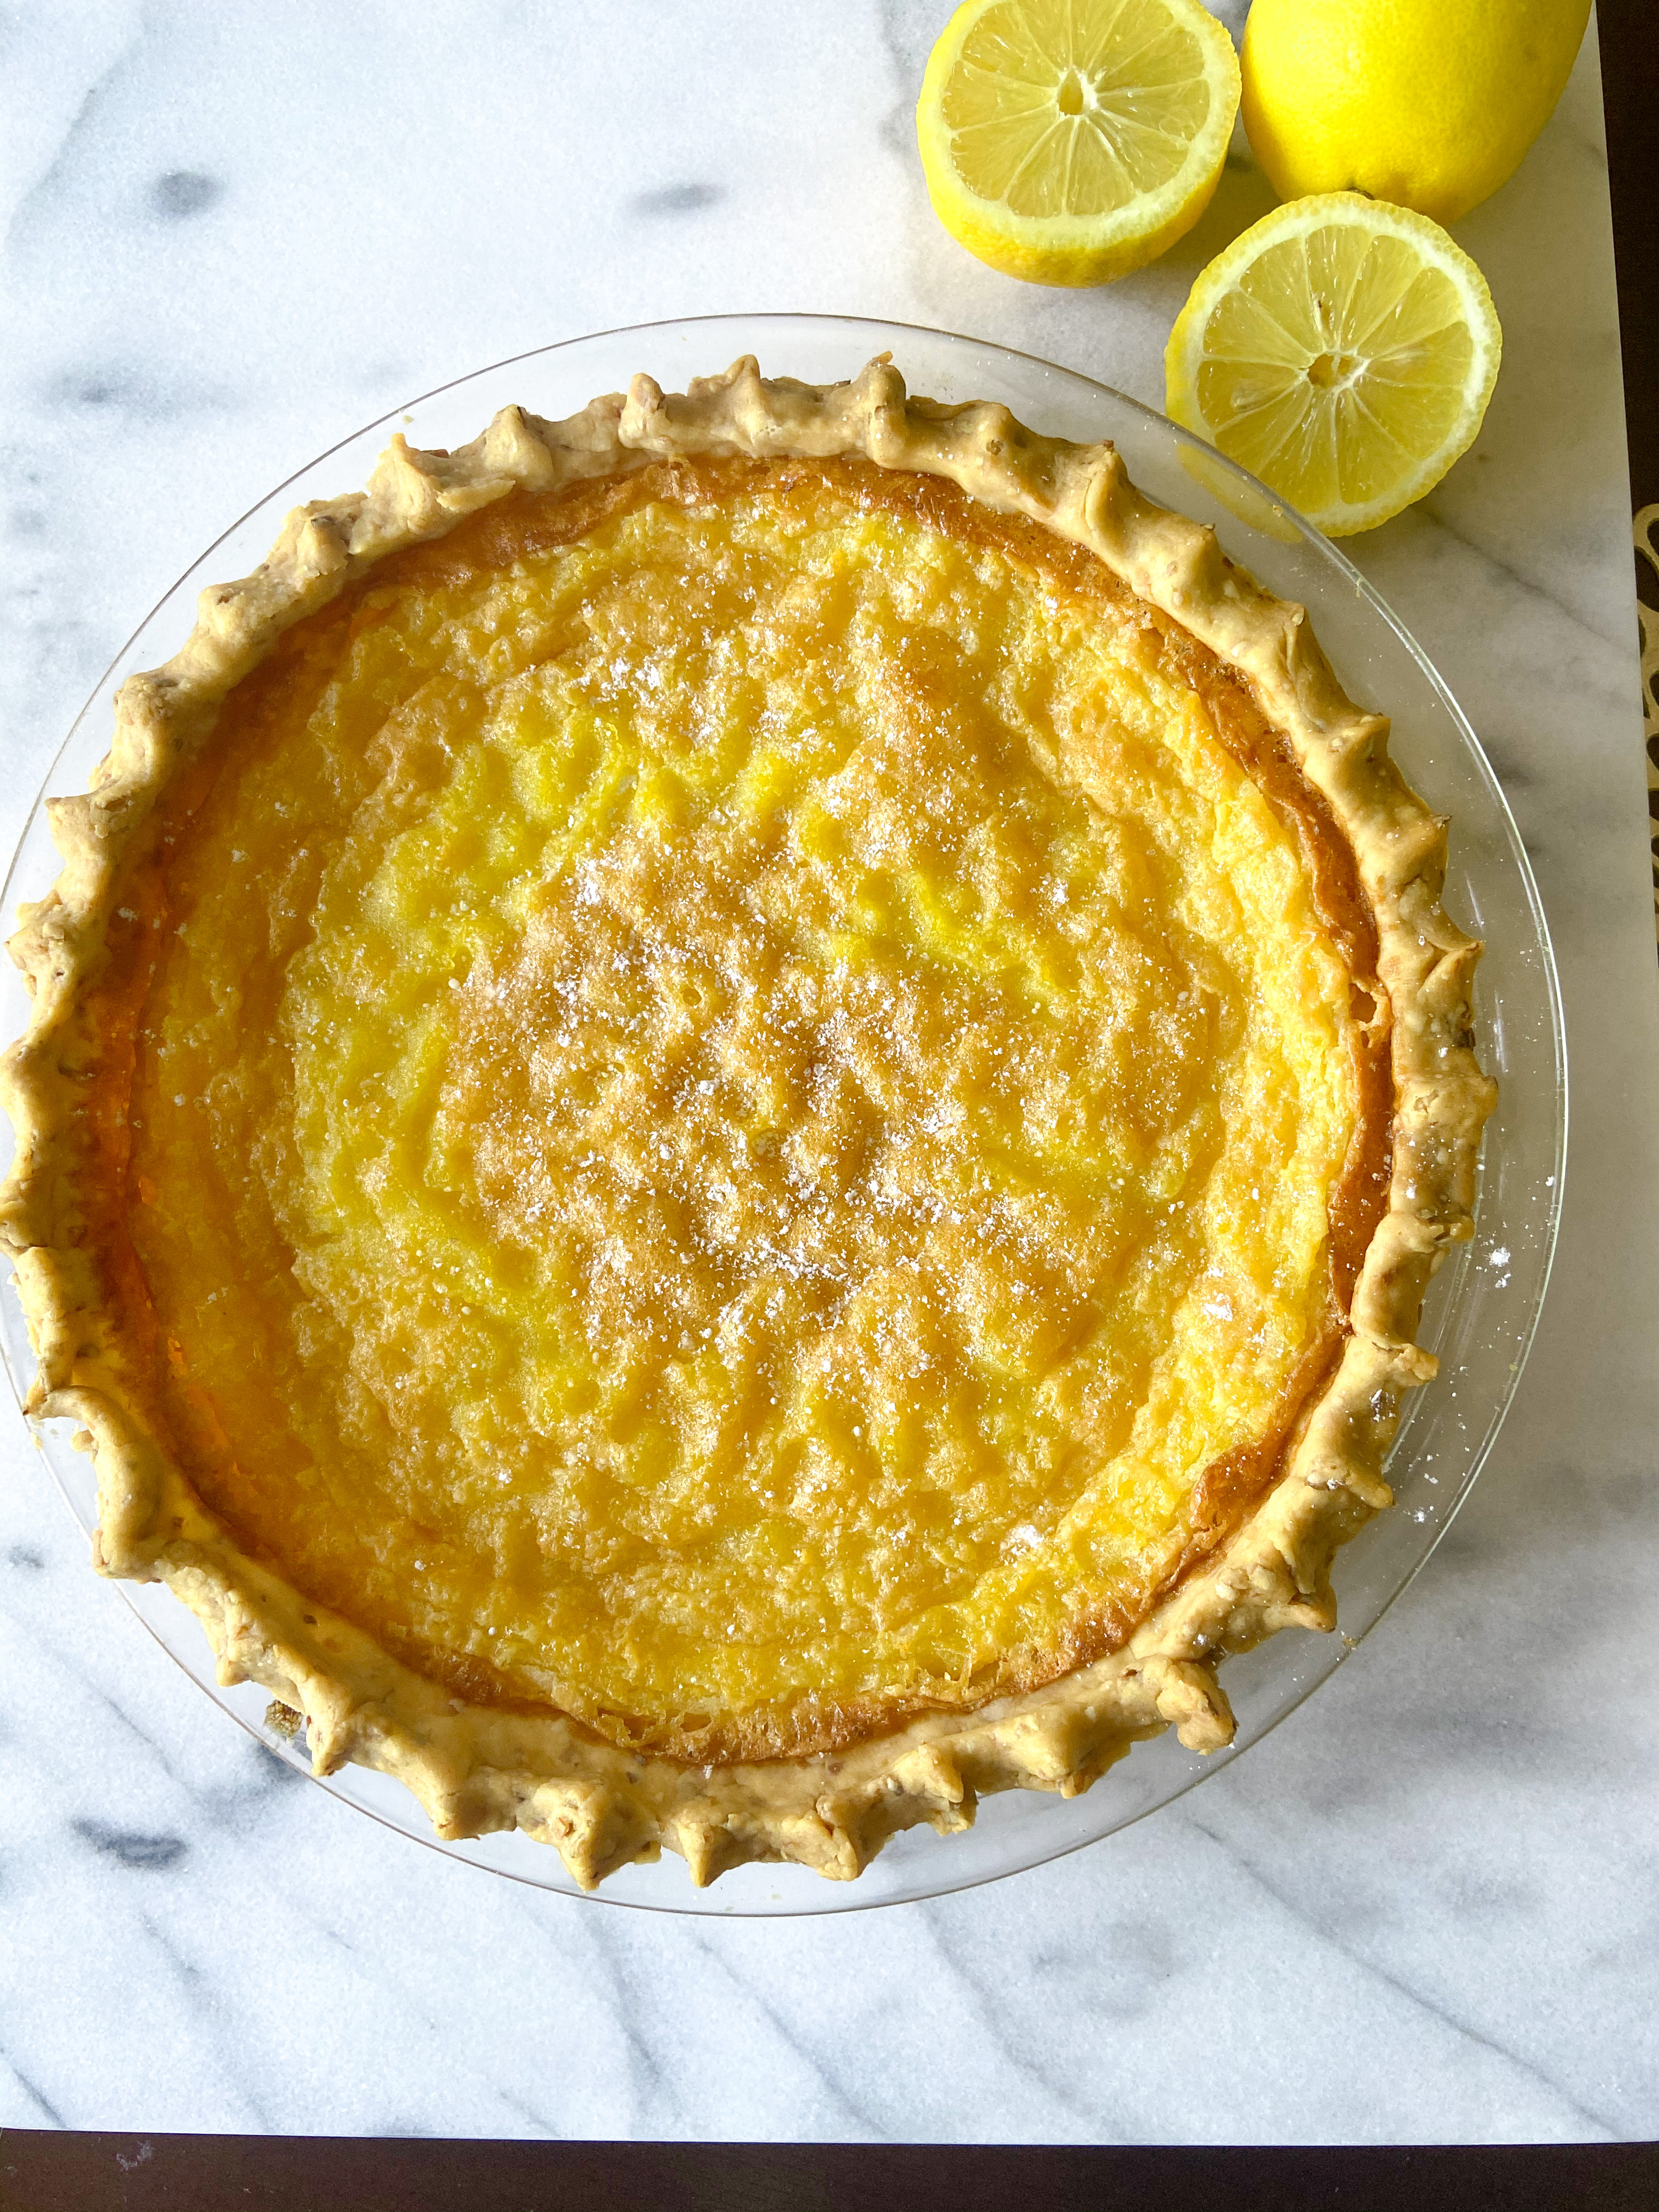
Lemon Chess Pie is somewhat new to me but it was a special birthday request so I was feeling the pressure to make sure it did not disappoint. So what exactly is it? To be honest, I think of it like a giant lemon bar – it has a smooth sweet, yet tart lemon curd filling but with a flaky pie crust.

Lemon Chess Pie is also considered to be a traditional southern dessert and it seems like the jury is still out in regards to how this pie got its name but some attribute it to the southern accent on the phrase “just pie” which sounds like “chess pie.” Regardless of the name origins, it makes for a delicious bite of lemon pie!

IMG_2221IMG_2229

I wanted to make this extra special so I wanted to make the crust fun and knowing lemon and berries go well, a berry sauce would need to accompany it. While thinking of the crust I was reminded of a cheesecake slice I had from The Cheesecake Factory a few months back that had coconut in its crust. It was absolutely amazing and went well with the mango cheesecake. Since this pie would have similar bright fruit flavors like the cheesecake did, I decided to make it with a shredded coconut flaky buttery crust. The coconut flavor is not as strong but it adds a nice textural element to this pie. If coconut is not your jam, feel free to use your favorite pie crust recipe in its place.

IMG_2244

IMG_2270

IMG_2282


Ingredients

Crust

  • 1 cup all-purpose flourimg_2253
  • 1/2 cup unsweetened shredded coconut
  • ⅓ cup cold butter
  • Pinch of salt
  • 5 tbsp of cold water

Filling

  • zest of 1 large lemon
  • juice of 1 large lemon, about 3 tablespoons
  • 1 1/4 cup white sugar
  • 1 tsp vanilla 
  • 1/2 tsp lemon extract
  • 6 medium eggs (or can use 5 large eggs)
  • 1/2 cup unsalted butter, melted and cooled
  • 3 tablespoons cornmeal 
  • pinch of salt 

Mixed Berry Sauce

  • 1 1/4 cup frozen mixed berries 
  • 1 1/2 tsp sugar
  • 1/2 lemon juiced
  • 1 tsp cornstarch, dissolved in 1 tbsp water
  • 2 tbsp water

Directions

  1. Preheat your oven to 400F and make sure you have a 9-inch pie dish handy.
  2. First prepare your dough for the pie crust.

  3. In a food processor combine the flour, shredded coconut, and salt. Mix until the coconut shreds and flour are well combined.

  4. Dice up your cold butter into cubes and then add to the food processor. Pulse until the dough comes together. It will first look like pieces of wet sand, once it gets to that stage, you can dump out the contents onto a lightly floured surface and knead it together until it forms a ball. 

  5. Gently roll out your dough, starting from the center outwards, applying even pressure. You will want to rotate your dough clockwise after every couple of passes to keep a circular shape. Keep turning and rolling your dough until it is about 1/8 of an inch thick or about the thickness of two quarters stacked on top of each other.
  6. Once you have the dough at the desired thickness, gently roll it onto your rolling pin to transfer it to your pie pan. Gently lay the dough onto your pie pan and press it into the bottom and the edges of the pan.
  7. Prick the bottom of your pie crust with a fork 5-6 times. This will help keep the crust from puffing up too much. 

  8. You can cut off any excess dough that is hanging off the side. You can crimp the edges or simply leave it as is, or make a decorative border by gently pressing the edges of a fork around the dish.

  9. Bake at 400F for 15-18 minutes, until the crust is a light golden color. 

  10. Take out the oven and turn down the heat to 325F. 

  11. While the pie crust is baking you can begin to prepare your filling by whisking together the following ingredients until well combined and smooth: eggs, sugar, vanilla, lemon juice, lemon zest, lemon extract, cornmeal, and salt. 
  12. Pour the filling into the pie crust. 
  13. Bake for 40 minutes. The center will not be completely firm when you take it out. The top should have a light golden color but the center will still jiggle a bit. It will completely set as it cools. 
  14. Cool on a wire rack for 3 – 4 hours and then refrigerate until you are ready to serve it. 
  15. While the pie bakes, you can prepare your berry sauce. 
  16. In a small saucepan, combine your berries, water and sugar. Once the berries begin to pop, add in the dissolved cornstarch. Mix well and keep heat at a simmer. Add in lemon juice.
  17. Keep the berry sauce at a simmer until it has reached your desired consistency. If needed add more water, 1 tbsp at a time.
  18. Can be served warm or cooled and stored in the fridge. 
  19. Serve your lemon chess pie after it has completely cooled. Can be served on its own or with some dusted powdered sugar. Serve the berry sauce on top or on the side, also great with whipped cream!

Kazakhstan


This meal is brought to you from Kazakhstan! Besides knowing that the controversial film Borat was about a character from Kazakhstan and that it is located geographically caucasus_cntrl_asia_pol_2003next to Russia, I knew very little about this country. After doing some research I rounded up some interesting facts: 

  1. Kazakhstan became its own country on December 10, 1991. 
  2. Over 100 different nationalities make up the population of Kazakhstan – this totally transfers over to the cuisine.
  3. It has a population of over 18 million 
  4. There are three different “New Years” that are celebrated in Kazakhstan – January 1, January 14, and March 22.
  5. It is the largest landlocked country! It is bordered by  is bordered by Russia, China, Kyrgystan, Uzbekistan, Turkmenistan, and the landlocked Caspian Sea. 
  6. It is the ninth largest country in the world!
  7. It is believed that this is the first place where horses were domesticated and rode on.
  8. Not surprising after fact 4, but Kazakhstan also has more horses than women.
  9. We can thank this country for apples – it is were they were first cultivated! 
  10. Russian is the official language. 

This Kazakhstan meal was so much fun to make – it was definitely a time consuming meal but it was well worth it. While researching the various foods of Kazakhstan I did IMG_2349
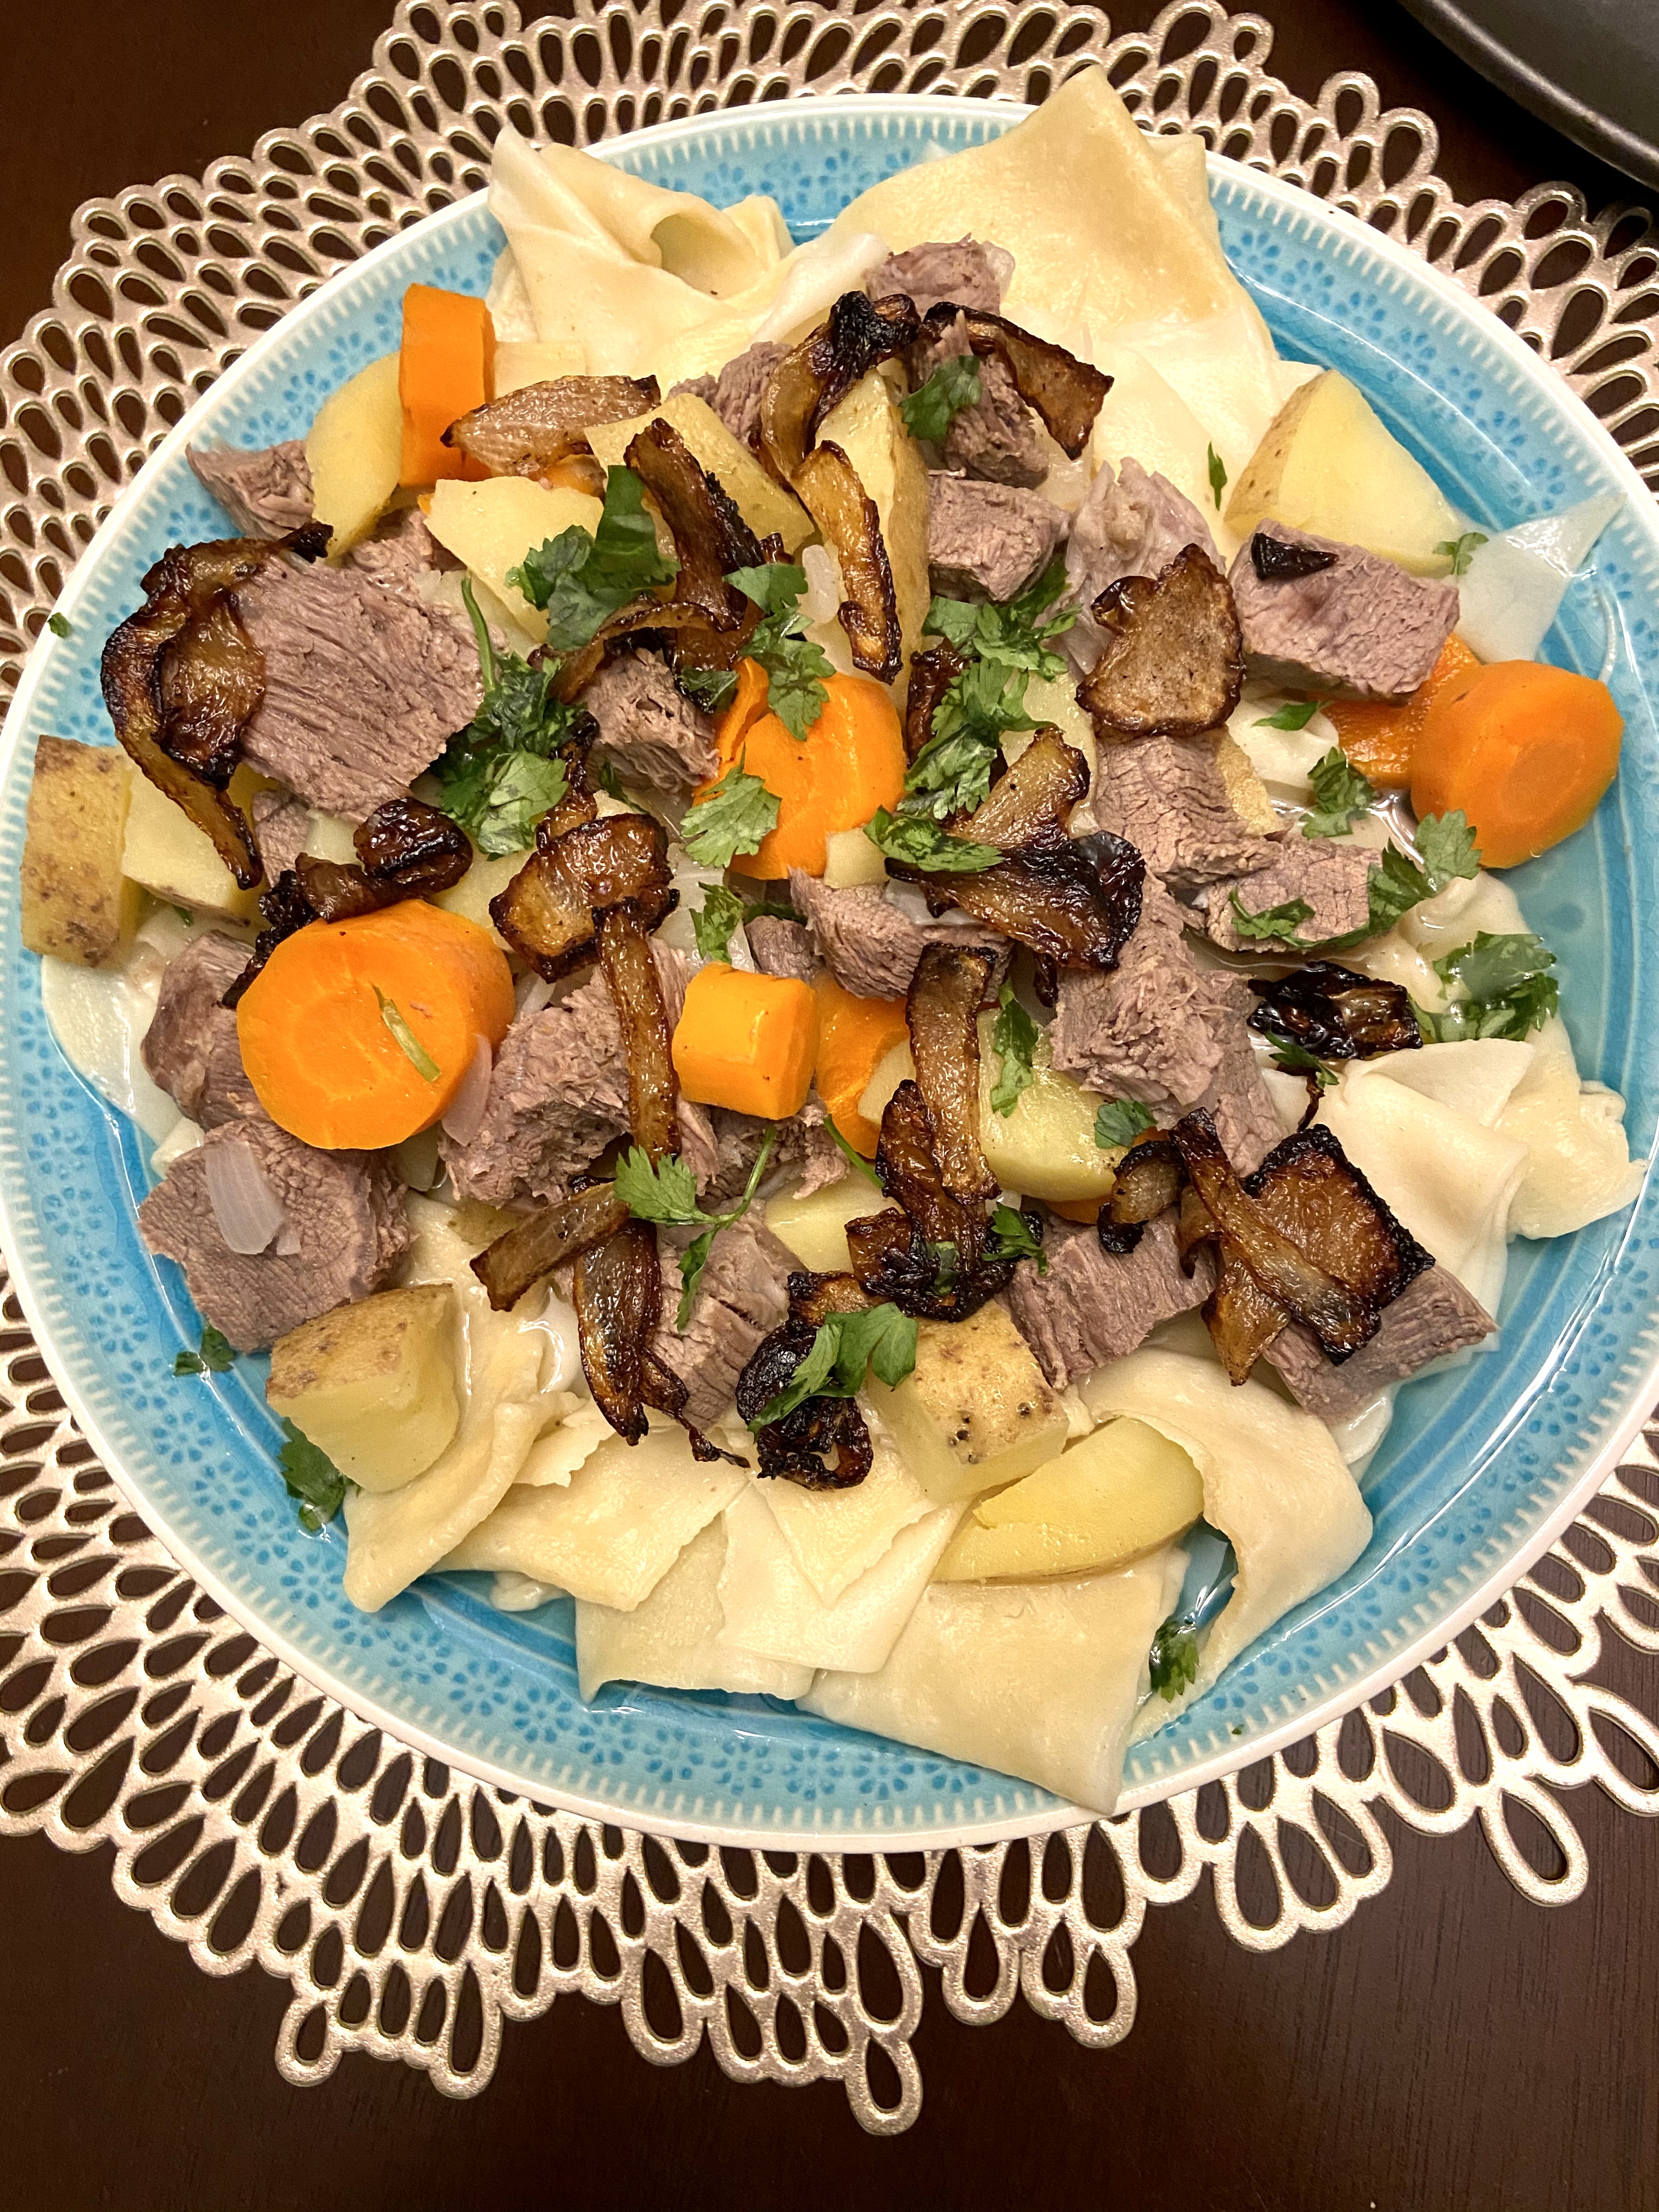
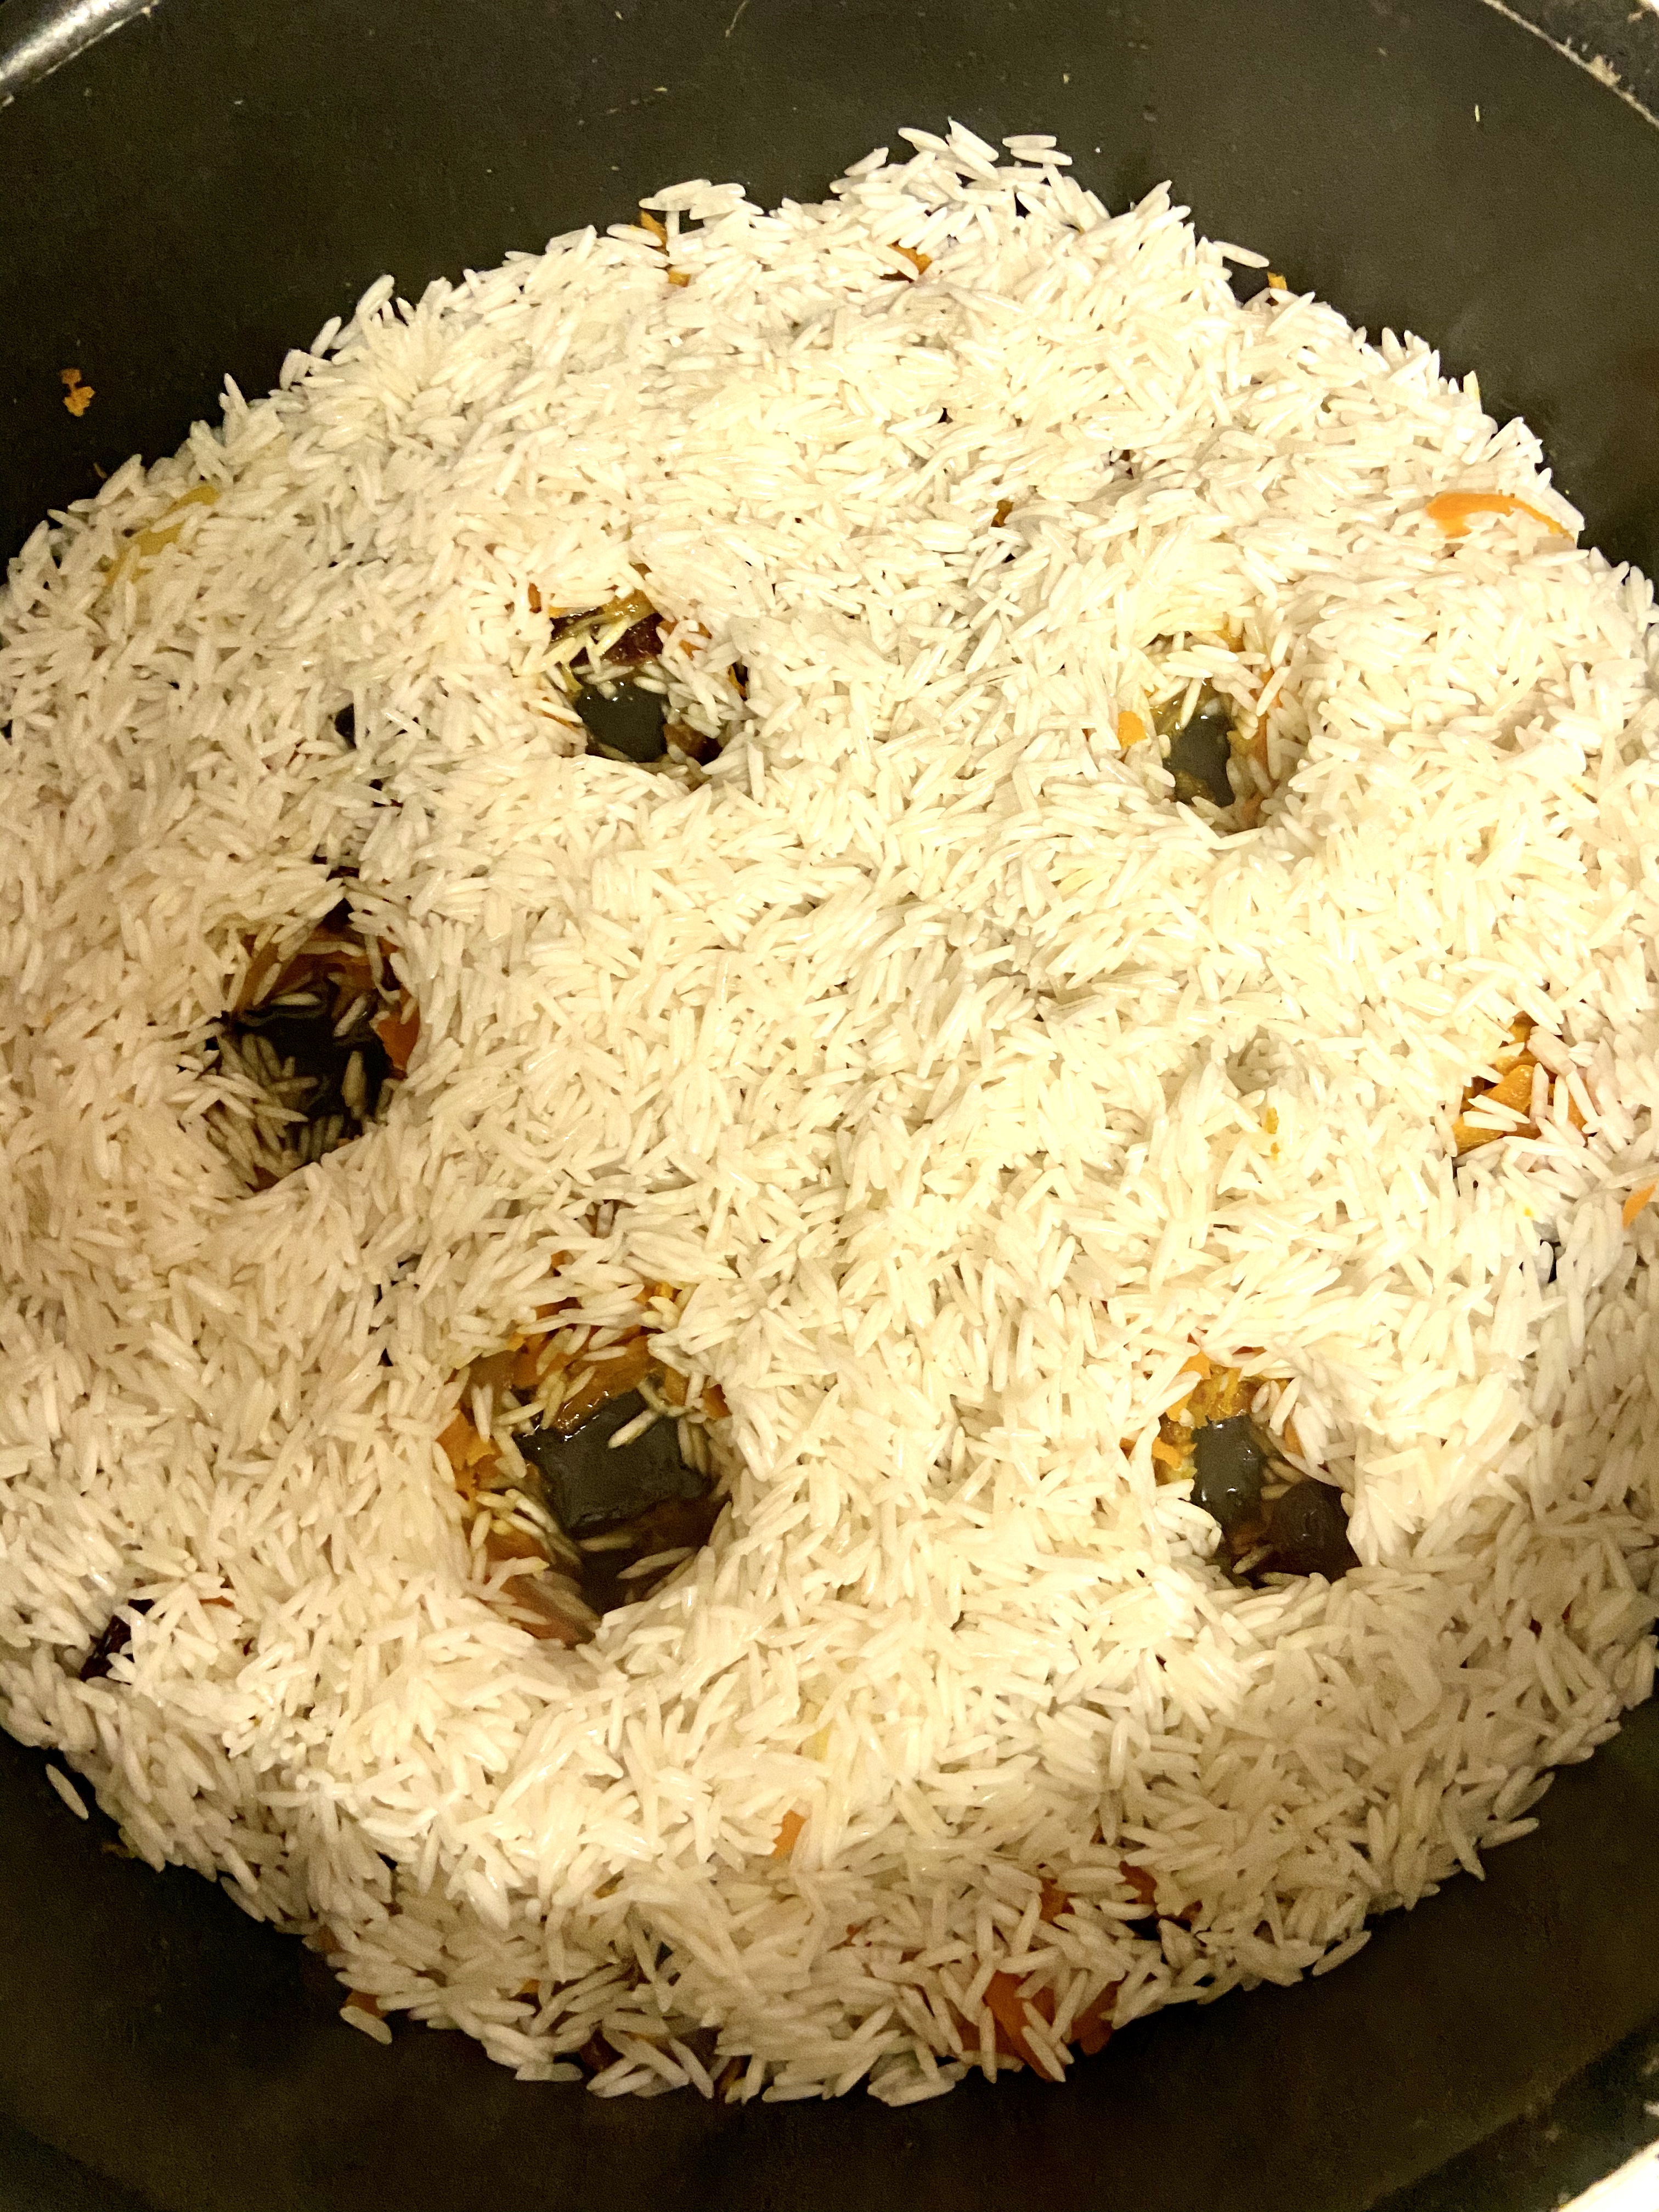
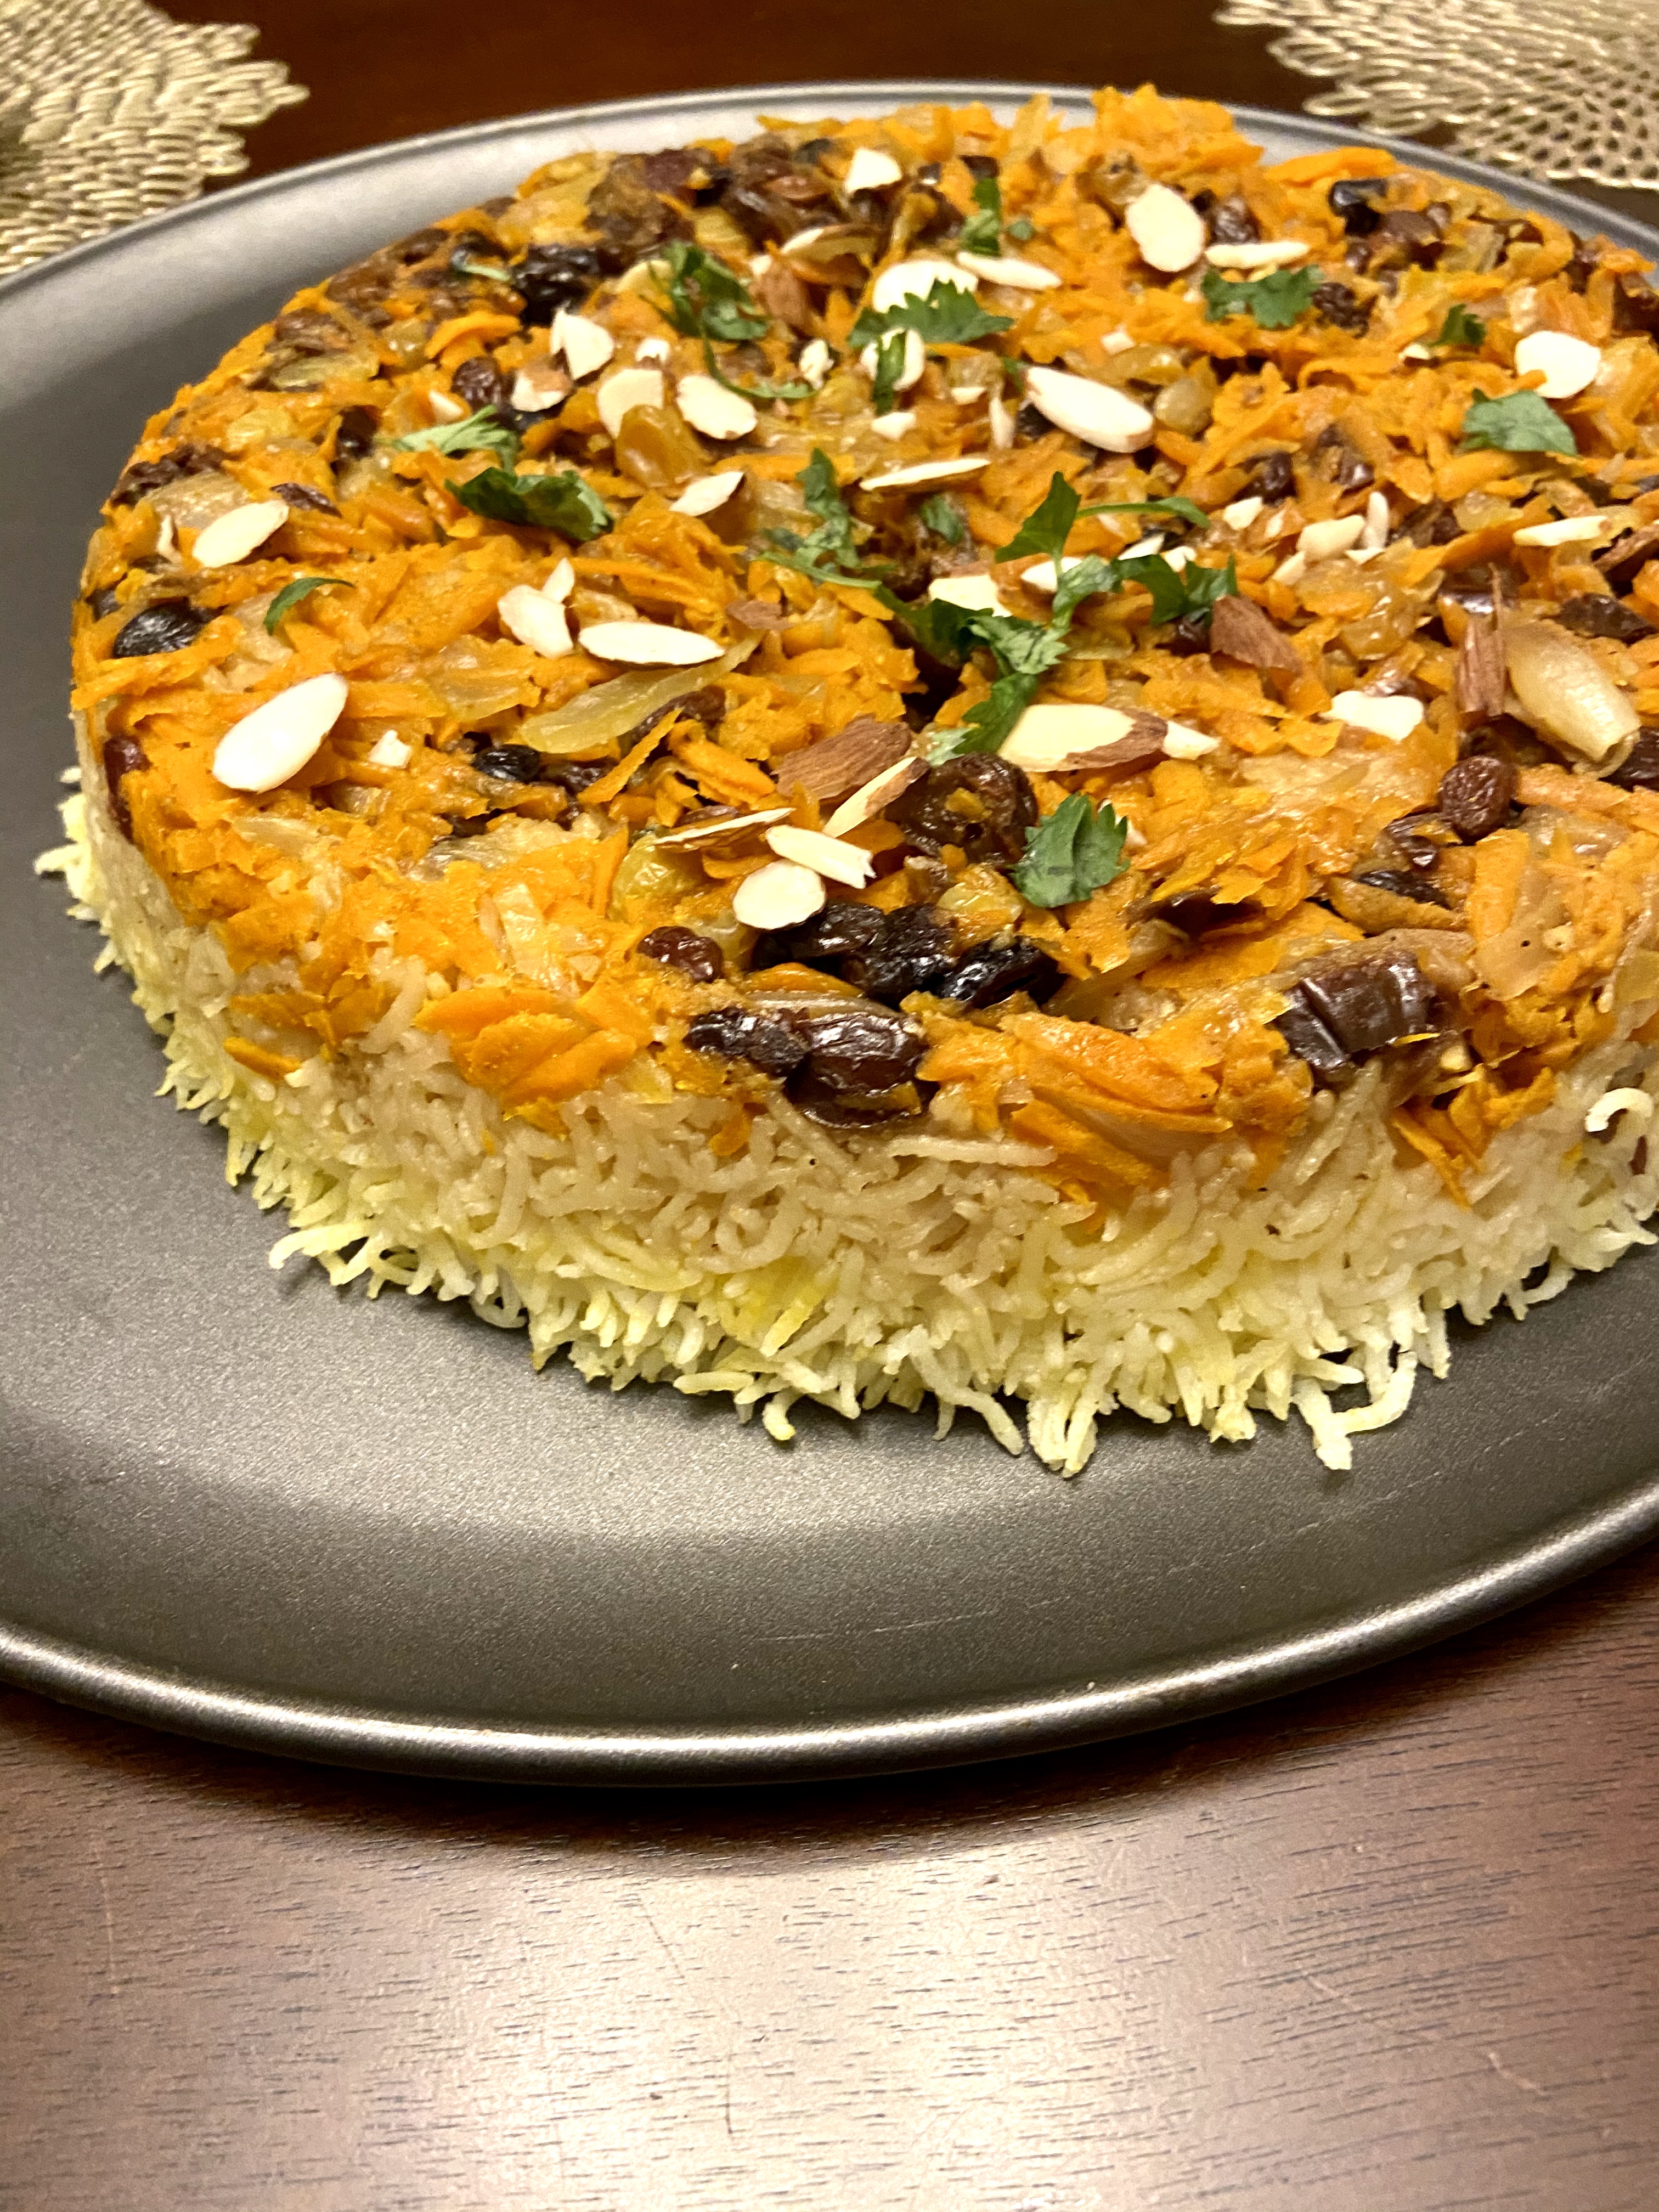
find that many were meat heavy, however, I think this may have led to one my favorite rice dishes – a jeweled vegetarian rice plov– it is definitely the most beautiful rice dish I have ever made. Traditional plov usually contains meat, lamb being a popular choice and most don’t have such a medley of dried fruits but I can’t imagine this dish without them!

The other vegetarian dish that I made were vegetarian manti. Manti are like Kazakhstan steamed dumplings, again usually stuffed with a meat filling but I opted for  a mushroom kale filling. They were so good! I served them with a tomato and yogurt sauce and that really took them to another level. I was surprised by how such simple ingredients came together to make such a tasty meal!

The third component of this meal was an impressive feat – Beshbarmak! This is a traditional meal that kept coming up in all of our research and the name of it directly translates to “Five Fingers.” The dish is composed of meat, potatoes, veggies, homemade pasta, and broth. The “five fingers” translation originally made me feel some kind of way, but I read that it got its name because it was traditionally eaten with one’s hands and the broth component was served on the side like a soup- which now makes the name make so much more sense. However, many in Kazakhstan now eat the  meat, veggies, pasta with the broth so it is no longer eating with one’s hands.


Menuimg_2346


Beshbarmak

The Beshbarmak recipe was followed as written out in the recipe linked above. It was definitely a dish that required lots of different skills and time to make but nonetheless it was a cooking experiment! Although I did not try this dish, it was fun making the dough and I loved how colorful the dish turned out. 

IMG_2339
Fresh dough ready to be boiled and cooked!


IMG_2343
Finished Beshbarmak topped with crispy onions!

Vegetarian Rice Plov

Recipe 
  • 2 cups of basmati rice, rinsed
  • 1 onion, finely chopped 
  • 2 carrots, shredded
  • 2 inch knob of fresh ginger, finely diced
  • 2 tsp ground coriander
  • 3 tsp salt
  • 1/2 tsp ground pepper 
  • 1 tsp ground turmeric 
  • 1/2 cup raisins
  • 1/2 cup diced prunes
  • 1/4 cup cranberries 
  • 1/4 cup golden raisins
  • Approx 3 – 4 cups of water
  • 2 tbsp oil (avocado, olive or coconut oil)
  • sliced almonds for garnish
  • cilantro for garnish 

Directions: 

  1. Rinse your basmati rice well and let soak for at least 30 minutes
  2. Prep your veggies -finely chop your onion, peel and grate/chop the ginger, and shred the carrots.
  3. Chop your dried fruits so they are all around the same size – this may only be necessary for prunes and raisins if they are large. 
  4. In a large pan (pick one with a lid) heat up your oil and then add onions. Let them cook for a few minutes. 
  5. Add ginger, ground coriander, black pepper, turmeric, shredded carrots and 1 tsp of salt to cooked onions. Saute for 5 minutes until carrots soften.
  6. Add your dried fruit to the pan and cover with just enough water to cover the fruit/carrot mix. Let cook for 5 minutes and then add 2 tsp of salt and mix well.
  7. While the fruit softens, drain the rice and rinse through one last time.IMG_2329
  8. Add the rice to the pan. DO NOT MIX!!!
  9. Make 5 – 6 holes/wells in the rice. This can be done with the end of a wooden spoon. Add in 1 tbsp of oil and water to cover the rice. You’ll want to try to add the water and oil in the holes you have created. You will want the water to fully cover the rice and rest 1 – 1 1/2 inches above the rice.
  10. Cover the pan – if you have a clear lid that will work best. Turn the heat to med-low and let cook for 35-40 minutes. If you are unsure if you added the right amount of water check around 25 minutes. If the rice looks like it has soaked up all the water add about 1/2 cup of more water. 
  11. After 40 minutes check to see if the rice is done. It should be light and fluffy. If it is still under-cooked – cook for 5-10 more minutes. After the rice is done cooking let it rest for 10 – 15 minutes with the lid on. IMG_2337
  12. This next step is optional but HIGHLY recommend it- you’ll transform this dish from a tasty side to a showstopper. 
  13. Grab a flat serving dish that is larger than your pan. You will flip your rice pan onto the serving dish, like you would flip a cake. 
    1. Cover your rice pan with your serving dish.
    2. Holding the serving dish tightly over the rice pan, quickly flip the pan over.
    3. Place your serving dish on the counter/table with the pan over it.
    4. Gently tap on top of the rice pan to loosen up the rice. 
    5. Lift your pan and you should have your beautiful plov – the dried fruits and carrots should be on top.
    6. Garnish with almonds and cilantro!

IMG_2341

Recipe adapted from here.


Manti

I followed this recipe when I was making the manti. I added kale and garlic powder to my filling just to make it a little more robust. The recipe also calls for oven roasting the mushrooms but I just sauteed them in my pan they turned out great. I also added some paprika to my finished tomato sauce and dish. While grocery shopping I could not find specific dumpling wrapper but so I used wonton wrappers and they turned out great steamed!

IMG_2327
Added kale to my onion and mushroom filling to make them a little more robust. 
IMG_2331
Add about a tablespoon into the center of each wonton/ dumpling wrapper. Dab the edges with water to help them stick when making the seal.
IMG_2332
You can shape them however you see best but I found this shape to work best!
IMG_2340
Steam for 10 minutes and serve with yogurt and tomato sauce and a little extra paprika! Enjoy!

Carrot Zucchini Muffins

Confession, sometimes I have a hard time falling asleep because I have so many recipe ideas running through my head or I’m super excited to bake something the next day (pretty strange I know!). Well that was definitely the case with this recipe. I knew I had some zucchinis in the fridge that I needed to use up and I originally thought to make a zucchini walnut loaf which I was pretty excited about but then I decided to switch it up to muffins.

IMG_2369


The next day I wanted to add a carrot cake vibe to these muffins and decided to add in shredded carrots, raisins and lots of spices! After tasting the first one I was hooked – a little butter and honey took them to the next level. These muffins are not too sweet that they could make the perfect breakfast complement to some fruit or a quick snack. 

IMG_2364


IMG_2368

However I knew they could also be a great sweet treat or dessert with a little frosting. Going with the carrot cake inspo, I decided I’d go with a cream cheese frosting. If you would like a sweeter muffin, this cream cheese frosting perfectly complements these muffins. This frosting recipe below is just enough for 4-5 muffins, so if you would like them all frosted just double the recipe! 

IMG_2453


Recipe

Ingredients

Wet Ingredients

  • 1 cup shredded zucchiniIMG_2388
  • ½ cup shredded carrot
  • 3 medium eggs (can use 2 large eggs)
  • 3 tbsp applesauce 
  • 2 tbsp olive oil or melted coconut oil
  • 1 tsp vanilla
  • ½ cup coconut sugar

Dry Ingredients

  • 1 ½ cup gluten free flour (I like Bob’s Red Mill)
  • 1 tbsp cinnamon
  • ½ tsp nutmeg
  • ½ tsp ground ginger
  • ¾ tsp baking soda
  • 1 tsp baking powder
  • ¼ tsp salt
  • ½ cup walnuts
  • ¼ cup raisins

Maple Cinnamon Cream Cheese Frosting

  • ¼ cup cream cheese – softened
  • 1 tsp cinnamon
  • 1 tbsp maple syrup
  • 1 tsp vanilla
  • Walnuts for topping

Instructions

  1. Preheat your oven to 350F and line a muffin tin. You should have 12 standard muffins from this recipe. 
  2. First you will want to remove excess liquid from your shredded zucchini. I like to leave the skin on the zucchini for some extra color! Once you measure out a cup of shredded zucchini you will wring it out to remove extra liquid. You can do this by using a cheesecloth or lining up a couple of paper towels and placing the zucchini in the middle of them, bundle it up and squeeze. Once you have the zucchini wrung out, place it in a large bowl with your shredded carrots. 
  3. Add in wet ingredients to shredded carrots and zucchini: eggs, applesauce, oil, and vanilla until well combined. 
  4. Add coconut sugar to the wet ingredient mixture and mix until well combined.
  5. In a separate bowl, whisk together the dry ingredients: flour, baking soda, baking powder, cinnamon, nutmeg, ginger, and salt. Combine until you can tell the spices are evenly mixed into the flour. 
  6. Add in dry ingredients to the wet ingredients. Do not overmix. The batter will be a bit thick. 
  7. Fold in your walnuts and raisins. 
  8. Use a ¼ c measuring cup to fill your muffin tin. This recipe makes 12 muffins, but you can definitely make 9-10 larger ones. 
  9. Bake for  25 – 28 minutes, around 25 minutes, check to see if they are done with a toothpick, if it comes out clean, they are done. If there is still batter on the toothpick, leave in the oven for a few more minutes. 
  10. Let cool for a few minutes. Store in an airtight container for 4-5 days.

Optional frosting:

First make sure your cream cheese is softened/room temperature. Using a hand blender or stand mixer, mix together all frosting ingredients until it is smooth and creamy: cream cheese, maple syrup, vanilla, and cinnamon. Make sure your muffins have completely cooled before frosting them. I like to top my muffins with extra muffins. 

Superseed Pecan Banana Bread

This banana bread features an amazing banana bread mix made by Simple Mills. Simple Mills is a Chicago based brand that makes such a great and ever expanding line of cake and bread mixes, cookies, crackers, and frostings with REAL ingredients that you can actually pronounce.

When I first looked at the ingredient lists of a few different products I couldn’t believe how short and not confusing the ingredient list was. When I got my hands on the Banana Bread and Muffin Mix I was excited to spruce it up and enhance its already goodness! 

IMG_2107 (1)

I added some of the typical seeds I would throw into my other baked goods and topped it with an additional banana and pecans for that extra flavor! I followed the baking instructions from the box. I usually don’t cover my loafs with foil halfway through the cooking process, in fact I try not to open the oven at all while something is baking, but I figured they knew what they were talking about and they sure did! The loaf came out great when baked as instructed!

Superseed banana bread batter

IMG_2094

This loaf did take a little longer to cook but that can be expected since it was in the oven at 325F. I typically cook my baked goods at 350F, but again, I followed what the Simple Mills’ experts directed me to do! It was well worth the wait!

IMG_2113


Recipe

Ingredients

Dry Ingredients

  • 1 Simple Mills Banana Bread and Muffins box
  • ½ c ground flax meal  IMG_2110
  • 1 ½ tsp cinnamon
  • 1 tbsp hemp seeds 
  • 2 tbsp chopped pecans 

Wet Ingredients

  • 1 ripe banana
  • 2 eggs
  • ½ c + 2 tbsp unsweetened almond milk 
  • 2 tbsp melted coconut oil
  • 1 tsp vanilla extract 
  • 1 tbsp chia seeds

Toppings (optional)

  • 1 whole banana 
  • Pinch of coconut sugar 
  • 1 tbsp chopped pecans

Instructions

  1. Preheat your oven to 325F and line your loaf pan with parchment paper, set aside. 
  2. In a large bowl, mash your spotty ripe banana and then add in wet ingredients until well combined: eggs, almond milk, vanilla, and melted coconut oil. Mix in chia seeds and let sit for a couple minutes to let the chia seeds expand a bit. 
  3. In a medium size bowl, mix your dry ingredients together: Simple Mills mix, cinnamon, flax meal, cinnamon, and hemp seeds. Mix until well combined. 
  4. Add your dry ingredients to your wet ingredients. Mix until just well combined and there are no clumps of dry ingredients. Gently fold in chopped pecans. The batter will be a bit thick but that’s okay!
  5. Pour your batter into your prepared baking pan. I like to top mine with a sliced banana and a few more pecans. You can slice your banana lengthwise in half or into medallions – have fun with it! I also sprinkle a little bit of coconut sugar on the banana to help caramelize and deepen the flavor a bit more – completely optional! Feel free to add more chopped pecans on top. 
  6. Bake for 30 minutes and then take it out of the oven and cover it with aluminum foil (you can cover your foil with nonstick spray).
  7. Bake your loaf for an additional 25 minutes and then test it with a toothpick, if it comes out clean you are good to go, if it does not, bake for an additional 5 minutes. 
  8. After removing from the oven, uncover your loaf and let it cool for 15-20 minutes before slicing. Enjoy on its own or slather some peanut butter on it 🙂 

Notes

  1. If your almond milk is cold you may notice that your coconut oil solidifies a bit. For this recipe that should not be an issue but it can be avoided if you leave your almond milk and eggs out to reach room temperature!
  2. Room temperature eggs work best when baking but don’t worry if you don’t have time to let them sit out!
  3. Store in an airtight container and can keep in the fridge for 5 days (although unlikely there will be any leftovers past day two)!

Namibia Night!

A while back the random country generator pulled up Namibia! We were excited to see where this food adventure would lead us, low and behold – Namibia. We had previously cooked meals from other woldat141
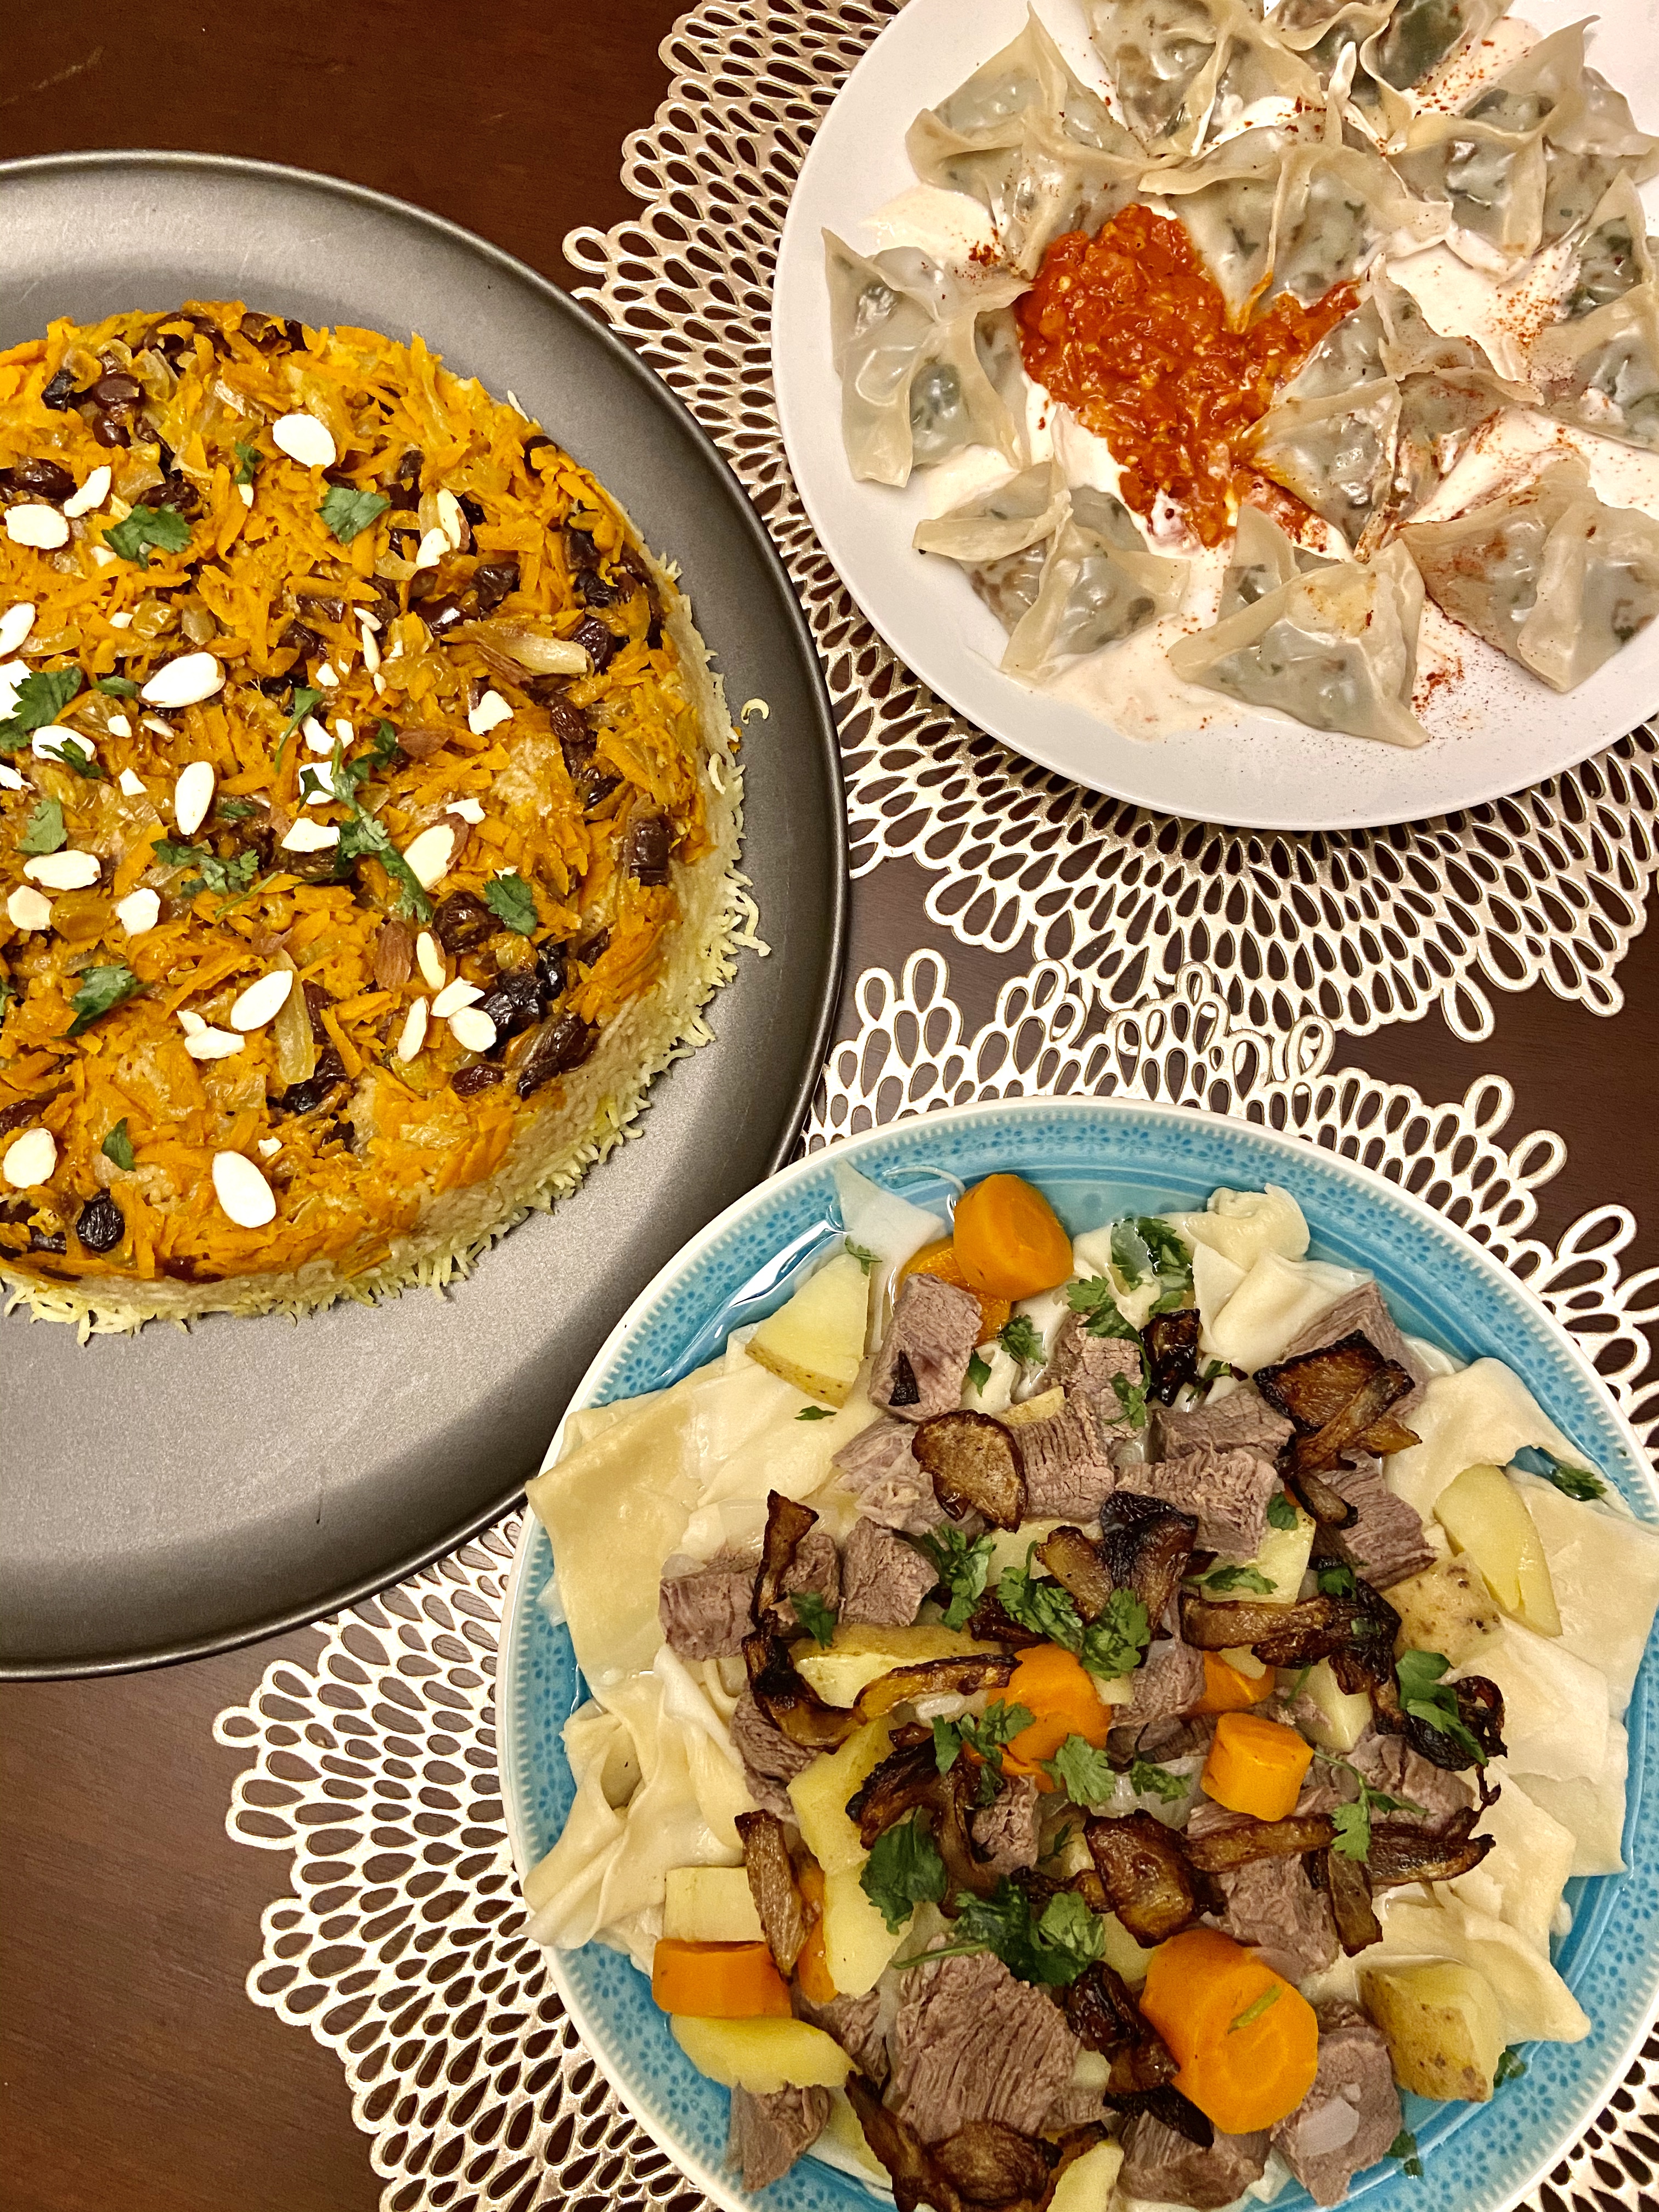
countries that I was somewhat familiar with in terms of food culture (Thailand & Argentina) but I really had no idea what the food scene was like in Namibia, or for that matter, I really did not know much about Namibia. Along with cooking up new meals and discovering new ingredients and flavors, learning about these countries’ histories, cultures, and traditions has been a great added benefit!

After browsing a few sites we saw that many of the recipes were meat heavy and called for different game meats that we do not have access to so we would have to improvise with what was available at our local grocery store. I also initially struggled a bit to find a vegetarian dish but I quickly found a sweet treat that I knew we would be making to end the night with – FAT CAKES! With a name like that I knew they would have to be good. They are basically just fried dough and reminded me a lot of New Orleans style beignets – super light and fluffy and dusted with powdered sugar!

IMG_0755

It was kind of ridiculous how easy these fat cakes were to make that in fact I have to actively forget how easy they are to keep me from making them a weekly event!


Menu

I really enjoyed making this meal. The recipes were straightforward and although they used ingredients I was familiar with, they were combined in new ways and left me feeling like I had added new attainable recipes into my rotation! 


Namibian Dinner is complete!

Tomato Sauce: I will say the tomato sauce flavors deepened the next day and it was great with scrambled eggs and toast. It reminded me of a shakshuka or huevos rancheros situation. The same goes for the soup, although I usually find soups to be tastier the next day as all the ingredients and spices come together. 

The Fat Cake recipes that I found were all pretty similar in ingredients and in the quantity they made! Since we were just cooking for two, I halved the recipe and it worked out great! I don’t recommend making more than what you will be having that day since they are fried and if you leave them overnight they may become too soggy/oily. 

With that said, I did have some dough leftover that I stored in the fridge overnight. The following morning I mixed in raisins, cinnamon and sugar into the dough and baked at 350F for 20-25 minutes and they came out like little tasty buns – delicious with jam and butter!

IMG_0754 (1)

Namibian Spicy Peanut Soup: This was so delicious and I loved that it included so many nutrient rich foods – pumpkin/squash, chickpeas, and kale (and of course my beloved peanut butter). I mostly followed along with what the recipe said but I used cubed butternut squash in place of pumpkin. You could totally substitute it with sweet potato as well. I added some of the oshifima into my soup and it went great with it. I loved how the oshifima soaked in some of the soup broth while it kept its thick consistency. This is definitely a filling soup or could be served as a delicious side.


Chocoflan aka The Impossible Cake

So just as an FYI I’m literally polishing off the last slice as a I write this and I’m tempted to go make another one! I made this one for Mother’s day and snuck a slice back home with me!


A little back story – I have always loved baking, ever since I was old enough I can remember being in the kitchen helping my grandma make different traditional Mexican sweet treats. When I was old enough to make them on my own, I decided I could be an entrepreneur and sell what I was making. I used to make these little pineapple empanadas (we call them turquitos– recipe coming soon!) and my aunt would sell them at her job. She would sell out every week and as a nine year old, I felt like I was living large with what I was making!

Flash forward a couple of years and I moved on to selling slices of Chocoflan! Now I remember one year being in my parents’ hometown in Mexico and selling it around to our neighbors and family! It was such a treat to not only see others enjoy what I made but then also to get paid for it – that year Chocoflan definitely supported my Mexican chip and candy needs!

So what exactly is Chocoflan you may be asking? 

Chocoflan or what some call “The Impossible Cake” is a decadent two-layered cake in which the bottom layer is rich chocolate cake and the top is a creamy flan. Usually you will find it topped with dulce de leche, cajeta ( cajeta is like dulce de leche but made from goat’s milk), simple caramel and/or pecans. 

Although the two batters are cooked together in the same pan, they perfectly separate in the oven. When the cake comes out the oven, you’ll see the chocolate cake is all on the top while the flan has settled on the bottom of the pan! The Chocoflan is slowly cooked in a water bath, which can sound intimidating, but is nothing to worry about! 

Now recently I made this cake once again and shared it with my family during Mother’s Day. It was just as good as I remembered it and the magical separation of the two batters is just as amazing each time. I hope you all enjoy a slice of this “Impossible Cake” and are able to share it with your loved one! This recipe easily serves 8 -10 with generous slices ☺


After prepping your pan, add a layer of dulce de leche!
Add your chocolate cake layer first, and then the flan mixture!
Enjoy your finished flan!

Before you make this recipe, make sure you read it all the way through and have the necessary kitchen tools: 

  • Bundt cake pan
  • Roasting pan for the water bath
  • Aluminum foil 
  • TIME – you will need at least 4 hours before you can enjoy this creation, you can definitely make this the night before! The cook time is 1hr 20minues and needs at least 3 hours to cool before you can remove it from the pan!

Recipe

Ingredients

Chocolate Cake Layer

  • 1 box of your favorite chocolate cake mix and the ingredients it calls for – I prefer Devil’s Food Cake
  • 1 tablespoon of instant coffee – I use regular Nescafe or Café de Olla – adds a nice cinnamon flavor!

Flan Layer

  • 2 whole eggs – room temperature
  • 2 egg whites – room temperature
  • 2 tsp vanilla
  • 1 can sweetened condensed milk (I prefer La Lechera brand)
  • 1 can evaporated milk (I prefer Carnation brand)
  • 6 oz cream cheese – softened to room temperature 
  • Pinch of salt

Toppings

  • ¼ c dulce de leche 
  • 3 tbsp chopped pecans
  • Optional: whipped cream, raspberries, strawberries, chocolate sauce

Instructions

  1. Preheat your oven to 350F and grease a bundt pan realllllyyyy well. Make sure to get all the nooks and crannies. I recommend using butter to prep your pan. Set aside. 
  2. If you’re using canned dulce de leche, pour ¼ cup into a microwave safe bowl and heat up for 30 seconds to melt it down a bit. Pour into the bottom of your prepared bundt pan. Set aside.
  3. Chocolate Layer – Prepare your chocolate cake mix as directed and mix in the instant coffee. Pour the chocolate batter into the prepared pan. 
  4. Flan Layer – Place all the flan ingredients into a high-speed blender until well combined. Pour the flan mixture on top of the chocolate batter. It is okay if you see them mix a little, they will completely separate when you bake it! That is where the magic happens! When it is done baking, you’ll see the flan is now on the bottom of the pan and the chocolate cake is on top so when you invert it the top layer will be the flan!
  5. Now carefully transfer your bundt pan into a large roasting pan to make your water bath.
  6. Cut off a piece of aluminum foil large enough to cover your bundt pan. To ensure the foil does not stick also spread some butter on it. Cover your bundt pan loosely.
  7. Now fill your roasting pan with about one inch of water. Transfer your roasting pan with the bundt pan in it, into the middle rack of your oven.
  8. Bake for 1 hour and 20 minutes. 
  9. After it is done baking, remove your bundt pan from the water bath and uncover it. Set aside to cool for at least three hours. DO NOT take it out of the pan until it has completely cooled.
  10. Once you’re ready to remove it, carefully run a knife along the pan to ensure it does not stick. Gently flip it onto your serving dish.
  11. Now if you’d like you can drizzle additional dulce de leche/caramel sauce (warm up it for 30-45 seconds to drizzle on top) and then add chopped pecans! This is also great with fresh whipped cream and raspberries!
  12. Store any leftovers in an air tight container in the refrigerator for up to 5 days.

flan